This post may contain affiliate links. If you make a purchase through links on our site, we may earn a commission. Please read our disclosure policy.

Why I Grow Garlic
Garlic is one of the easiest and most rewarding crops to grow at home. It asks you to think ahead a little, but the payoff is definitely worth it. Plant a clove in the fall, let winter do part of the work, and by the following summer, you can harvest full heads of garlic, ready for use in your kitchen.
That simple rhythm is exactly why I love growing it. In my Zone 5b Iowa garden, garlic has become one of those crops I count on year after year. It’s low-maintenance, full of flavor, and once you get a system going, it becomes part of the garden routine.
Even better, when you save your best cloves to replant, garlic starts to feel like a crop that keeps giving back.
If you’ve ever wanted to grow your own garlic but were not sure where to start, this is the guide for you. From choosing the right type to planting, feeding, harvesting, curing, and storing, here is exactly how to grow garlic at home.
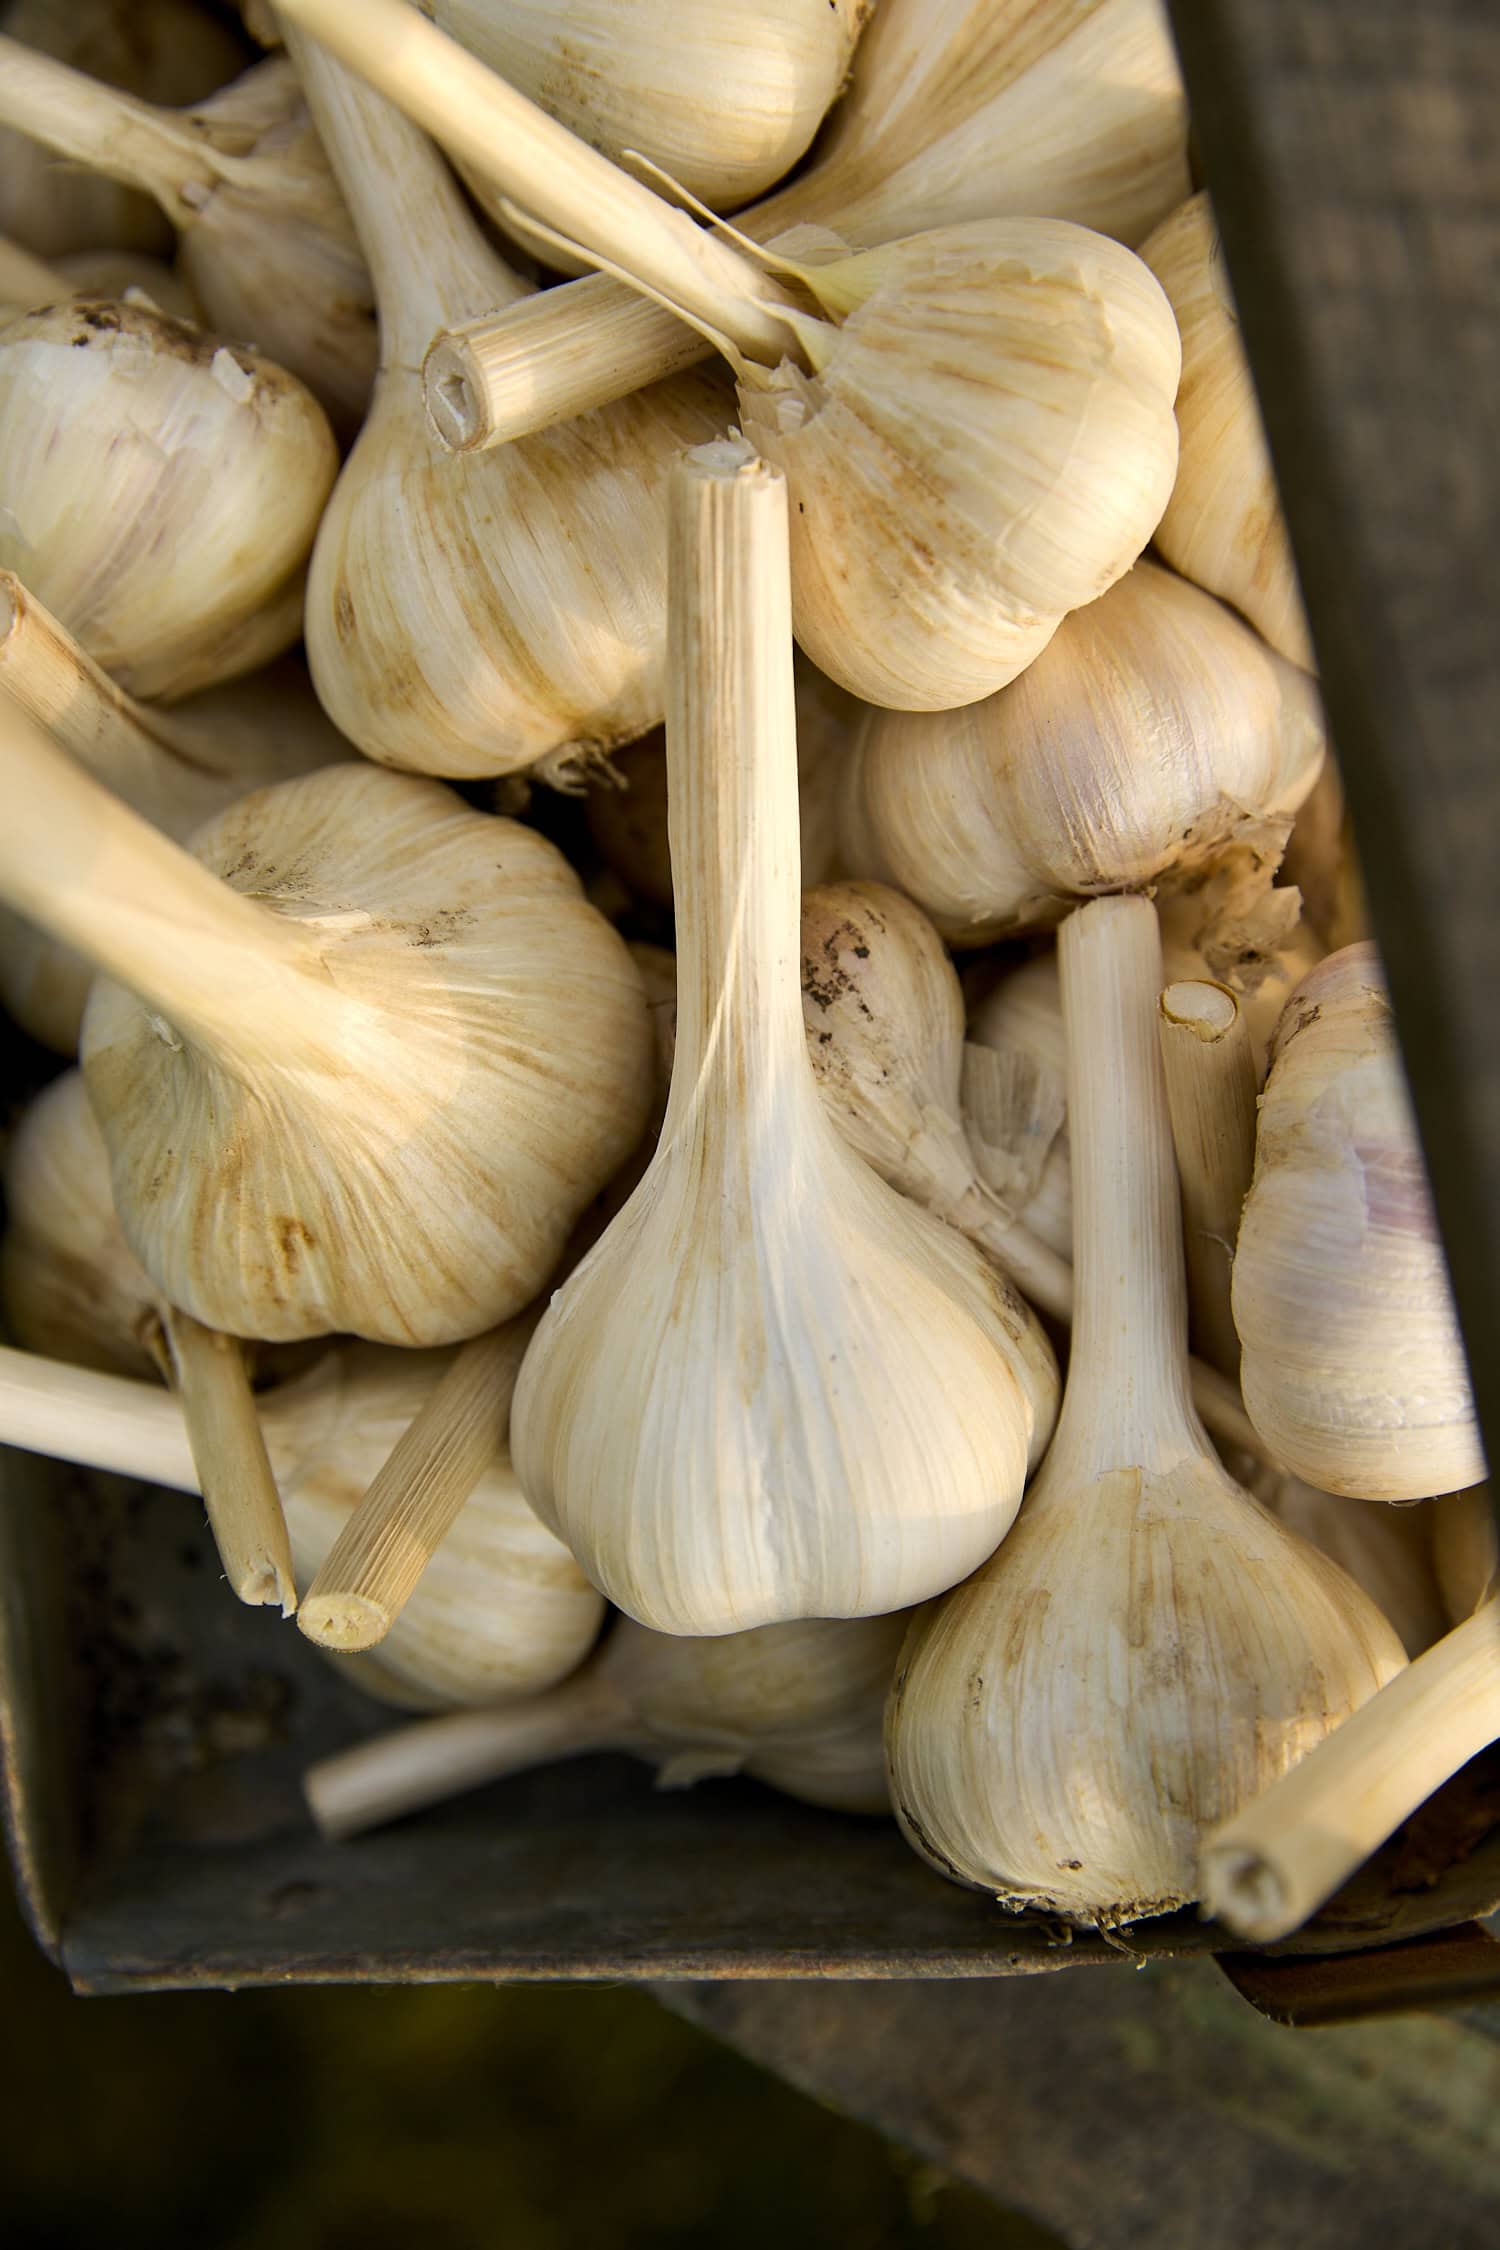
Table of Contents
- Why I Grow Garlic
- Overview of the Growing Process
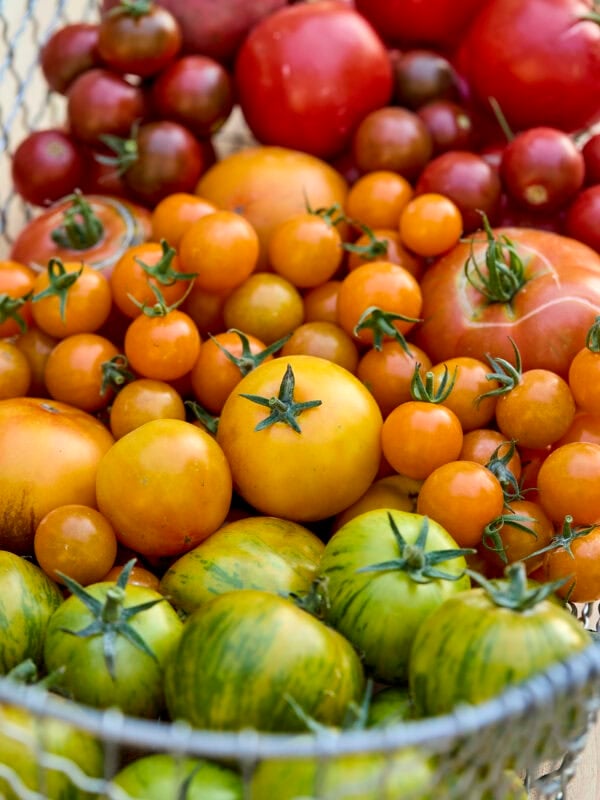
- Why Garlic Is So Great to Grow
- Hardneck vs Softneck Garlic
- Skip Grocery Store Garlic
- When to Plant Garlic
- Where to Plant Garlic
- How to Prepare the Bed
- How to Plant Garlic
- Watering Garlic After Planting
- Feeding Garlic in Spring
- What to Do With Garlic Scapes
- How to Know When Garlic Is Ready to Harvest
- How to Harvest Garlic
- Why Curing Garlic Matters
- How to Cure Garlic
- How to Trim and Store Garlic
- Save the Best Bulbs to Replant
- Can You Grow Garlic in Containers?
- Common Garlic Growing Problems
- Final Thoughts
- More Gardening Content
Overview of the Growing Process
- Plant individual cloves in the fall.
- Let them root before winter.
- Watch for fast spring growth.
- Cut hardneck scapes in late spring.
- Harvest in early summer.
- Cure, trim, and store the bulbs.
Why Garlic Is So Great to Grow
Some vegetables ask for constant attention. Garlic isn’t one of them. Once it’s planted, it settles in for the season and does most of the work quietly. That alone makes it appealing, but there are a few other reasons it’s worth making room for in the garden.
First, it’s practical. Garlic shows up in everything from soups and sauces to marinades and roasted vegetables. It’s one of those ingredients you reach for constantly (at least I know I do!), so growing your own makes a lot of sense.
Second, it’s satisfying. Each clove you plant becomes a full head of garlic by the next season. There’s something exciting about putting one small thing in the ground and coming back months later to dig it up and find something so useful.
And third, it’s a crop that gets better with time. Once you harvest your own garlic, you can set aside the biggest and healthiest bulbs to plant again in the fall. That cycle is one of my favorite parts of growing garlic. Over time, you aren’t just growing garlic. You’re building your own better crop year after year.
Hardneck vs Softneck Garlic
Before planting, it helps to know that not all garlic is the same. The two main types are hardneck and softneck, and each has a few advantages. Let’s talk about each one.
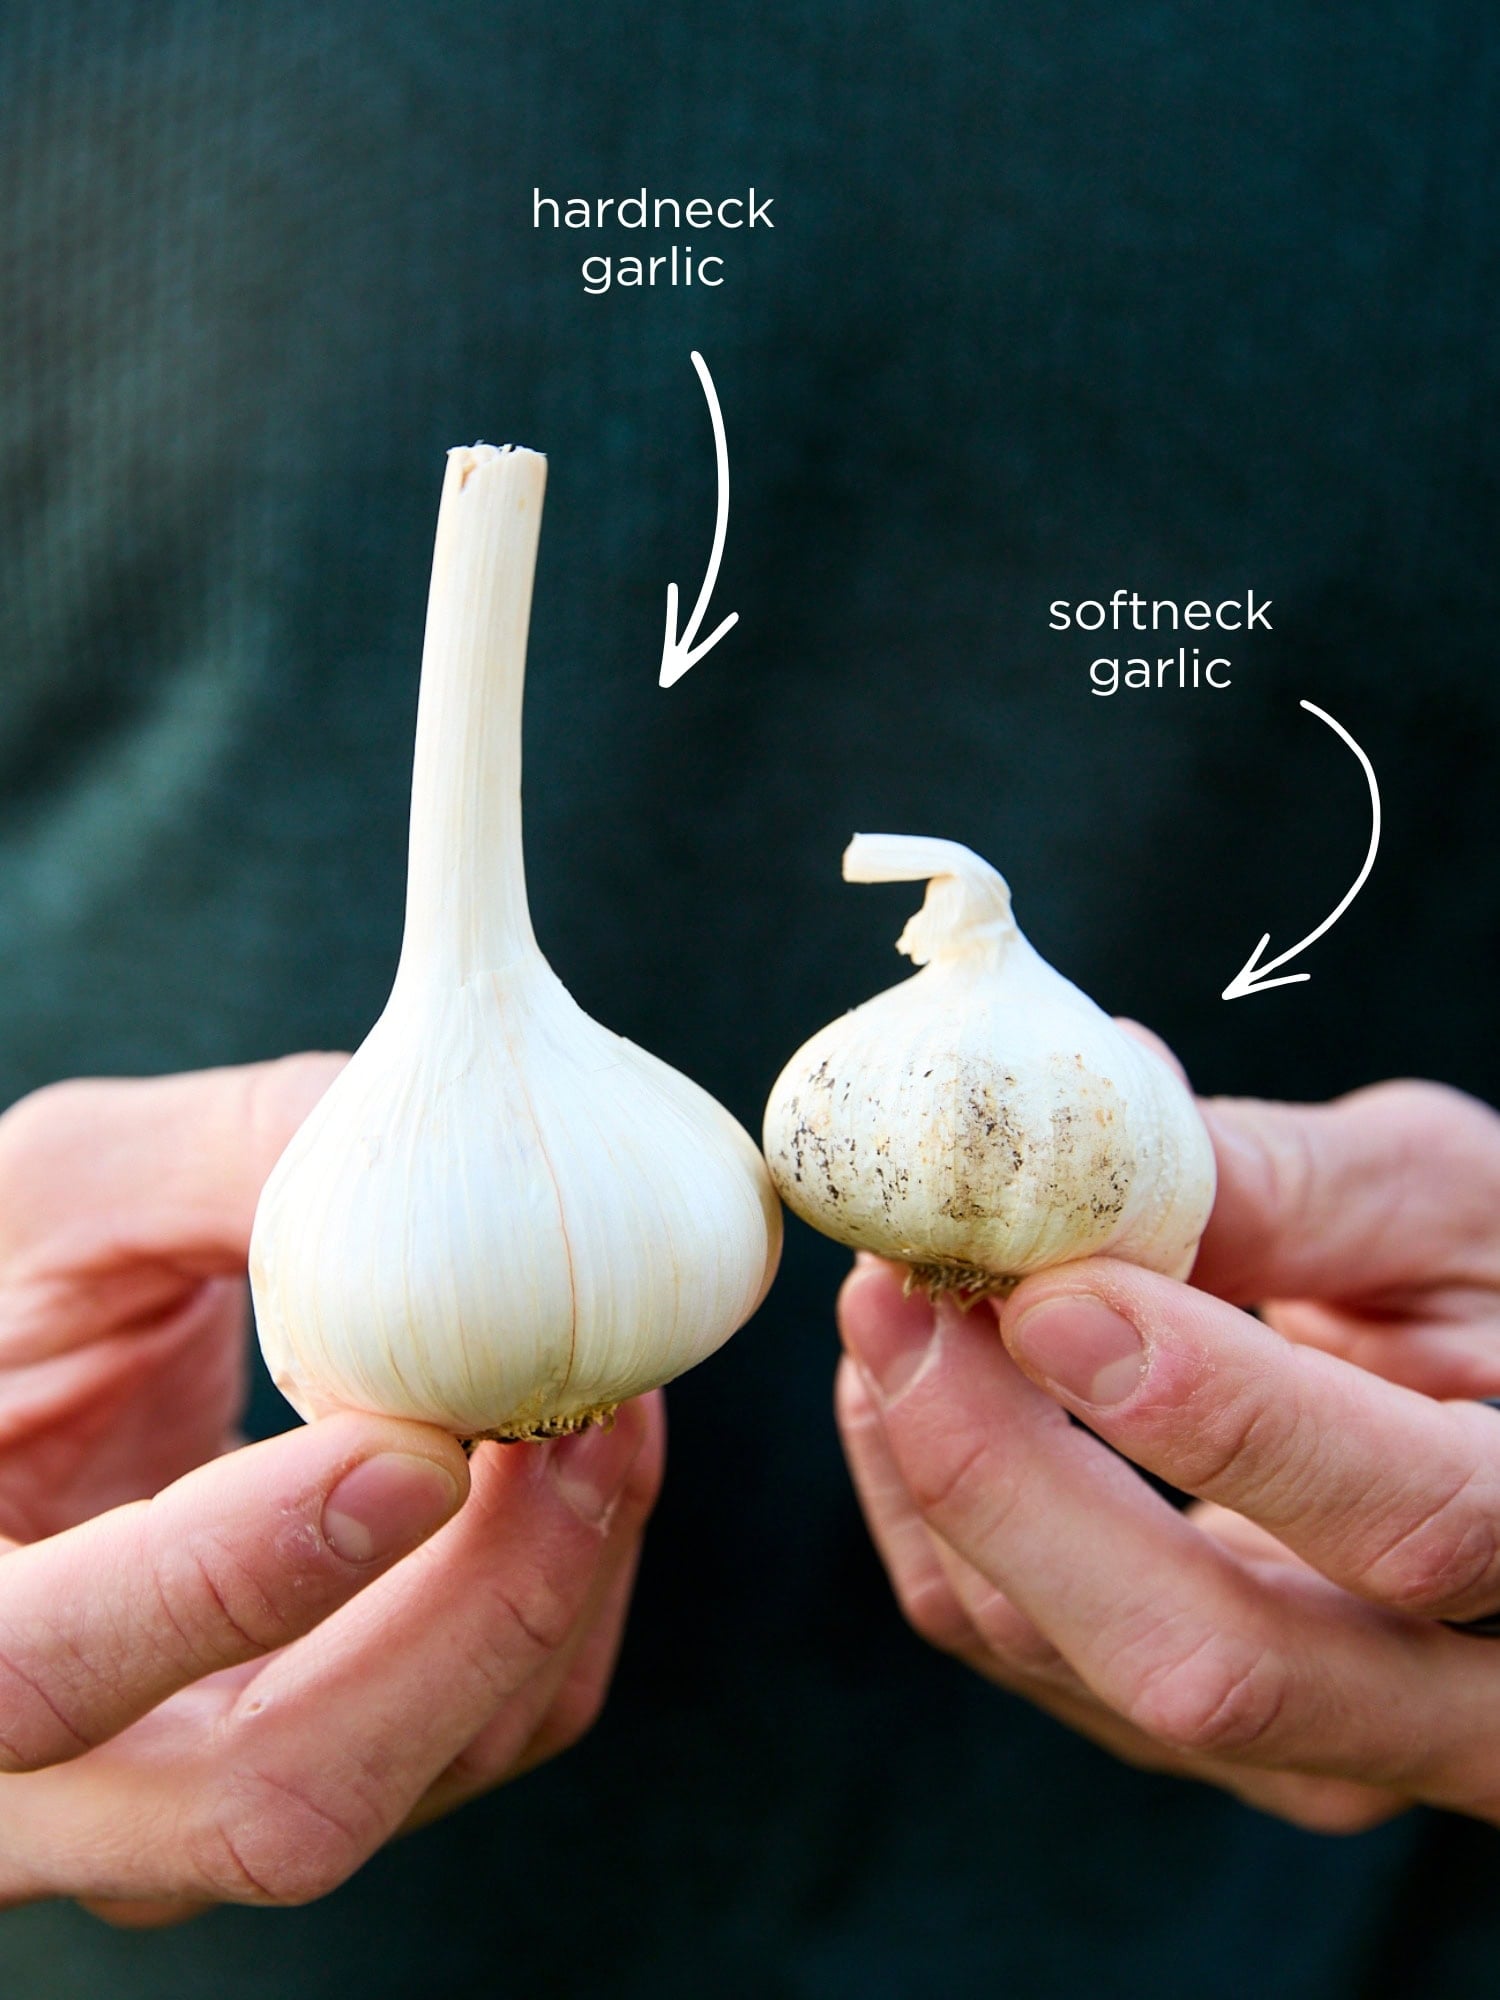
Hardneck Garlic
Hardneck garlic is usually the favorite in colder climates, which is part of why I love to grow it in Iowa. It produces fewer cloves per bulb, but those cloves are often larger. Hardneck varieties also tend to have more flavor nuance and a stronger garlic character.
One of the easiest ways to identify hardneck garlic is the stiff central stem. As it grows, it also sends up a flowering stalk called a scape (more in the garlic scape section). That scape needs to be removed so the plant can keep putting energy into the bulb.
The tradeoff is storage. Hardneck garlic generally does not keep as long as softneck, so it’s often the type to use first through fall and early winter.
Softneck Garlic
Softneck garlic is better known for its storage life. It keeps longer, which makes it especially useful if you want garlic that lasts well into winter. The bulbs usually contain more cloves, though the cloves are often smaller than those of hardneck.
Softneck does not produce scapes, and the neck stays flexible, which is why it is often used for braiding.
Which One Should You Grow?
If you garden in a cold climate, hardneck is often a great choice. If long storage is your top priority, softneck may make more sense. Many gardeners grow both. That’s often the best of both worlds, with hardneck for flavor and softneck for keeping quality.
A good rule of thumb is simple: if a local grower can grow it well, chances are you can too.
Bonus Tip
Skip Grocery Store Garlic
Technically, you can plant garlic from the grocery store, but it’s usually not the best option. Grocery store garlic may not be adapted to your climate, and it may have been treated in ways that make it less reliable for planting.
A better option – Buy seed garlic from a local grower, a farmers’ market, or a reputable online source. If someone in your area is growing it successfully, that’s a great sign it will work in your garden too.
Once you’ve grown your own, you may not need to buy it again. I’ve been planting from my own harvest for years. I simply save the best heads, break them apart in the fall, and replant the strongest cloves for the next season.
When to Plant Garlic
For most gardeners, garlic is best planted in the fall. That timing gives the cloves a chance to send out roots before winter arrives. Then, when spring warms up, the plants are already in place and ready to grow quickly.
In my Zone 5b garden, garlic usually goes in from late September into early October. But depending on your climate, planting can stretch later into the fall season.
A general planting window looks like this:
- Zones 3 to 5 – late September to early October
- Zones 5 to 7 – mid to late October
- Zones 7 to 9 – late October into November
- Zones 9 to 10 – late October through December
If you’re unsure what zone you’re in, make sure to check out my guide to garden zones.
Spring planting is possible, especially in milder climates, but the bulbs are often smaller. Fall planting gives garlic the head start it needs for bigger, better harvests.
Where to Plant Garlic
Garlic grows best in full sun and loose, well-draining soil. If the soil stays too wet, cloves can rot before they establish. If it’s compacted or low in organic matter, the bulbs may stay small.
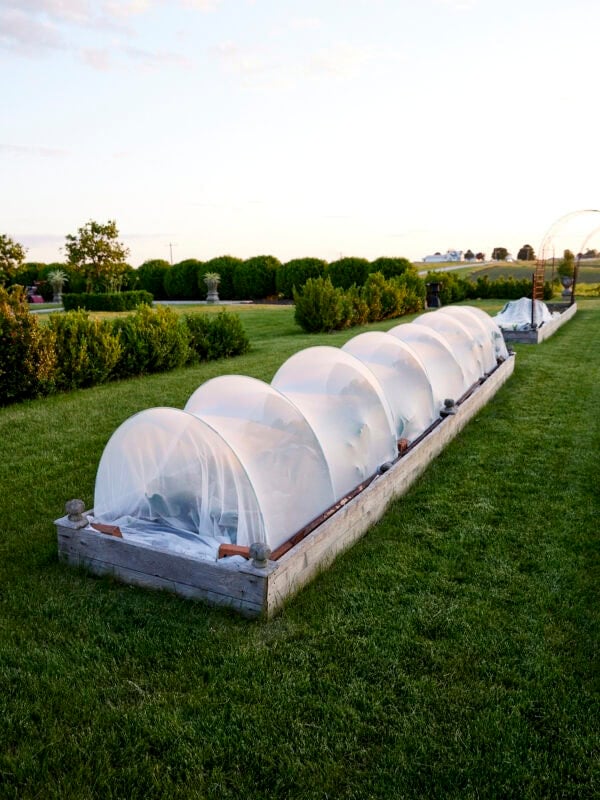
Raised beds are especially helpful because they drain well and are easy to amend. I grow much of my garlic in raised beds, where the soil is rich, airy, and easy to work with. That kind of structure matters, especially in a wet year when garlic benefits from drainage and a looser planting bed.
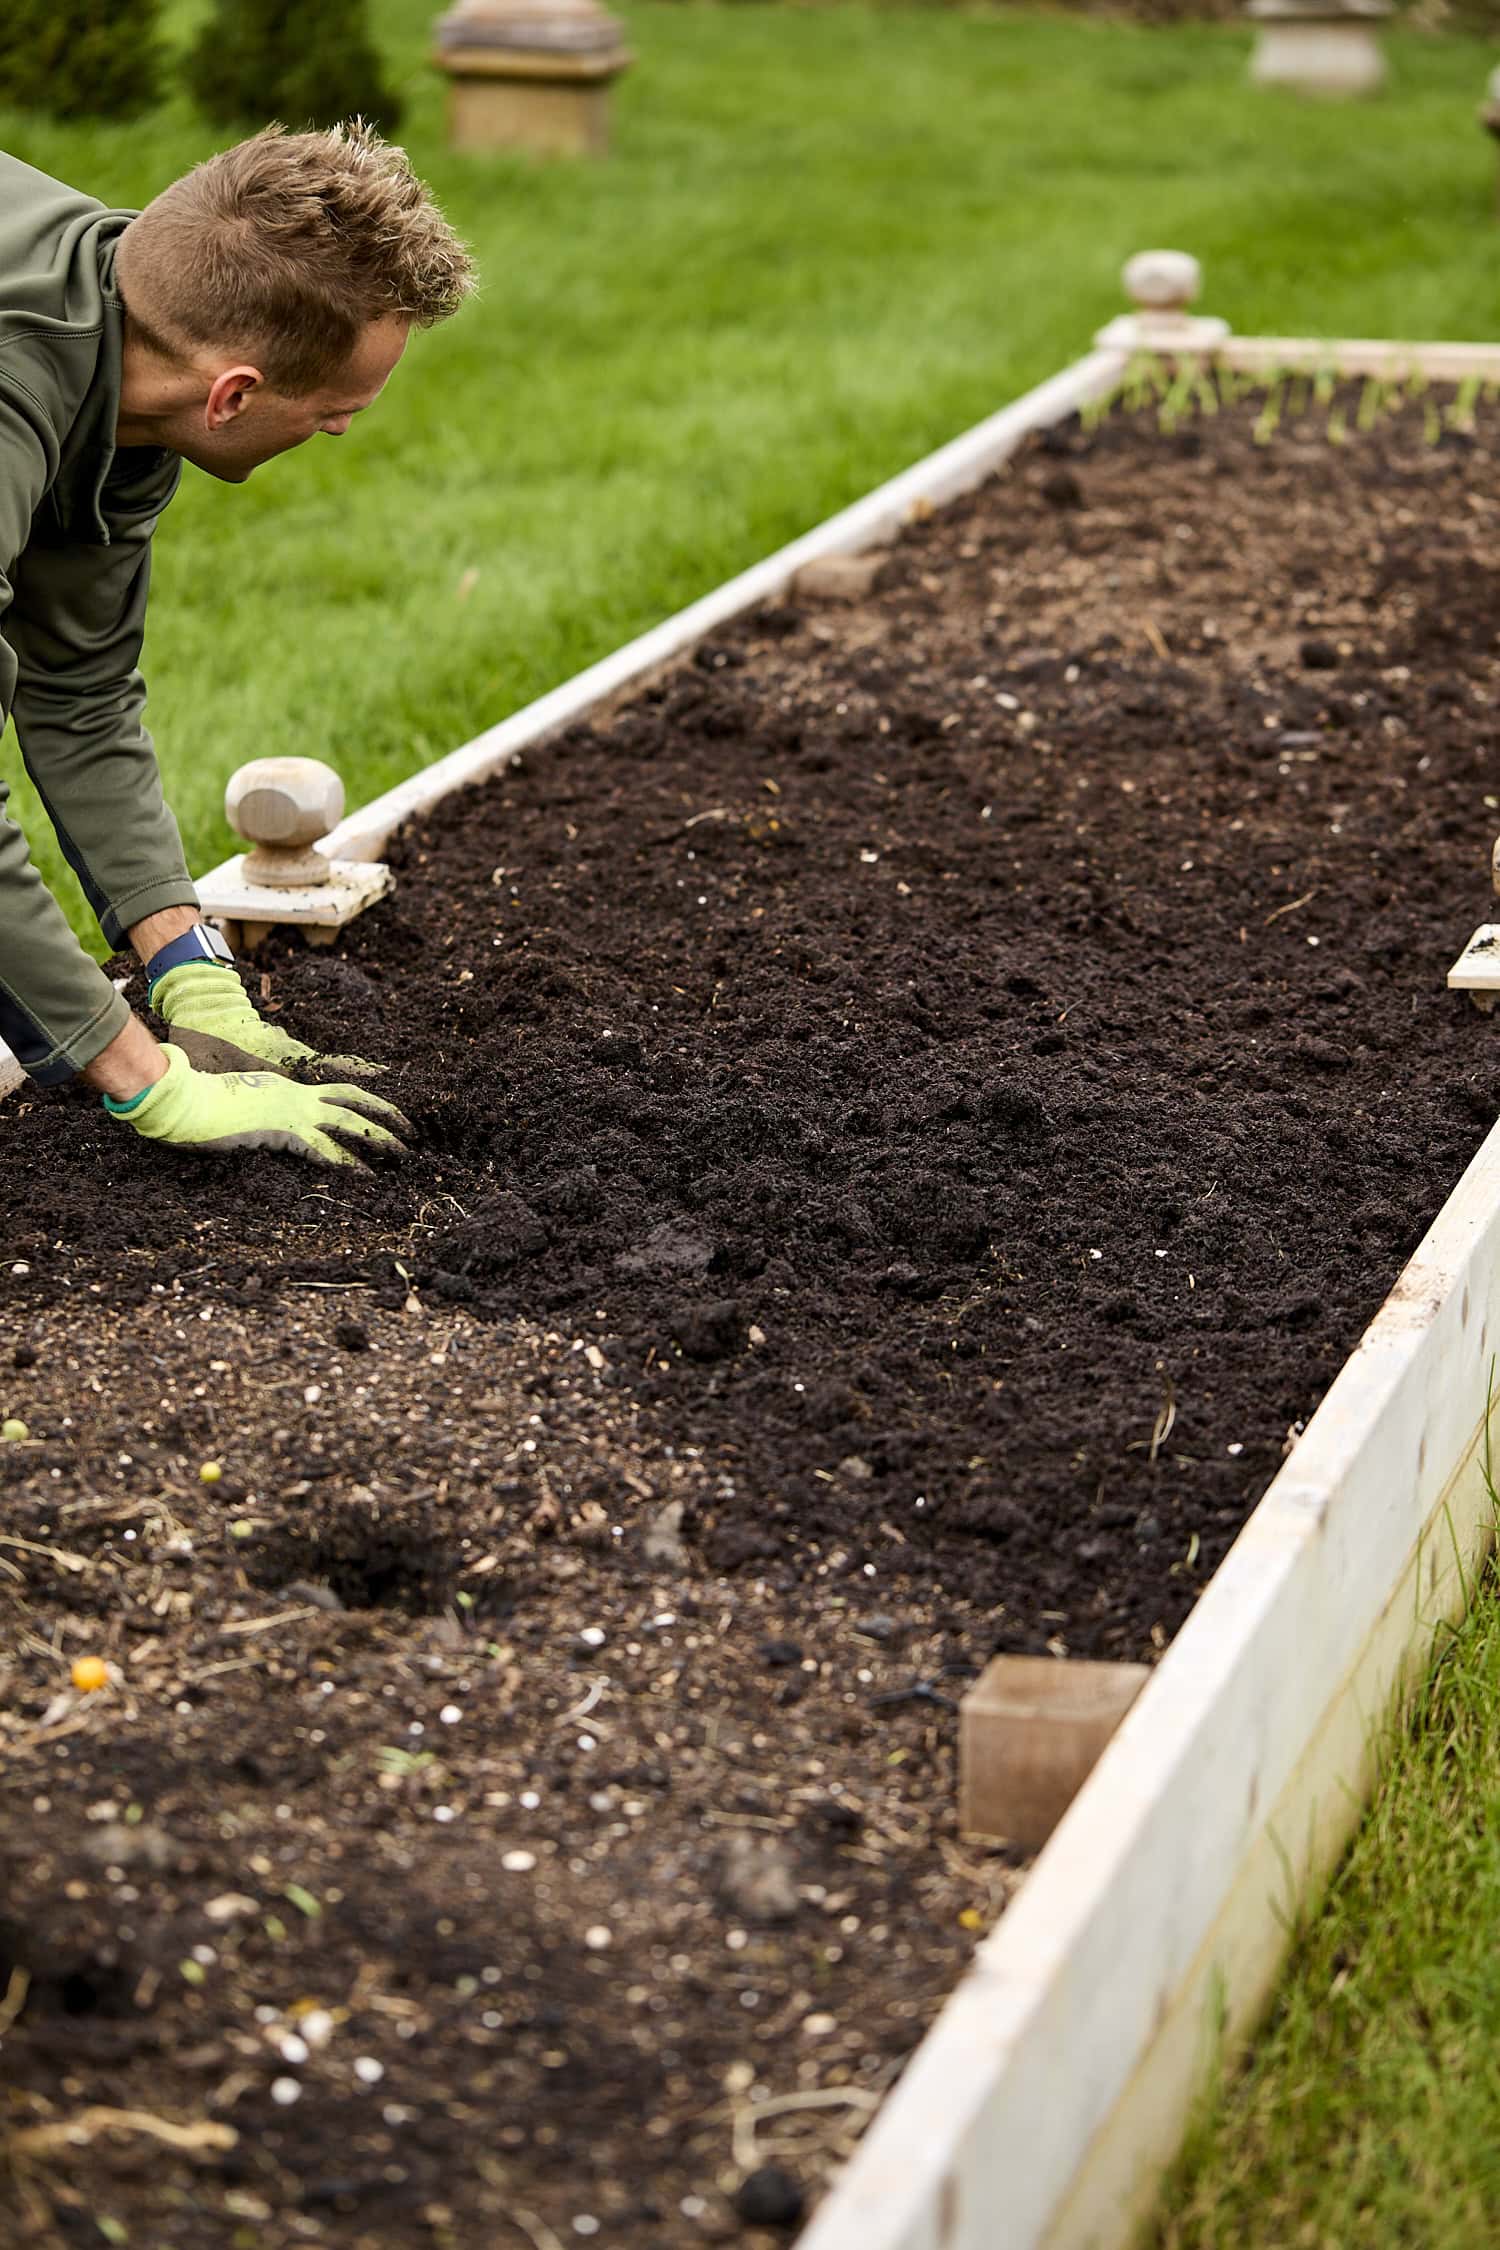
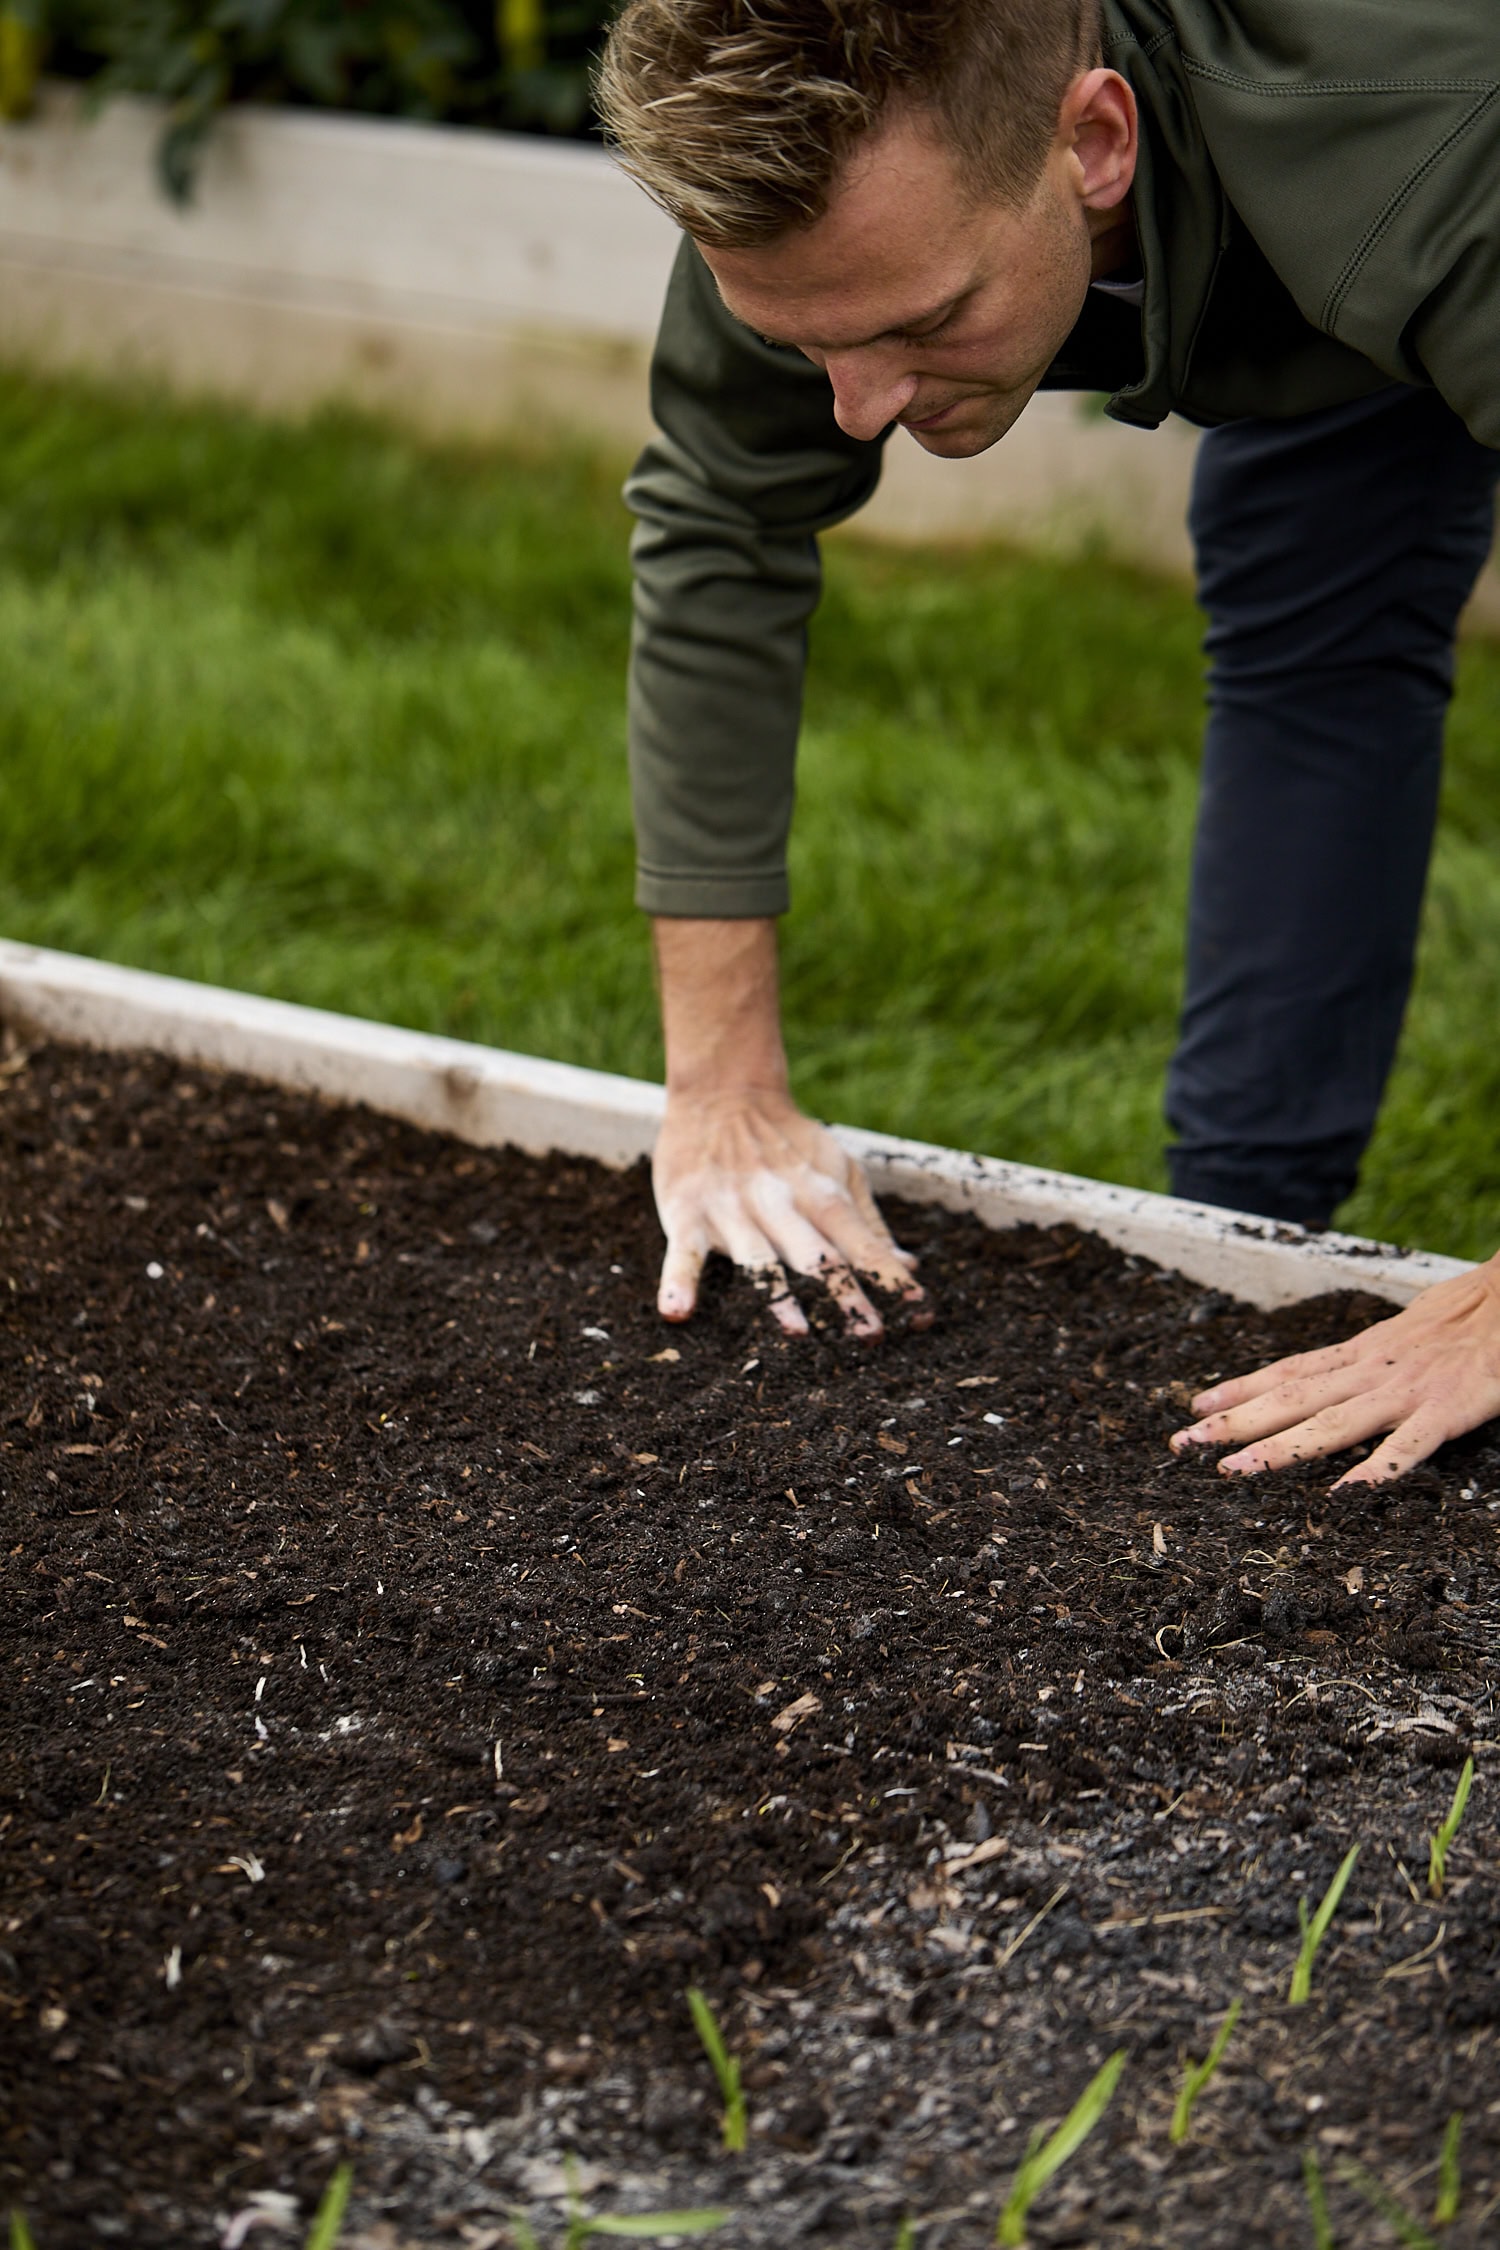
How to Prepare the Bed
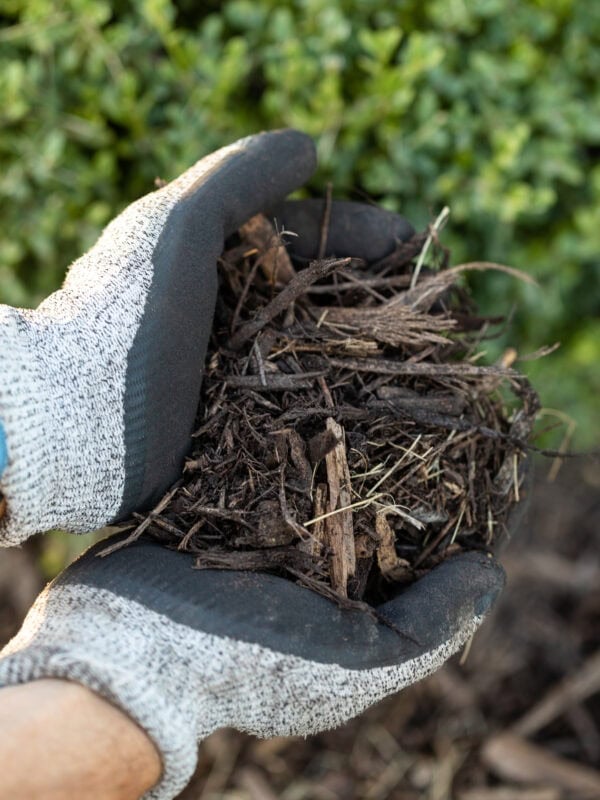
Garlic does not need complicated bed prep, but it does appreciate fertile, well-fed soil. Before planting, I like to refresh the area with compost and organic amendments. Depending on the season, that may mean compost from the pile, composted manure, or a bulb-supporting organic fertilizer. A soil pH around 6.0 to 7.0 is ideal.
The goal is not to till the soil aggressively. It’s simply to improve the top layer with nutrients and organic matter so the cloves have a healthy place to take root. Once that’s worked in lightly, the bed is ready to plant.
If you mulch your beds with shredded leaves in fall, garlic benefits from that too. Those leaves help protect the soil through winter and slowly break down over time, feeding the bed as they go.
How to Plant Garlic
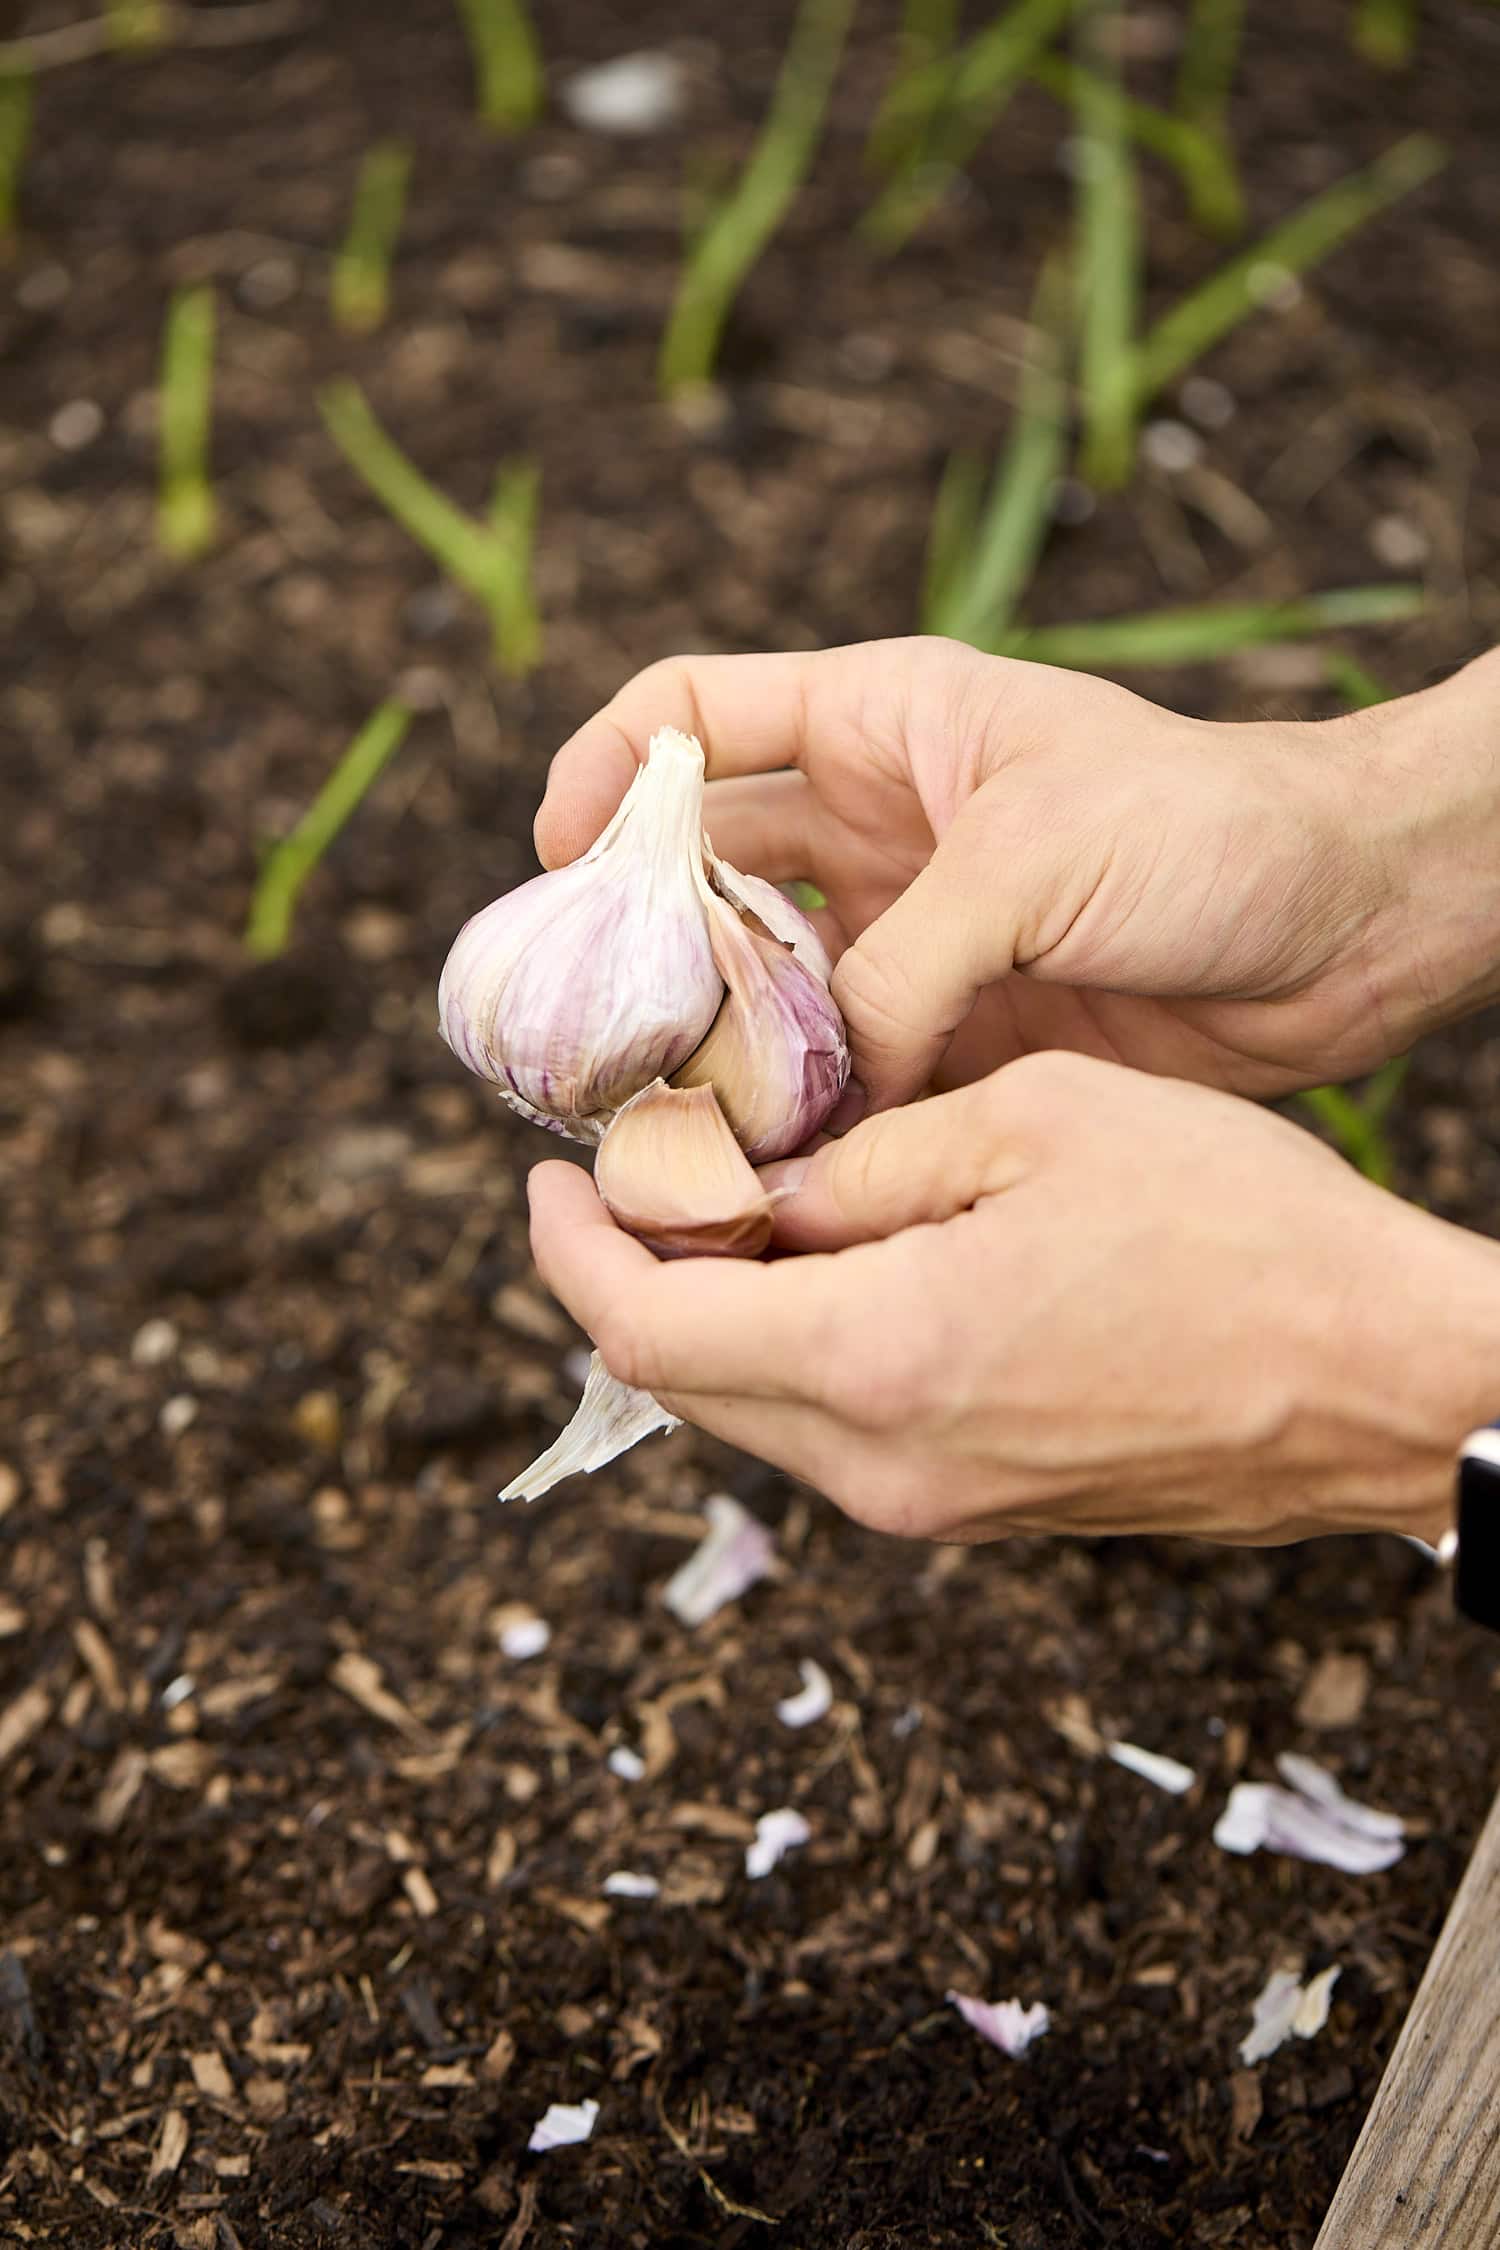
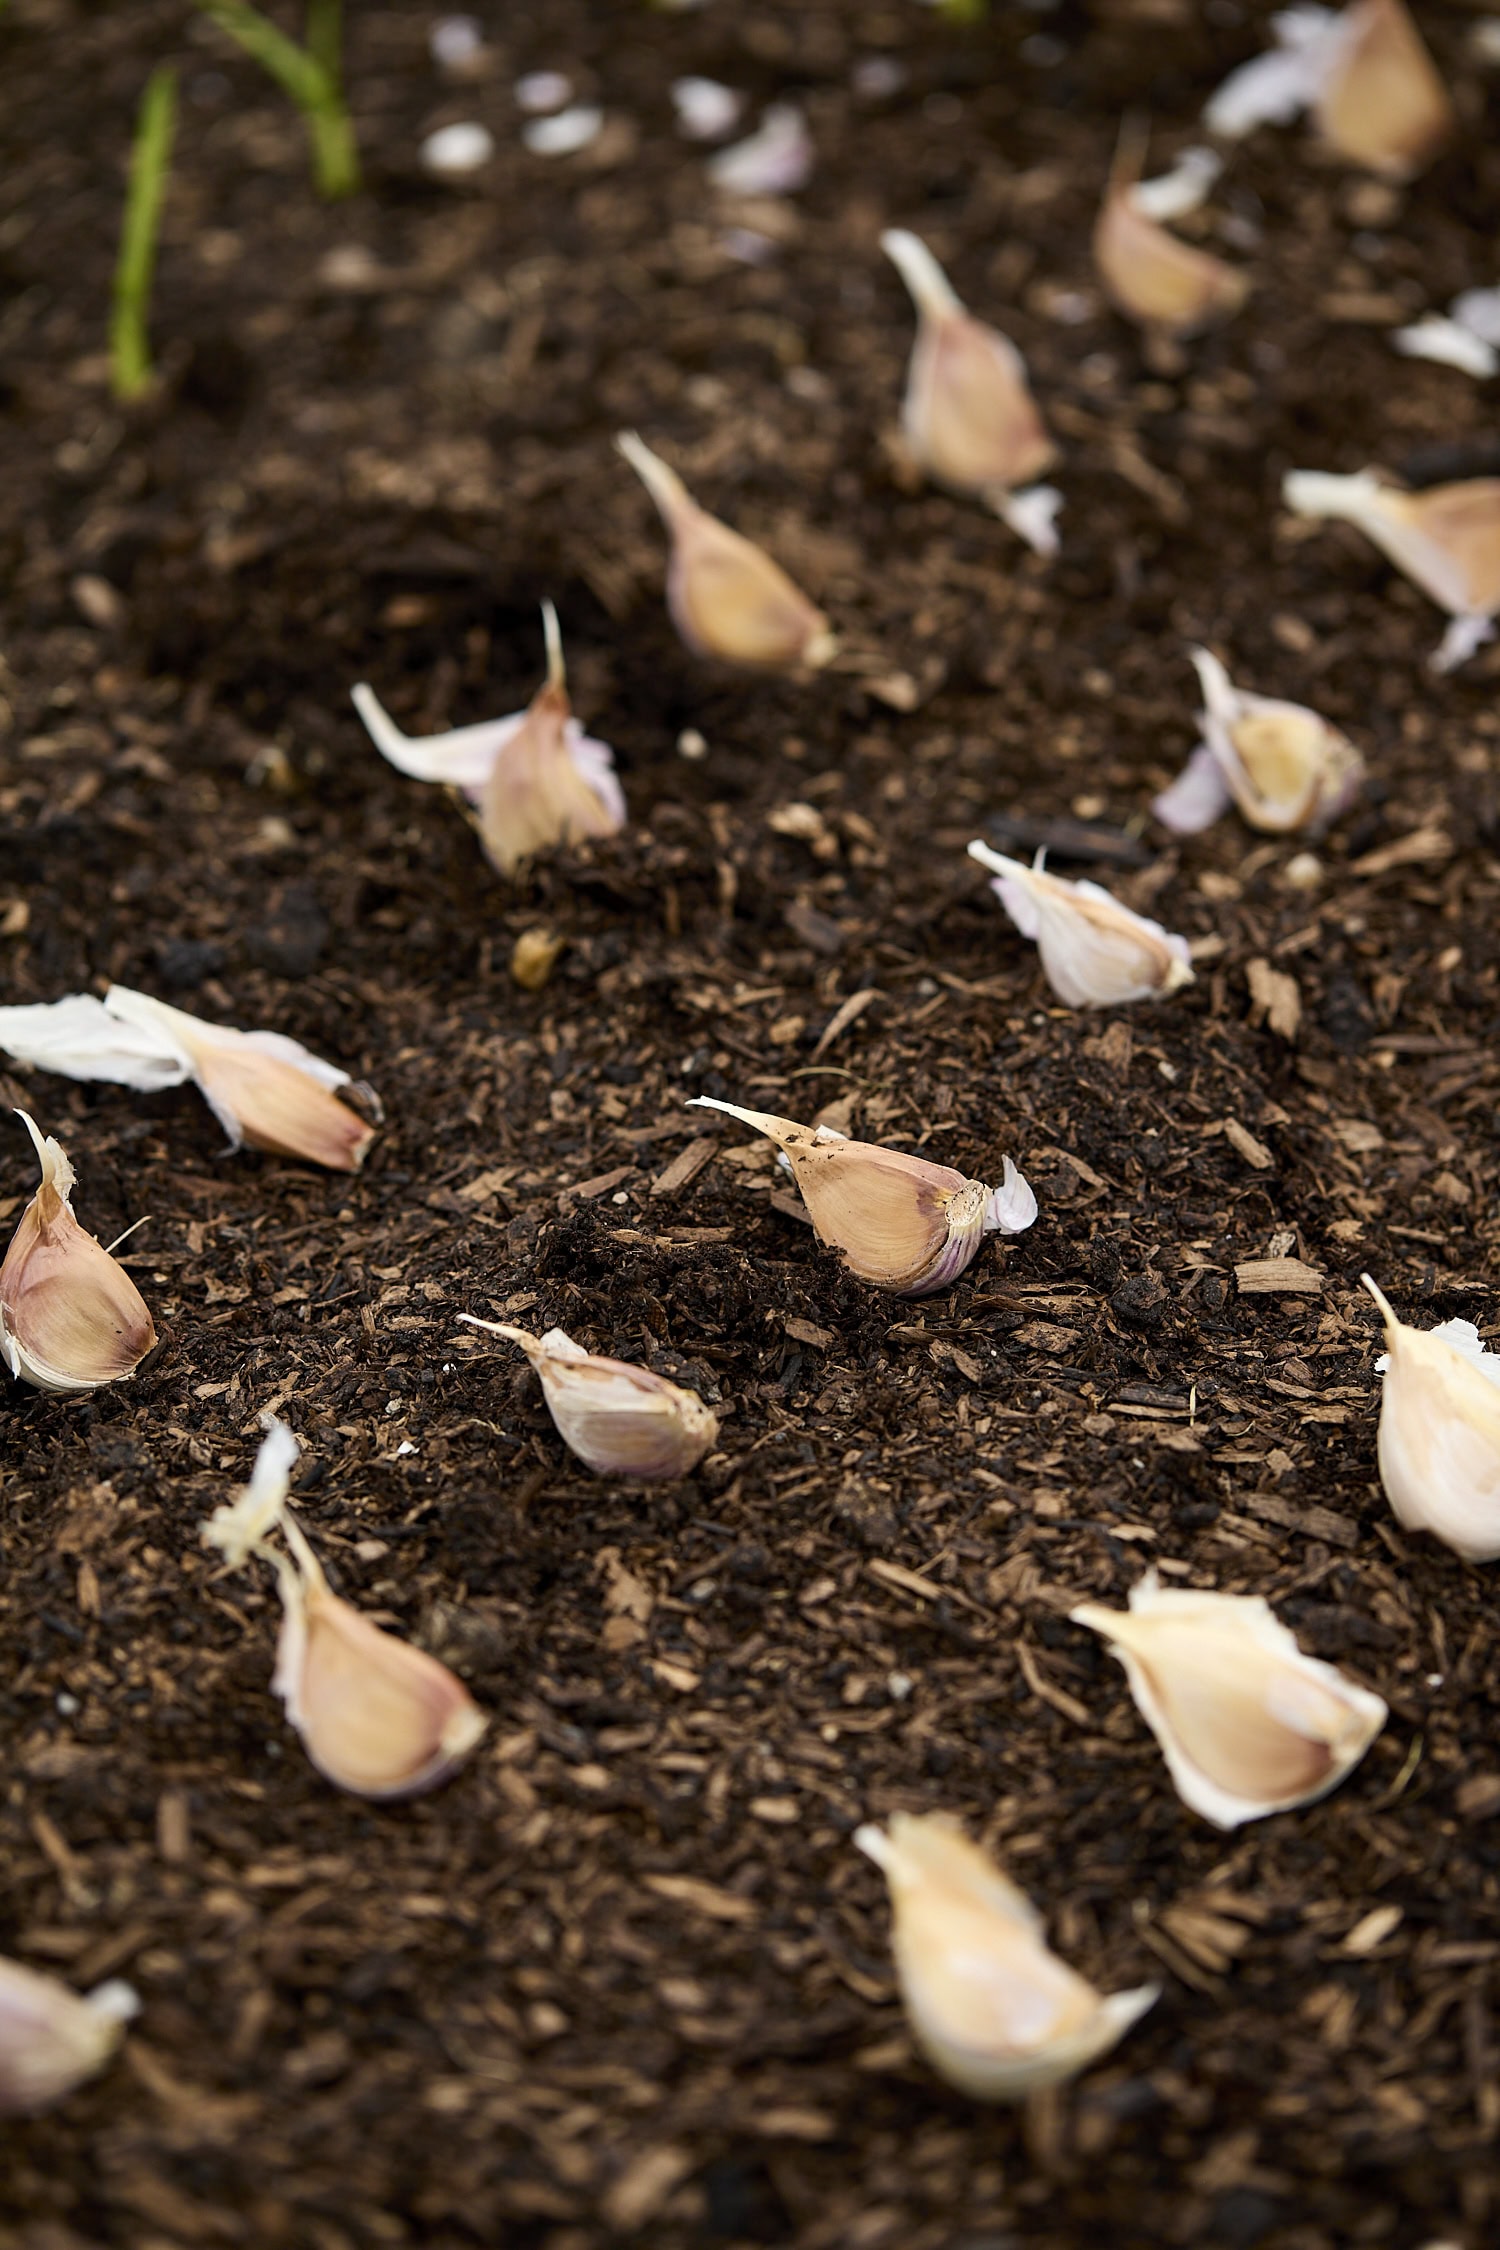
Planting garlic is super simple. Start with a full head and break it into individual cloves. Each clove will grow into one new head of garlic next year.
Choose the biggest, healthiest cloves for planting. The papery skins can stay on, as they help protect the clove and do not need to be removed.
To plant, make a shallow trench or simply press each clove into the soil. Always place the root end down and the pointed end up. That orientation matters because the roots emerge from the flat bottom, and the green shoot grows from the pointed top.
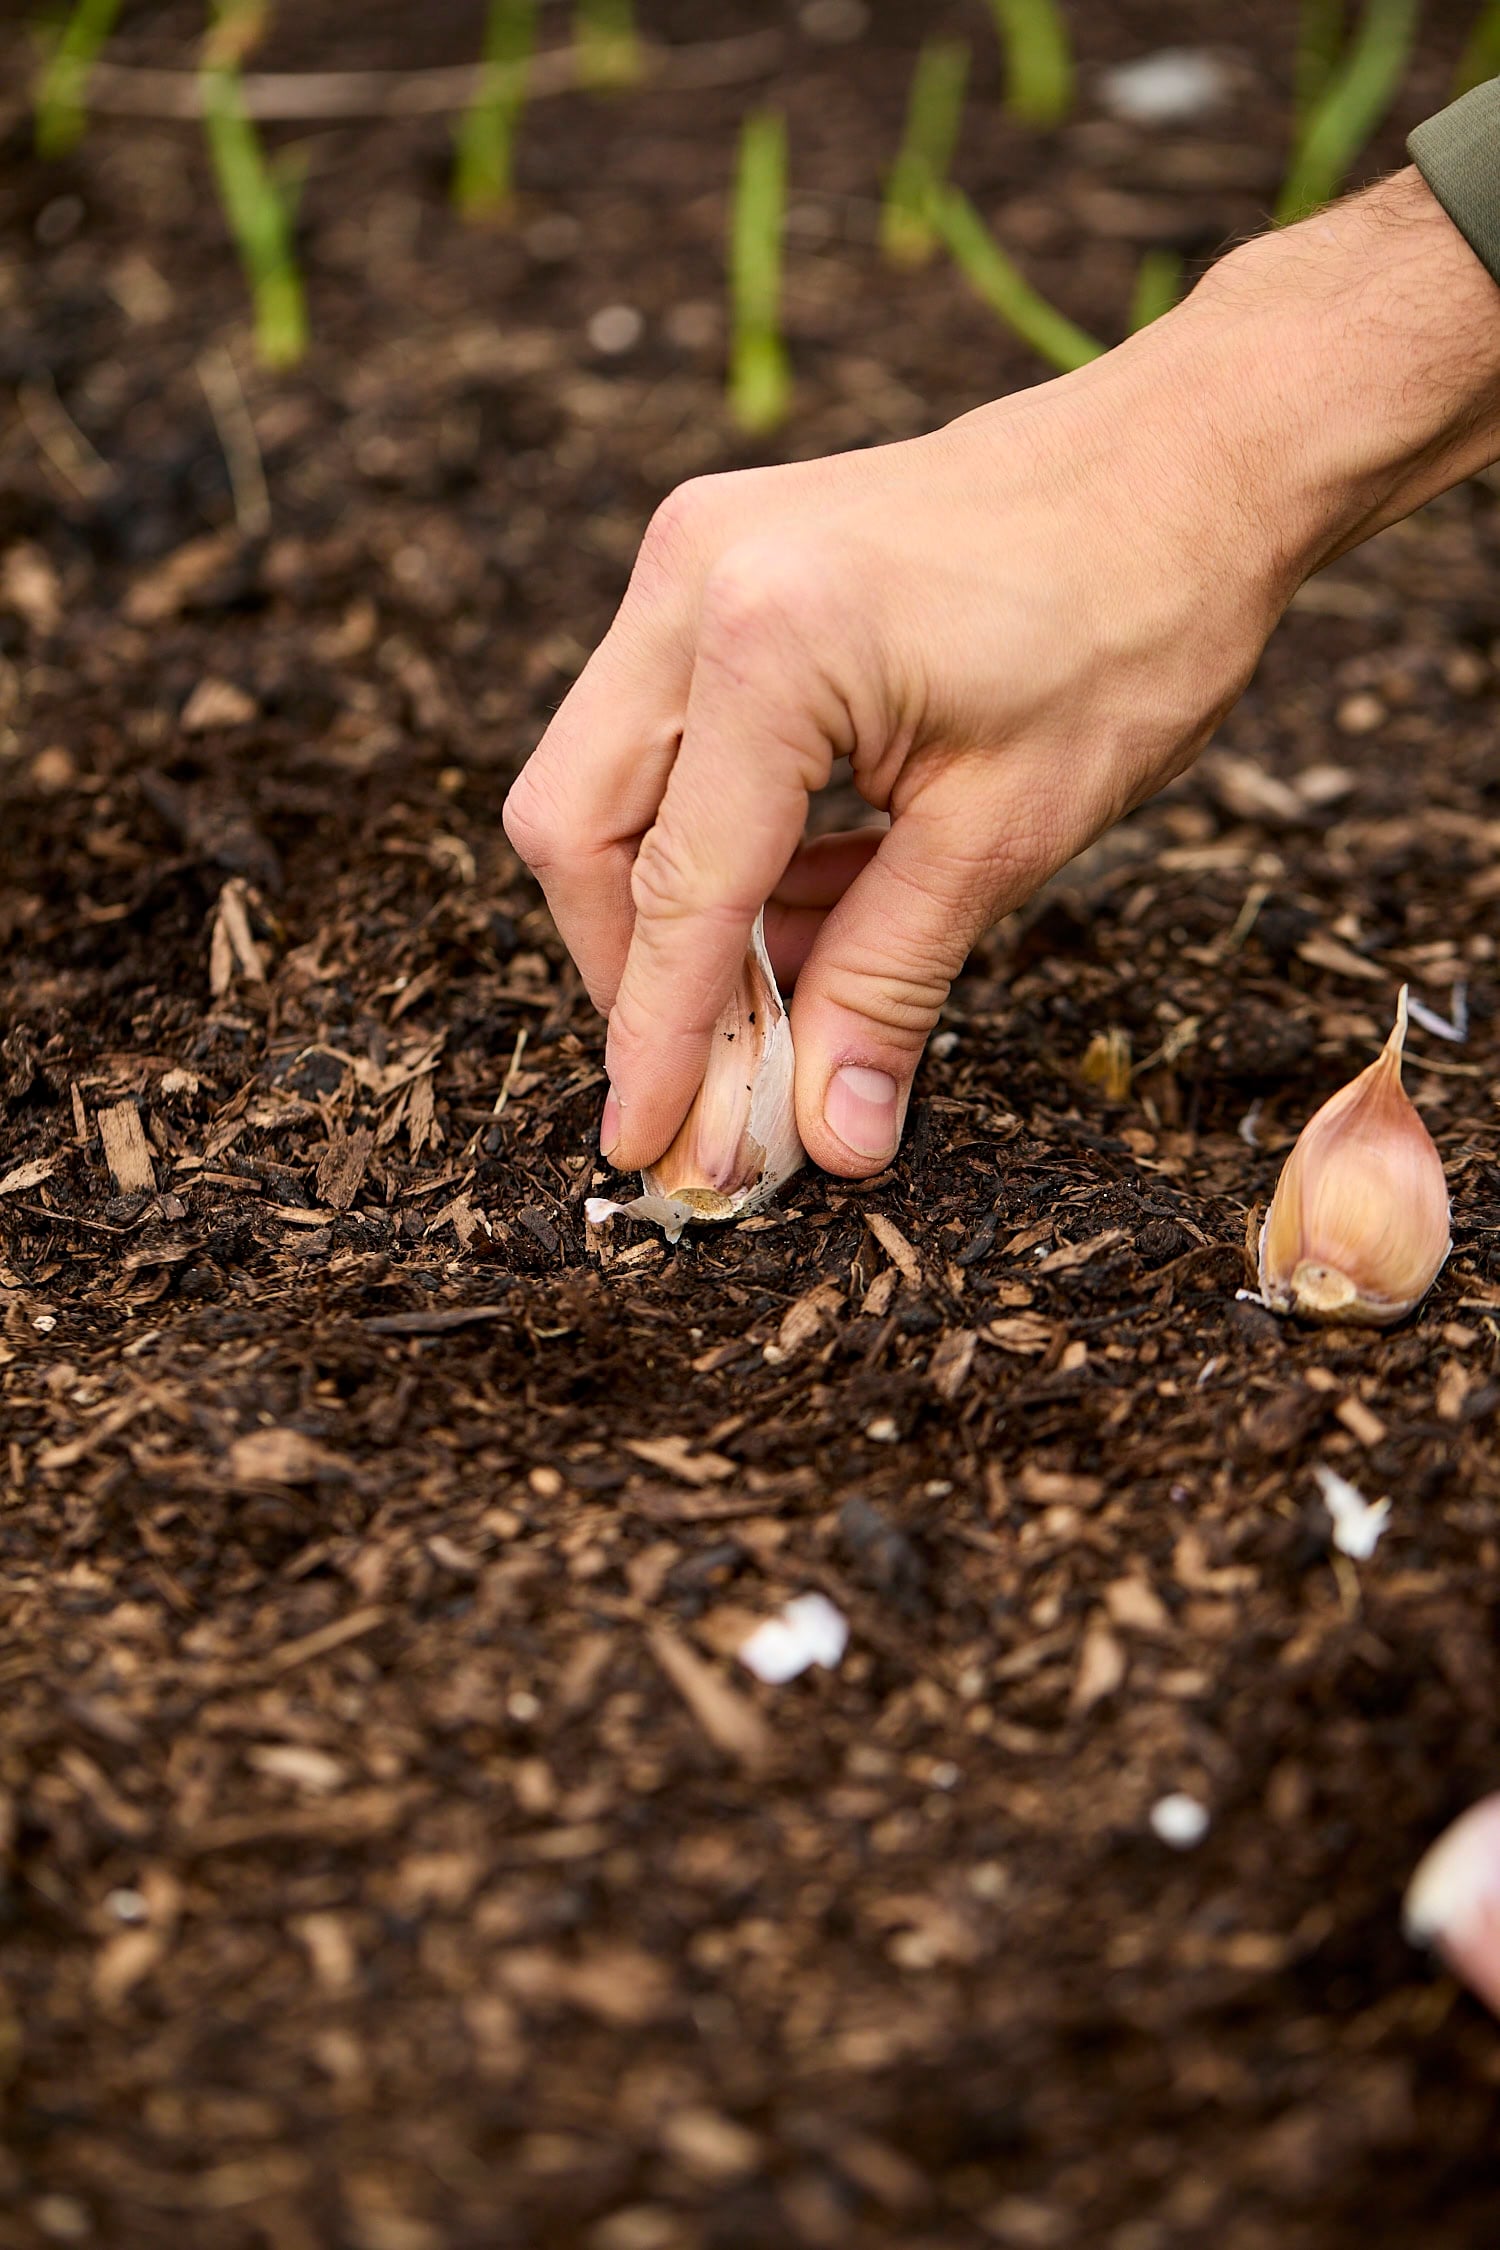
Set cloves about 4 inches deep, then plan to add compost or mulch on top so the final depth is around 6 inches. Space them about 4-6 inches apart so each clove has enough room to form a full head.
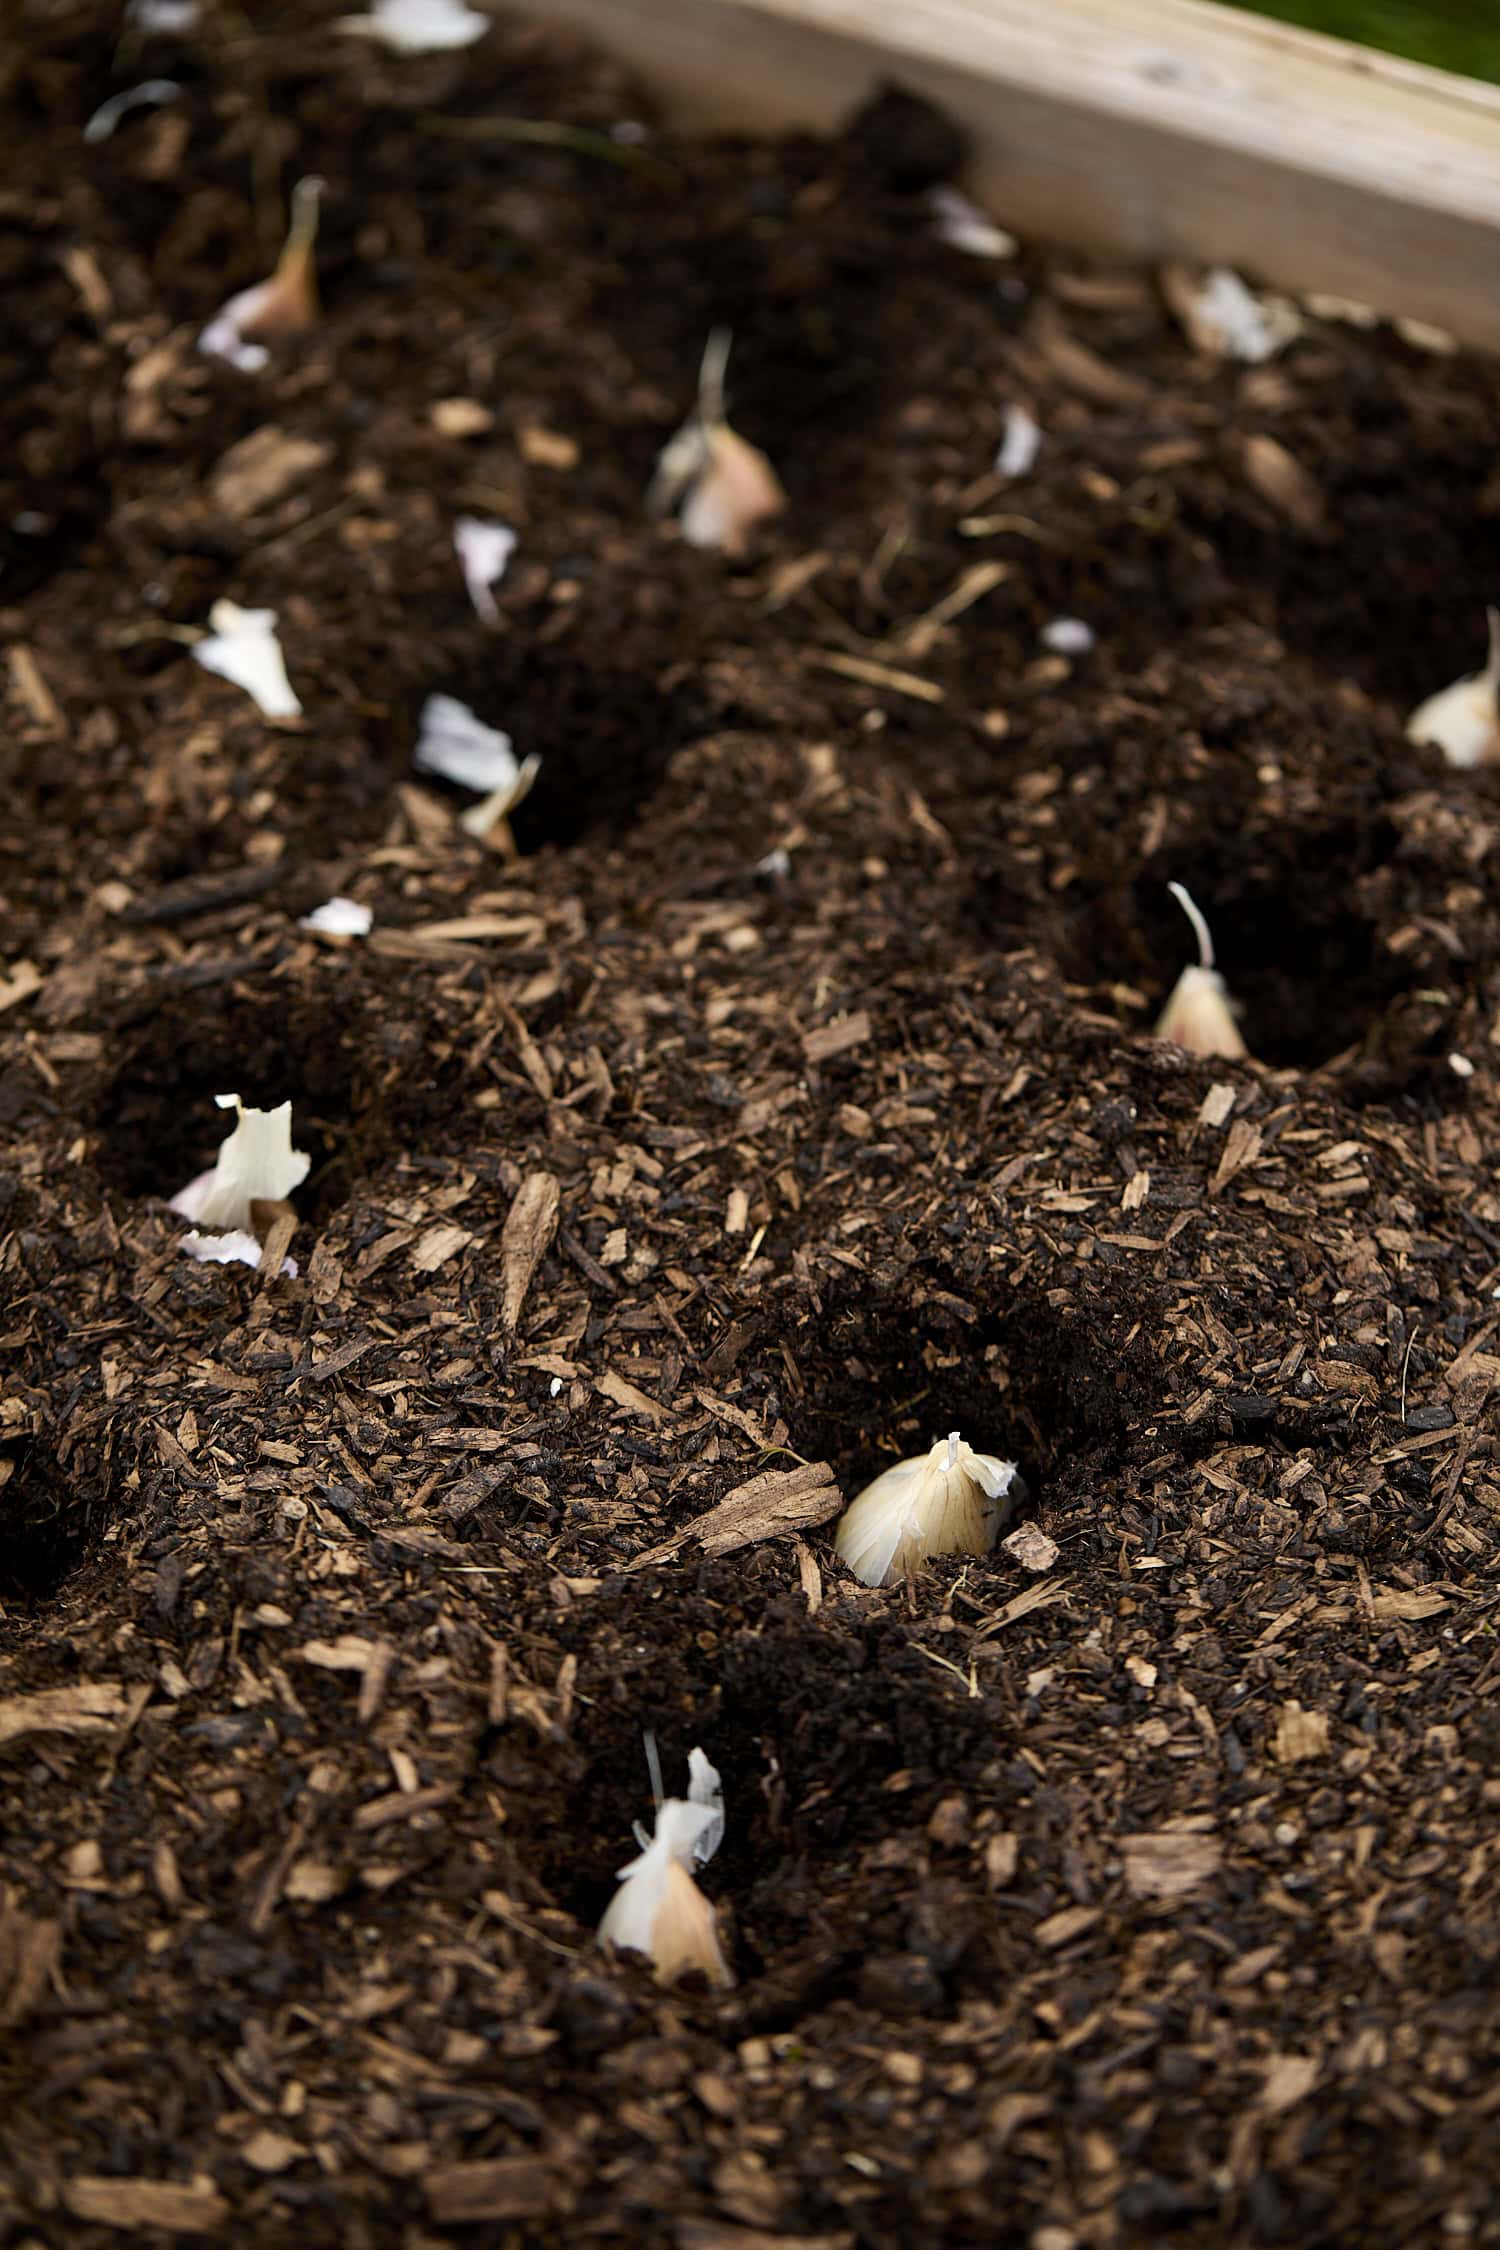
Once planted, cover the cloves with soil and top the bed with compost, shredded leaves, straw, or another mulch. In my garden, a final layer of chopped fall leaves helps protect the bed through winter while also adding organic matter back to the soil.
Note – If you garden in a warm climate, garlic may need a cold period to develop properly. In those areas, some gardeners refrigerate cloves for several weeks before planting to mimic winter.
Watering Garlic After Planting
After planting, garlic does not need constant watering, but it does benefit from some moisture if fall is dry. The key is balance. Freshly planted cloves do not yet have roots, so soaking them repeatedly can encourage rot. Once roots begin to form and green tips appear, watering becomes more useful.
In a dry fall, give the cloves water occasionally to help them settle in and start rooting. Once the ground begins to freeze, the bed can largely be left alone until spring.
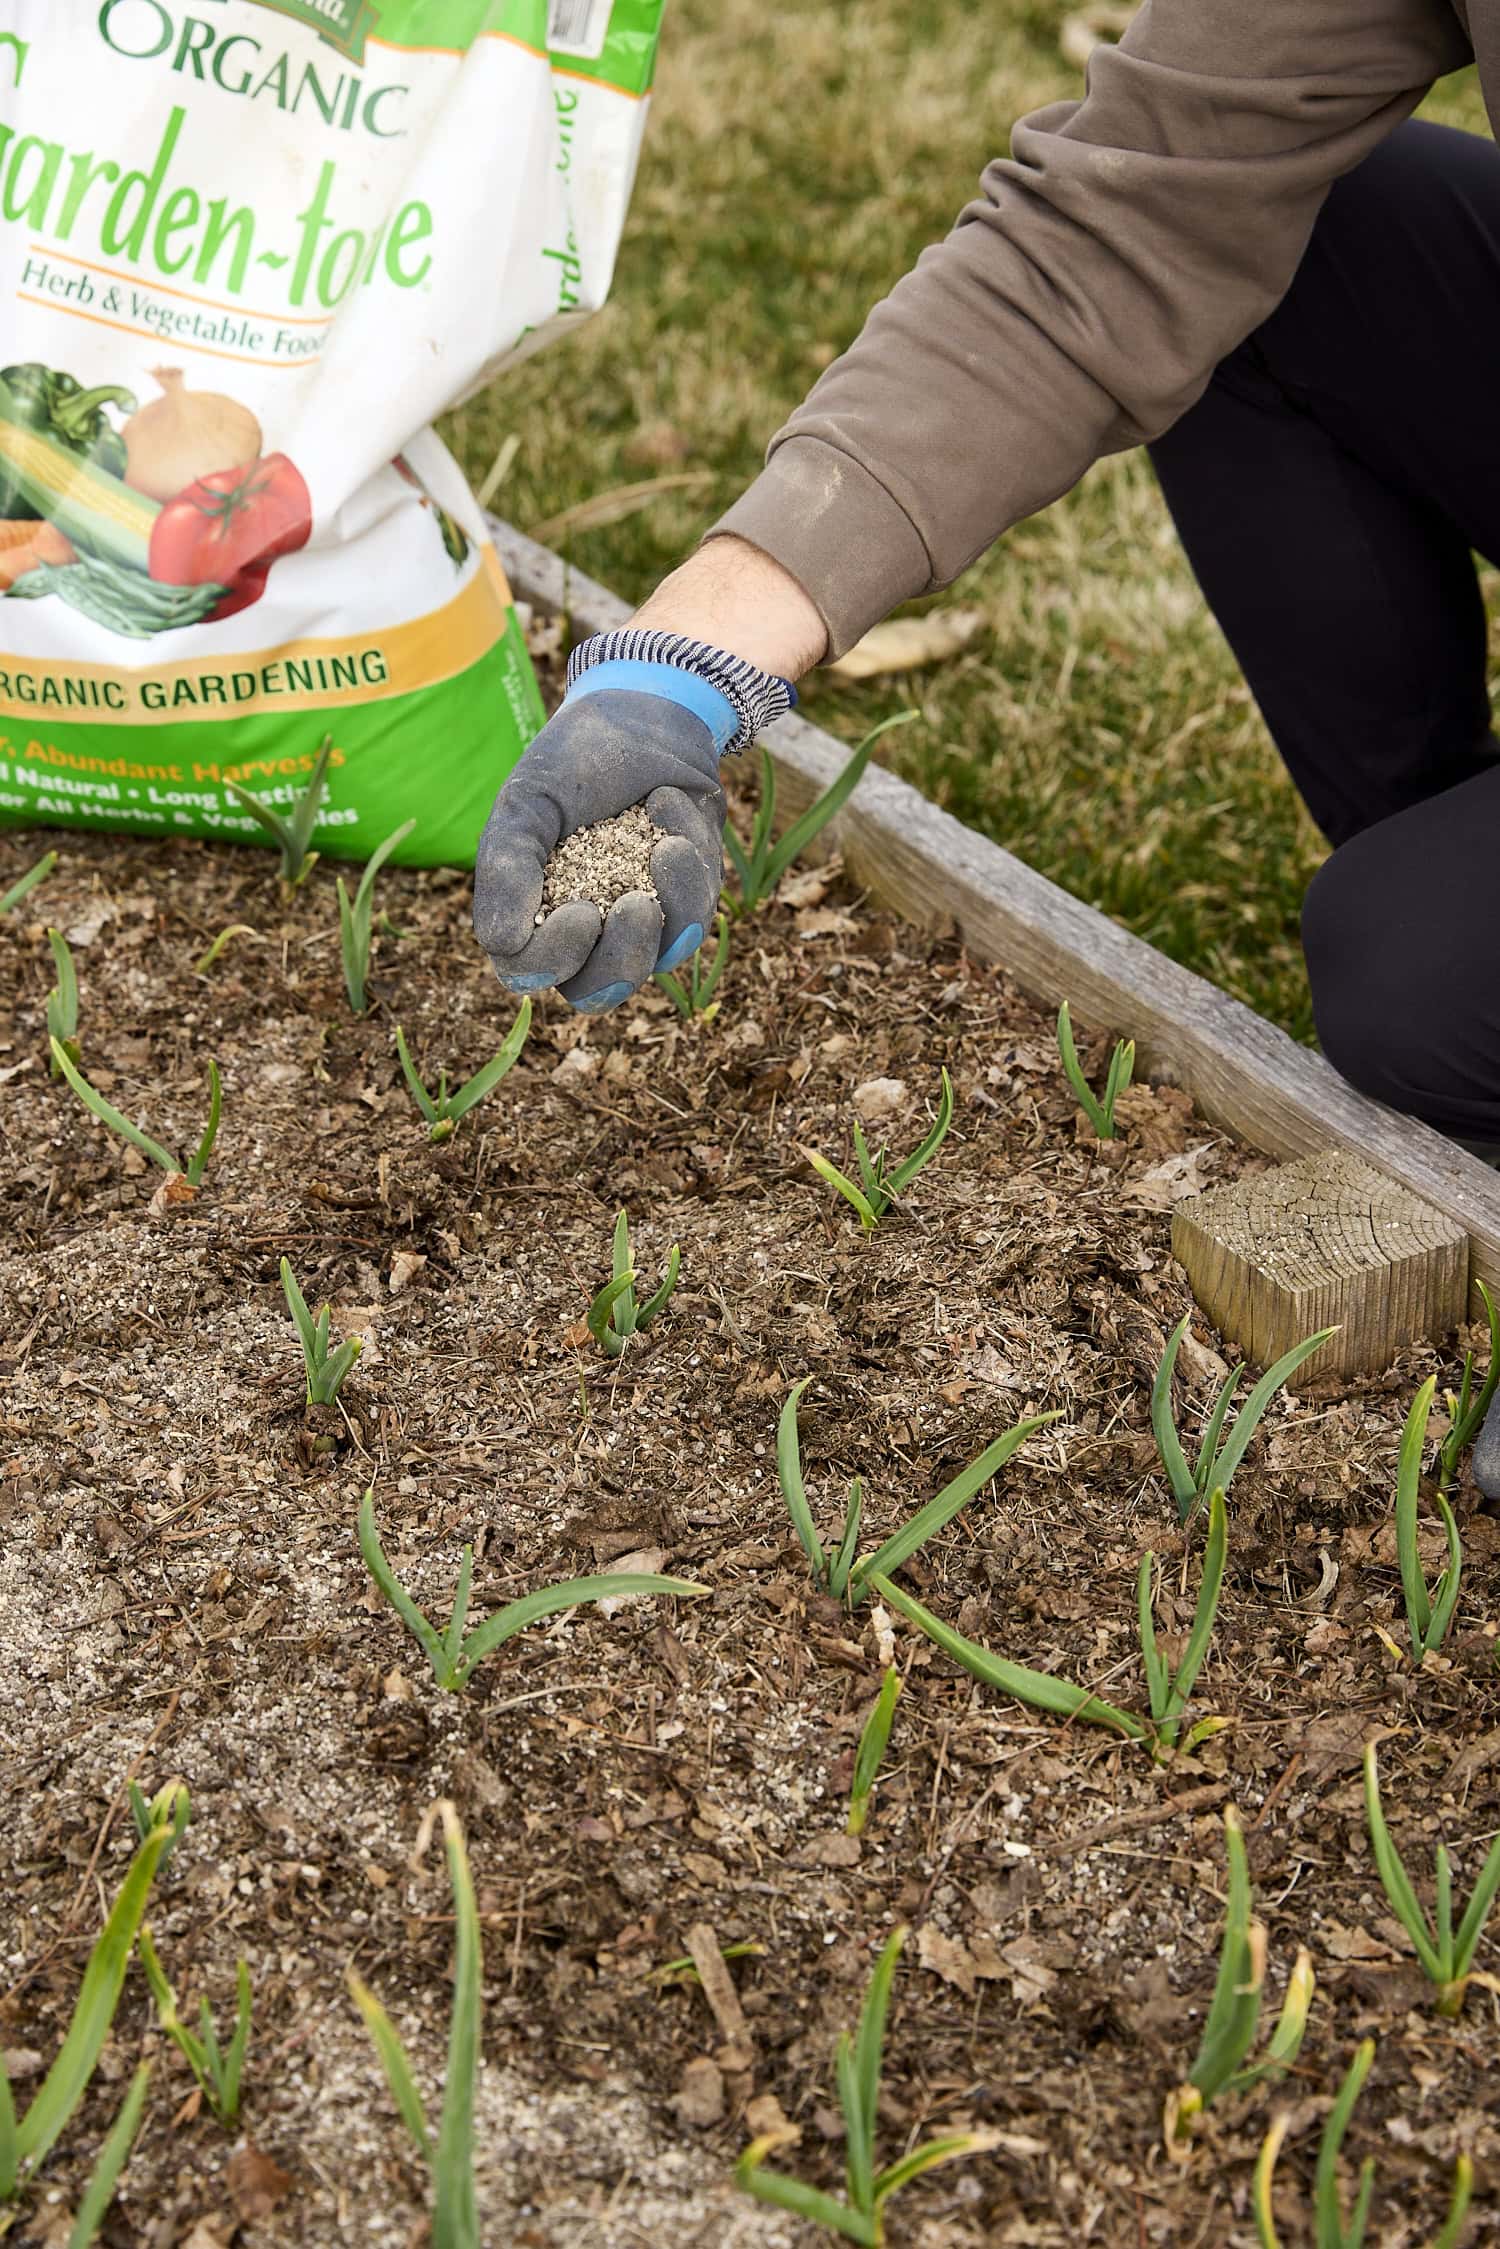
Feeding Garlic in Spring
When garlic starts growing again in spring, it benefits from a nutrient boost. This is a good time to feed with a nitrogen-rich organic fertilizer. I often use organic products that support early-season leafy top growth, which in turn helps build strong bulbs underground.
Work the fertilizer lightly into the surface of the soil. There’s no need to dig deeply or disturb the bed too much. Garlic is one of those crops that appreciates steady support more than dramatic intervention.
If you notice a few brown leaf tips in spring, do not panic! That can happen and does not automatically mean something is wrong.
What to Do With Garlic Scapes
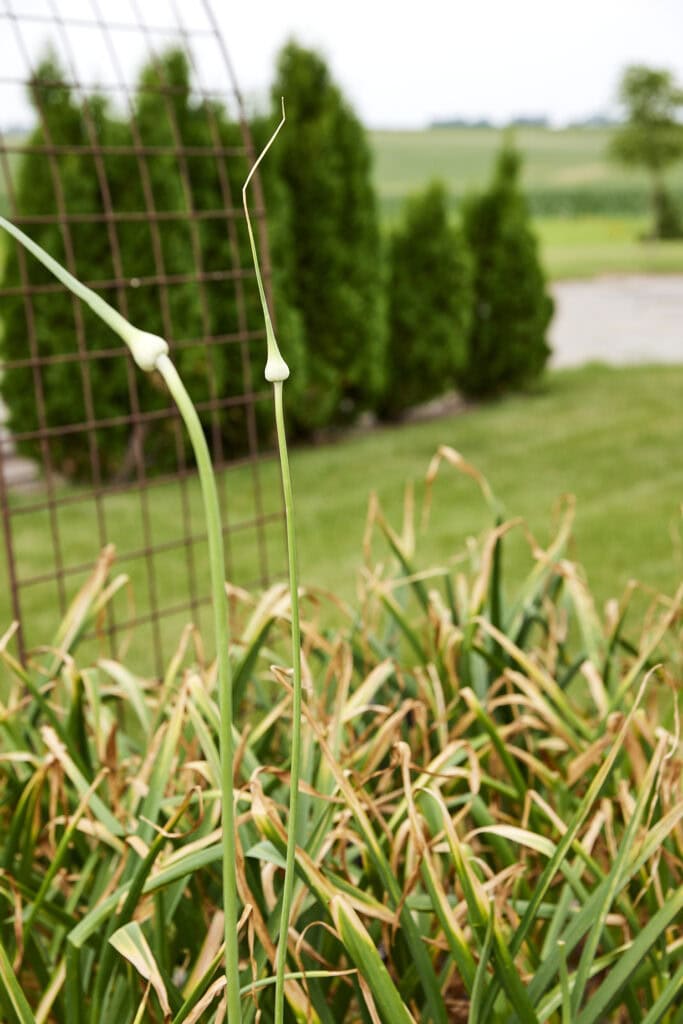
If you’re growing hardneck garlic, one of the best parts of the season arrives in late spring or early summer: scape season.
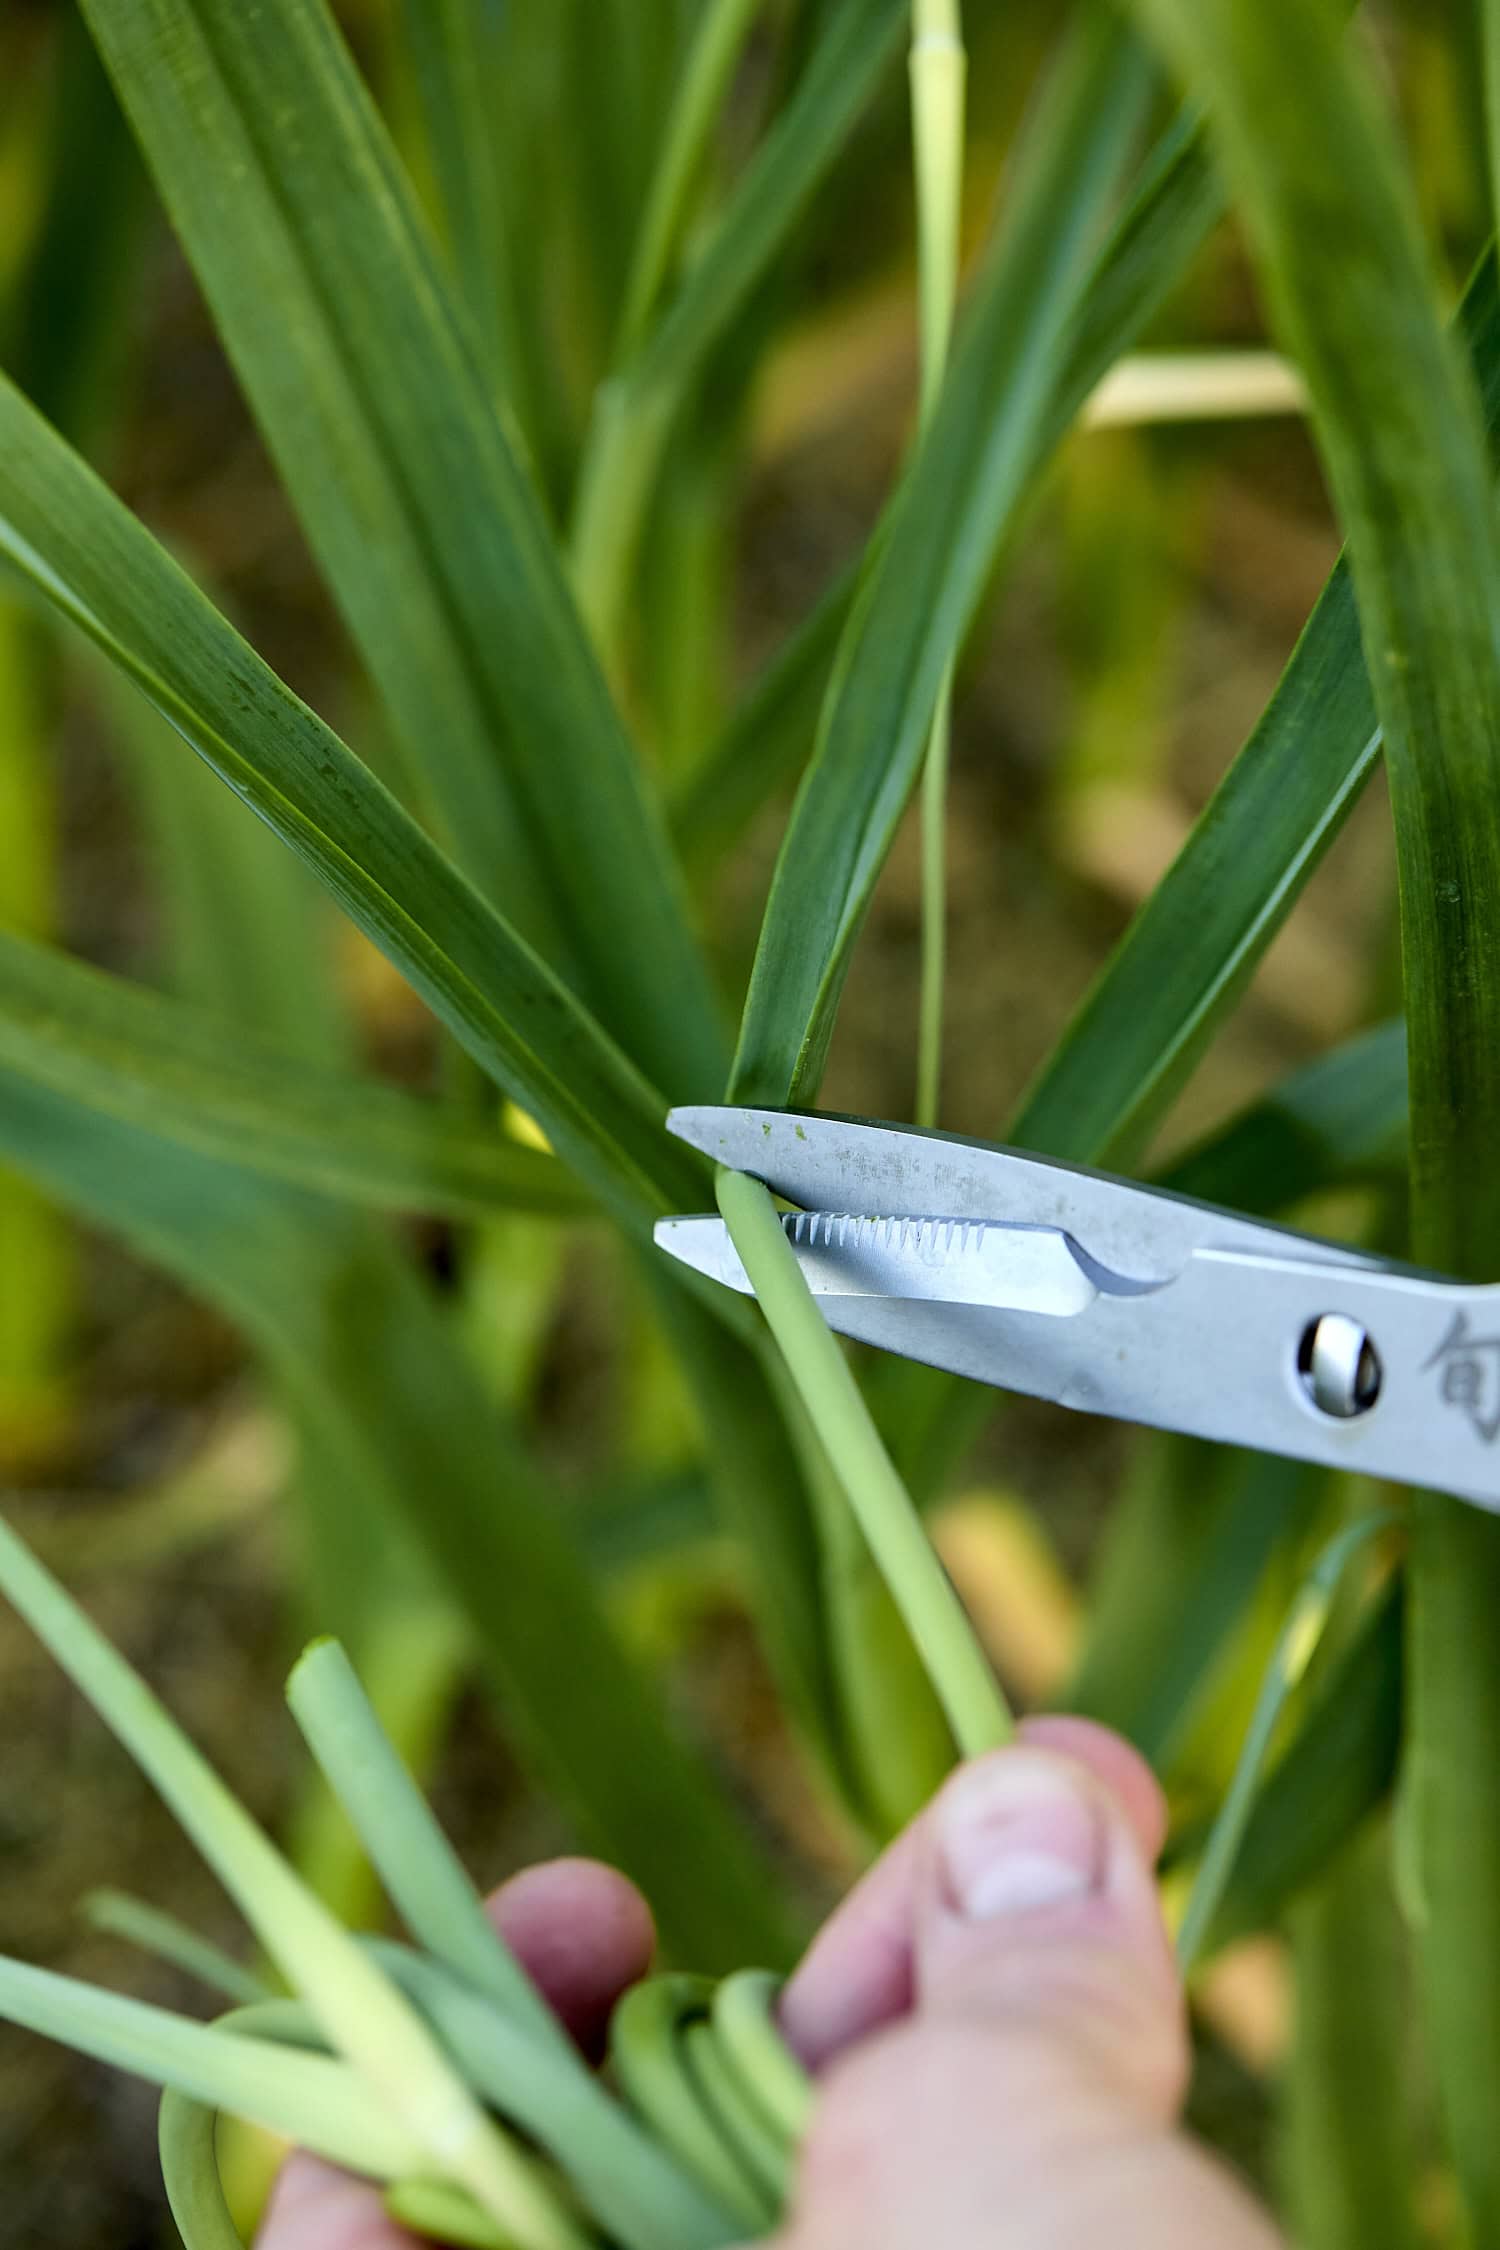
Garlic scapes are the flowering stalks that emerge from hardneck plants. At first, they grow upright, then they begin to curl. That curling stage is the time to remove them. If left on the plant, the scape will eventually try to flower, and the plant will start directing energy to it instead of to the bulb.
To remove a scape, simply cut or snap it off just above the top leaf once it starts curling.
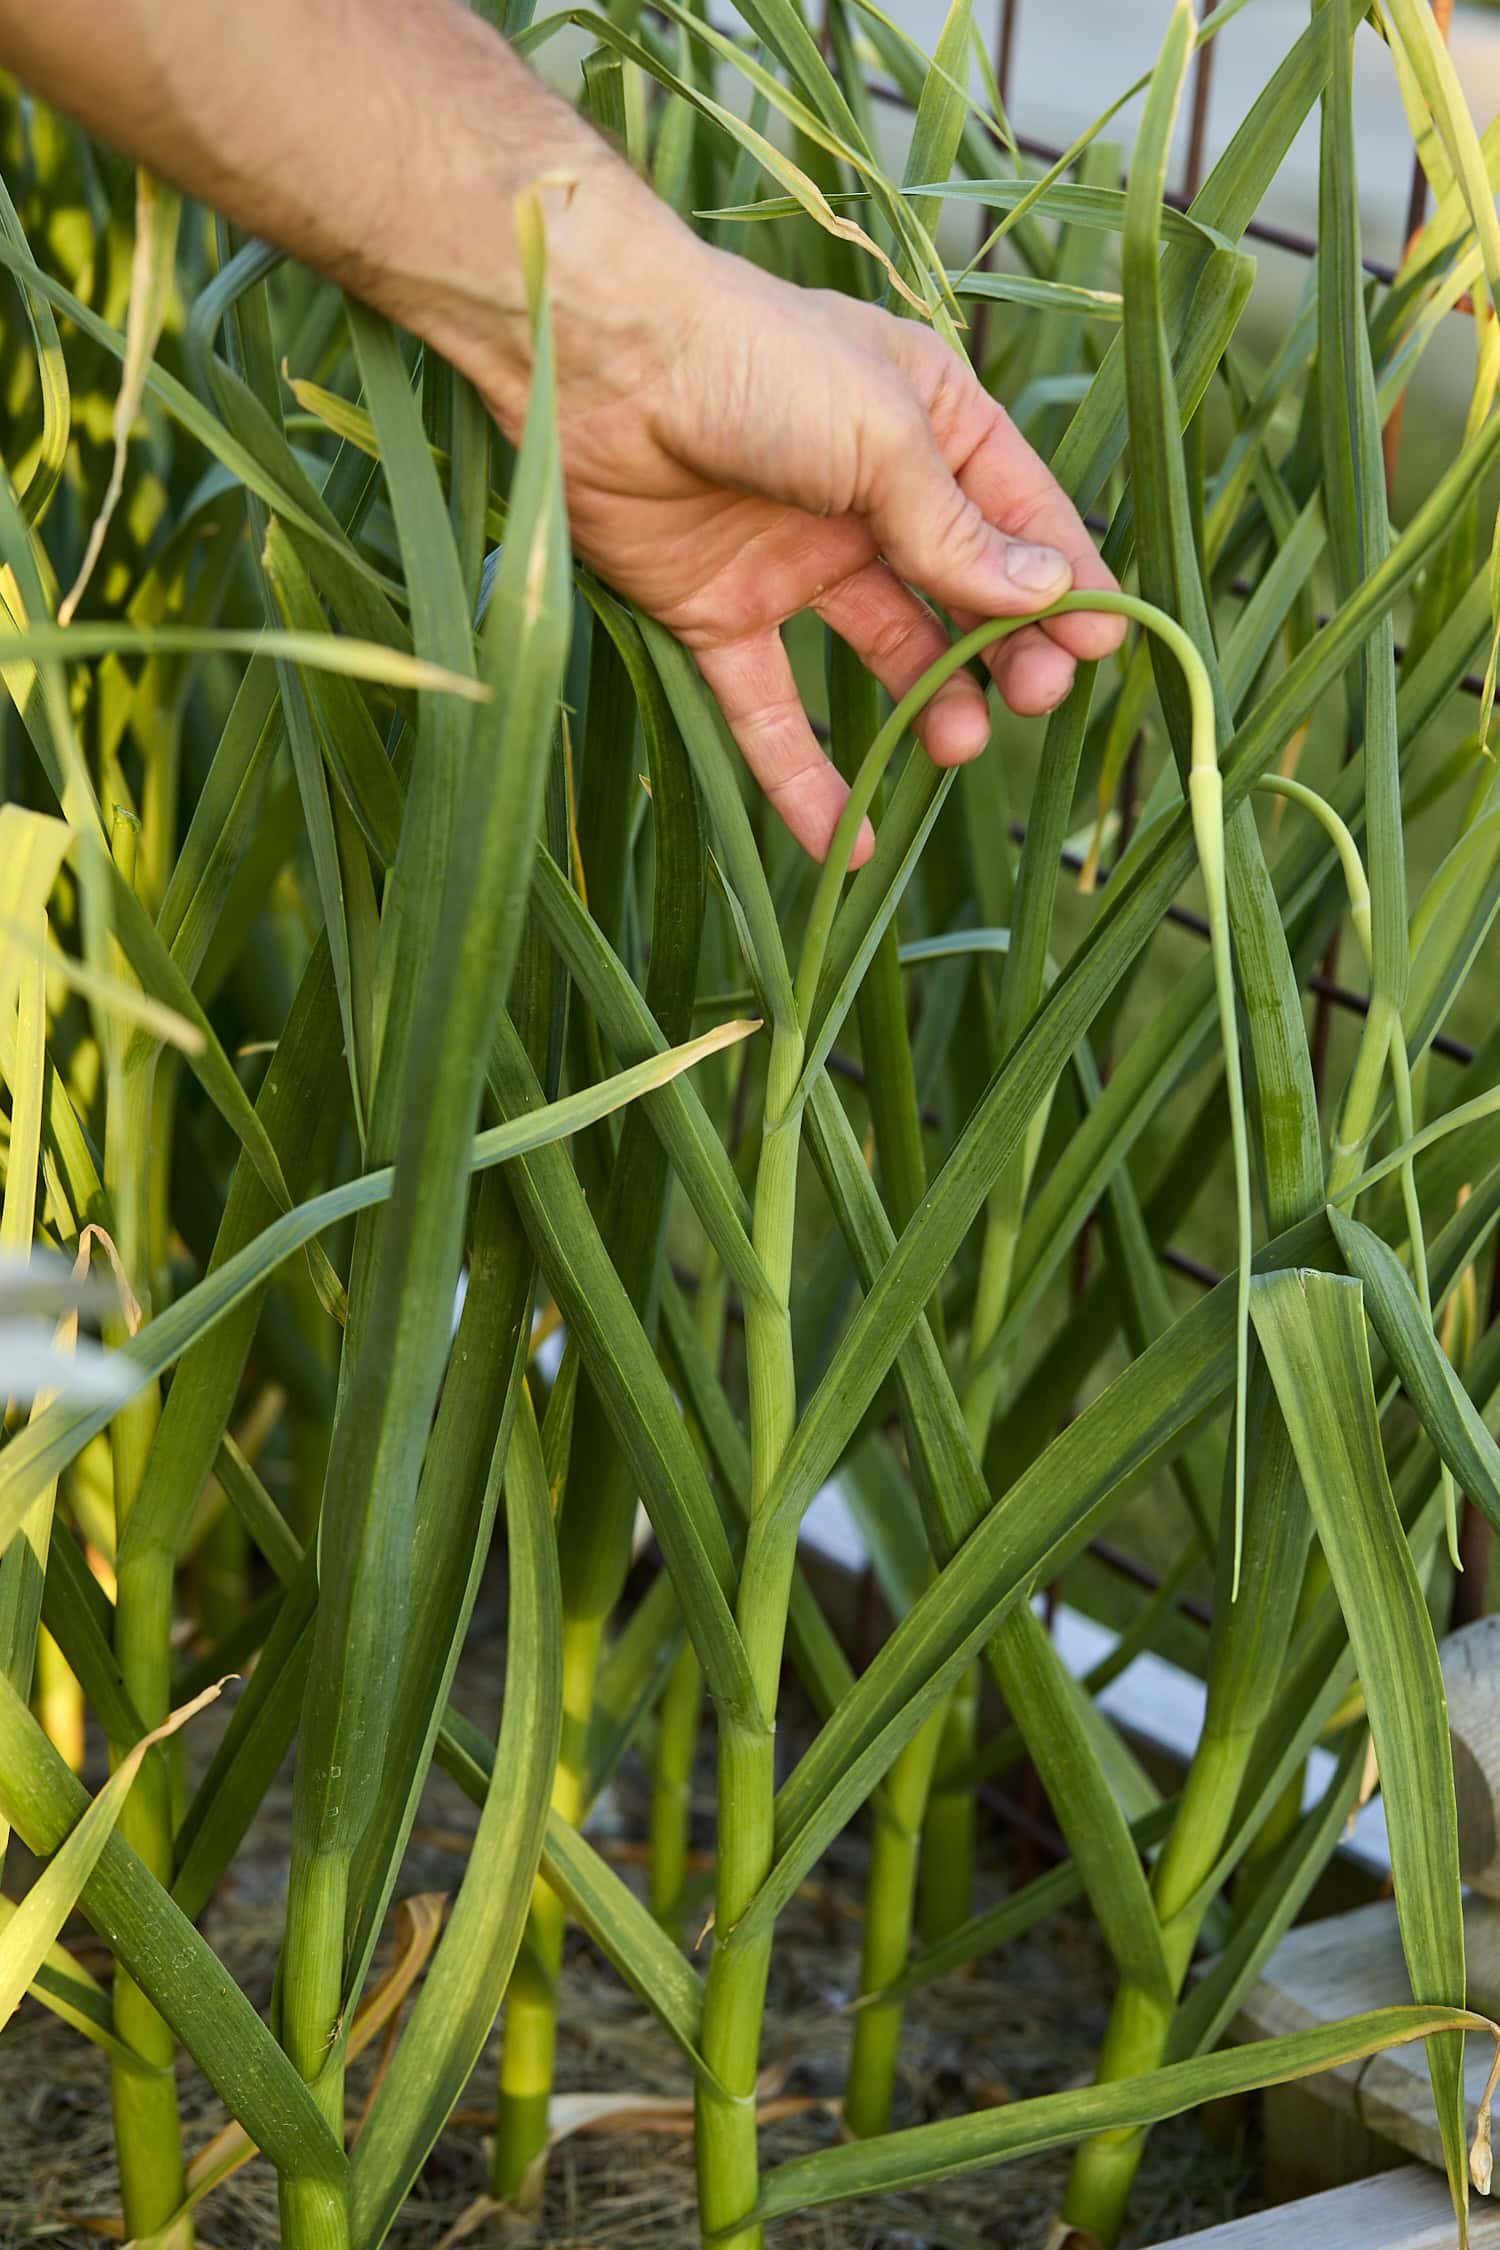
The good news is that scapes are not waste. They’re a bonus crop! Their flavor is sweet, fresh, and distinctly garlicky, though milder than a mature bulb. Blend them into pesto, stir them into butter, chop them into sauces, roast them, grill them, pickle them, or toss them into a stir-fry.
As an added bonus, once scapes appear, harvest is usually only a few weeks away.
How to Know When Garlic Is Ready to Harvest
Harvest timing is the part that often feels most uncertain, but once you know what to look for, it becomes much easier.
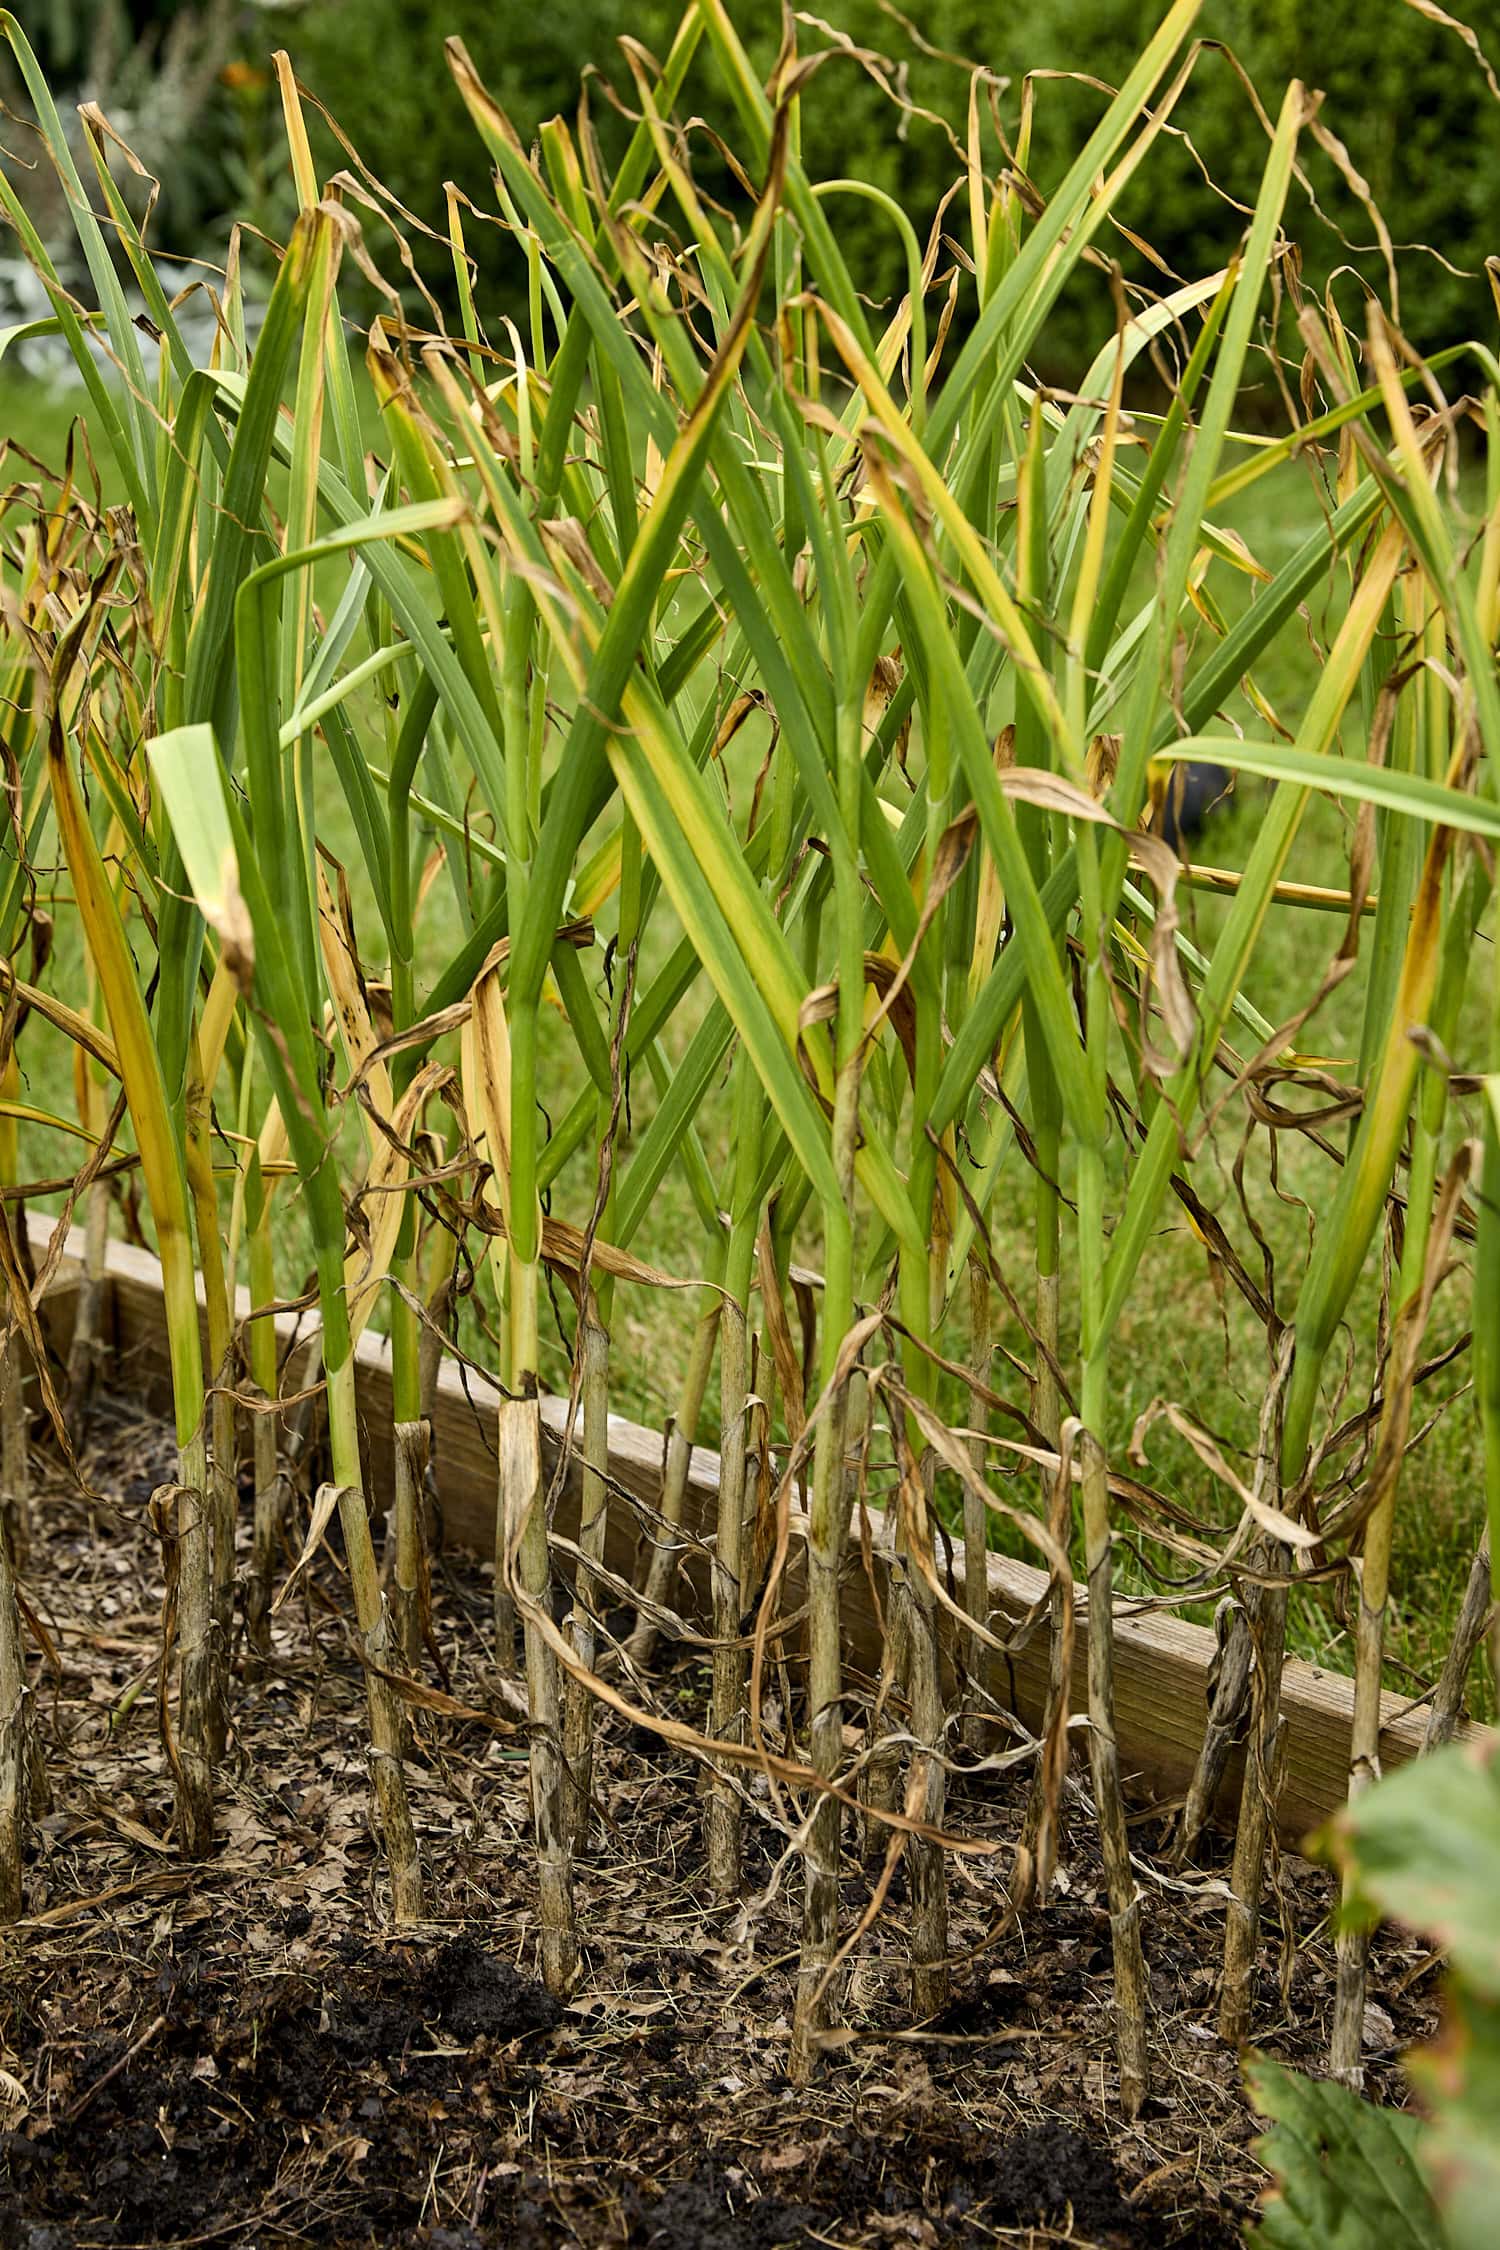
The first clue is the foliage. Garlic is usually ready when about one-third to one-half of the leaves have turned brown and yellow. You still want some green leaves left on the plant, but you should see enough browning to know it’s maturing.
In my garden, garlic is often ready from late June into early or mid July, depending on the season.
There is another helpful trick for hardneck garlic. If you leave one or two scapes on the plant instead of removing every single one, they can act as a harvest signal. After curling, those scapes will eventually straighten and point upward. That’s often a sign that the garlic is ready.
If you are unsure, dig one test bulb of both hardneck and softneck garlic. Use a garden fork to lift it gently and brush away the soil. Check that the outer wrapper has developed around the cloves. If the husk is nicely formed and the bulb looks full, it is ready.
Try not to wait too long. Overripe garlic starts to split underground, and the cloves begin separating from each other. When that happens, the heads do not store as well.
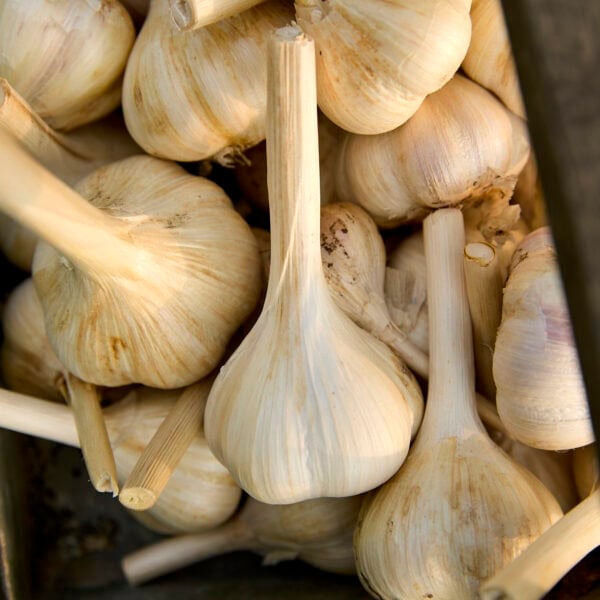
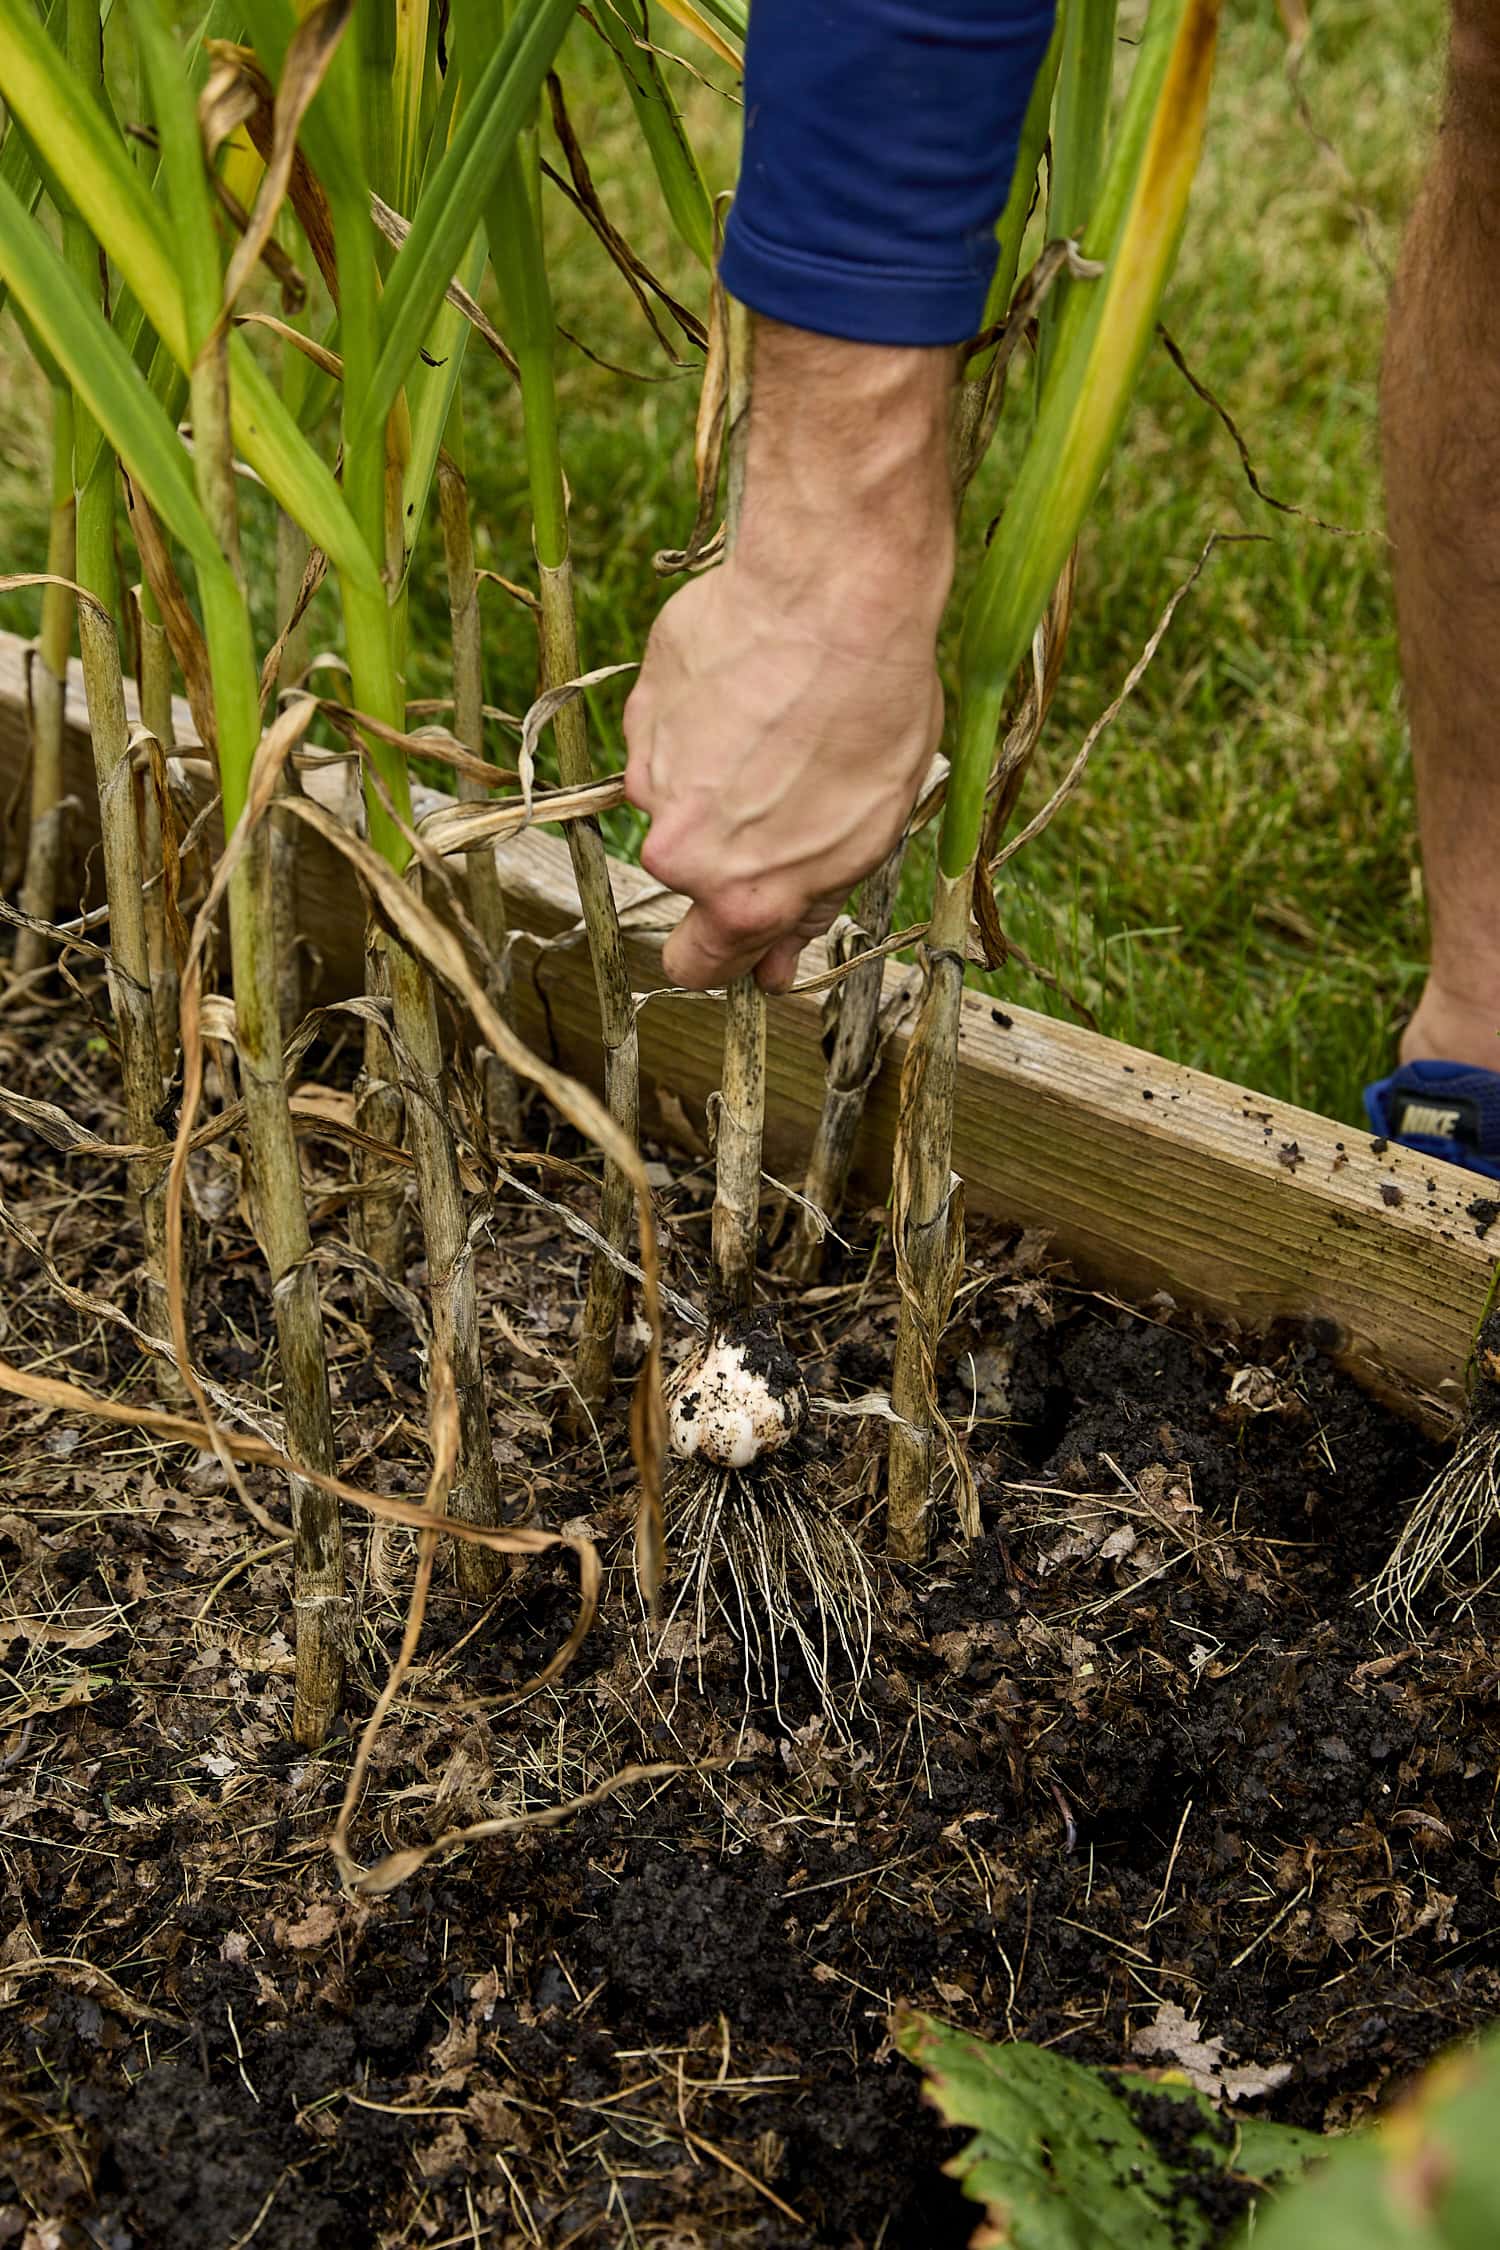
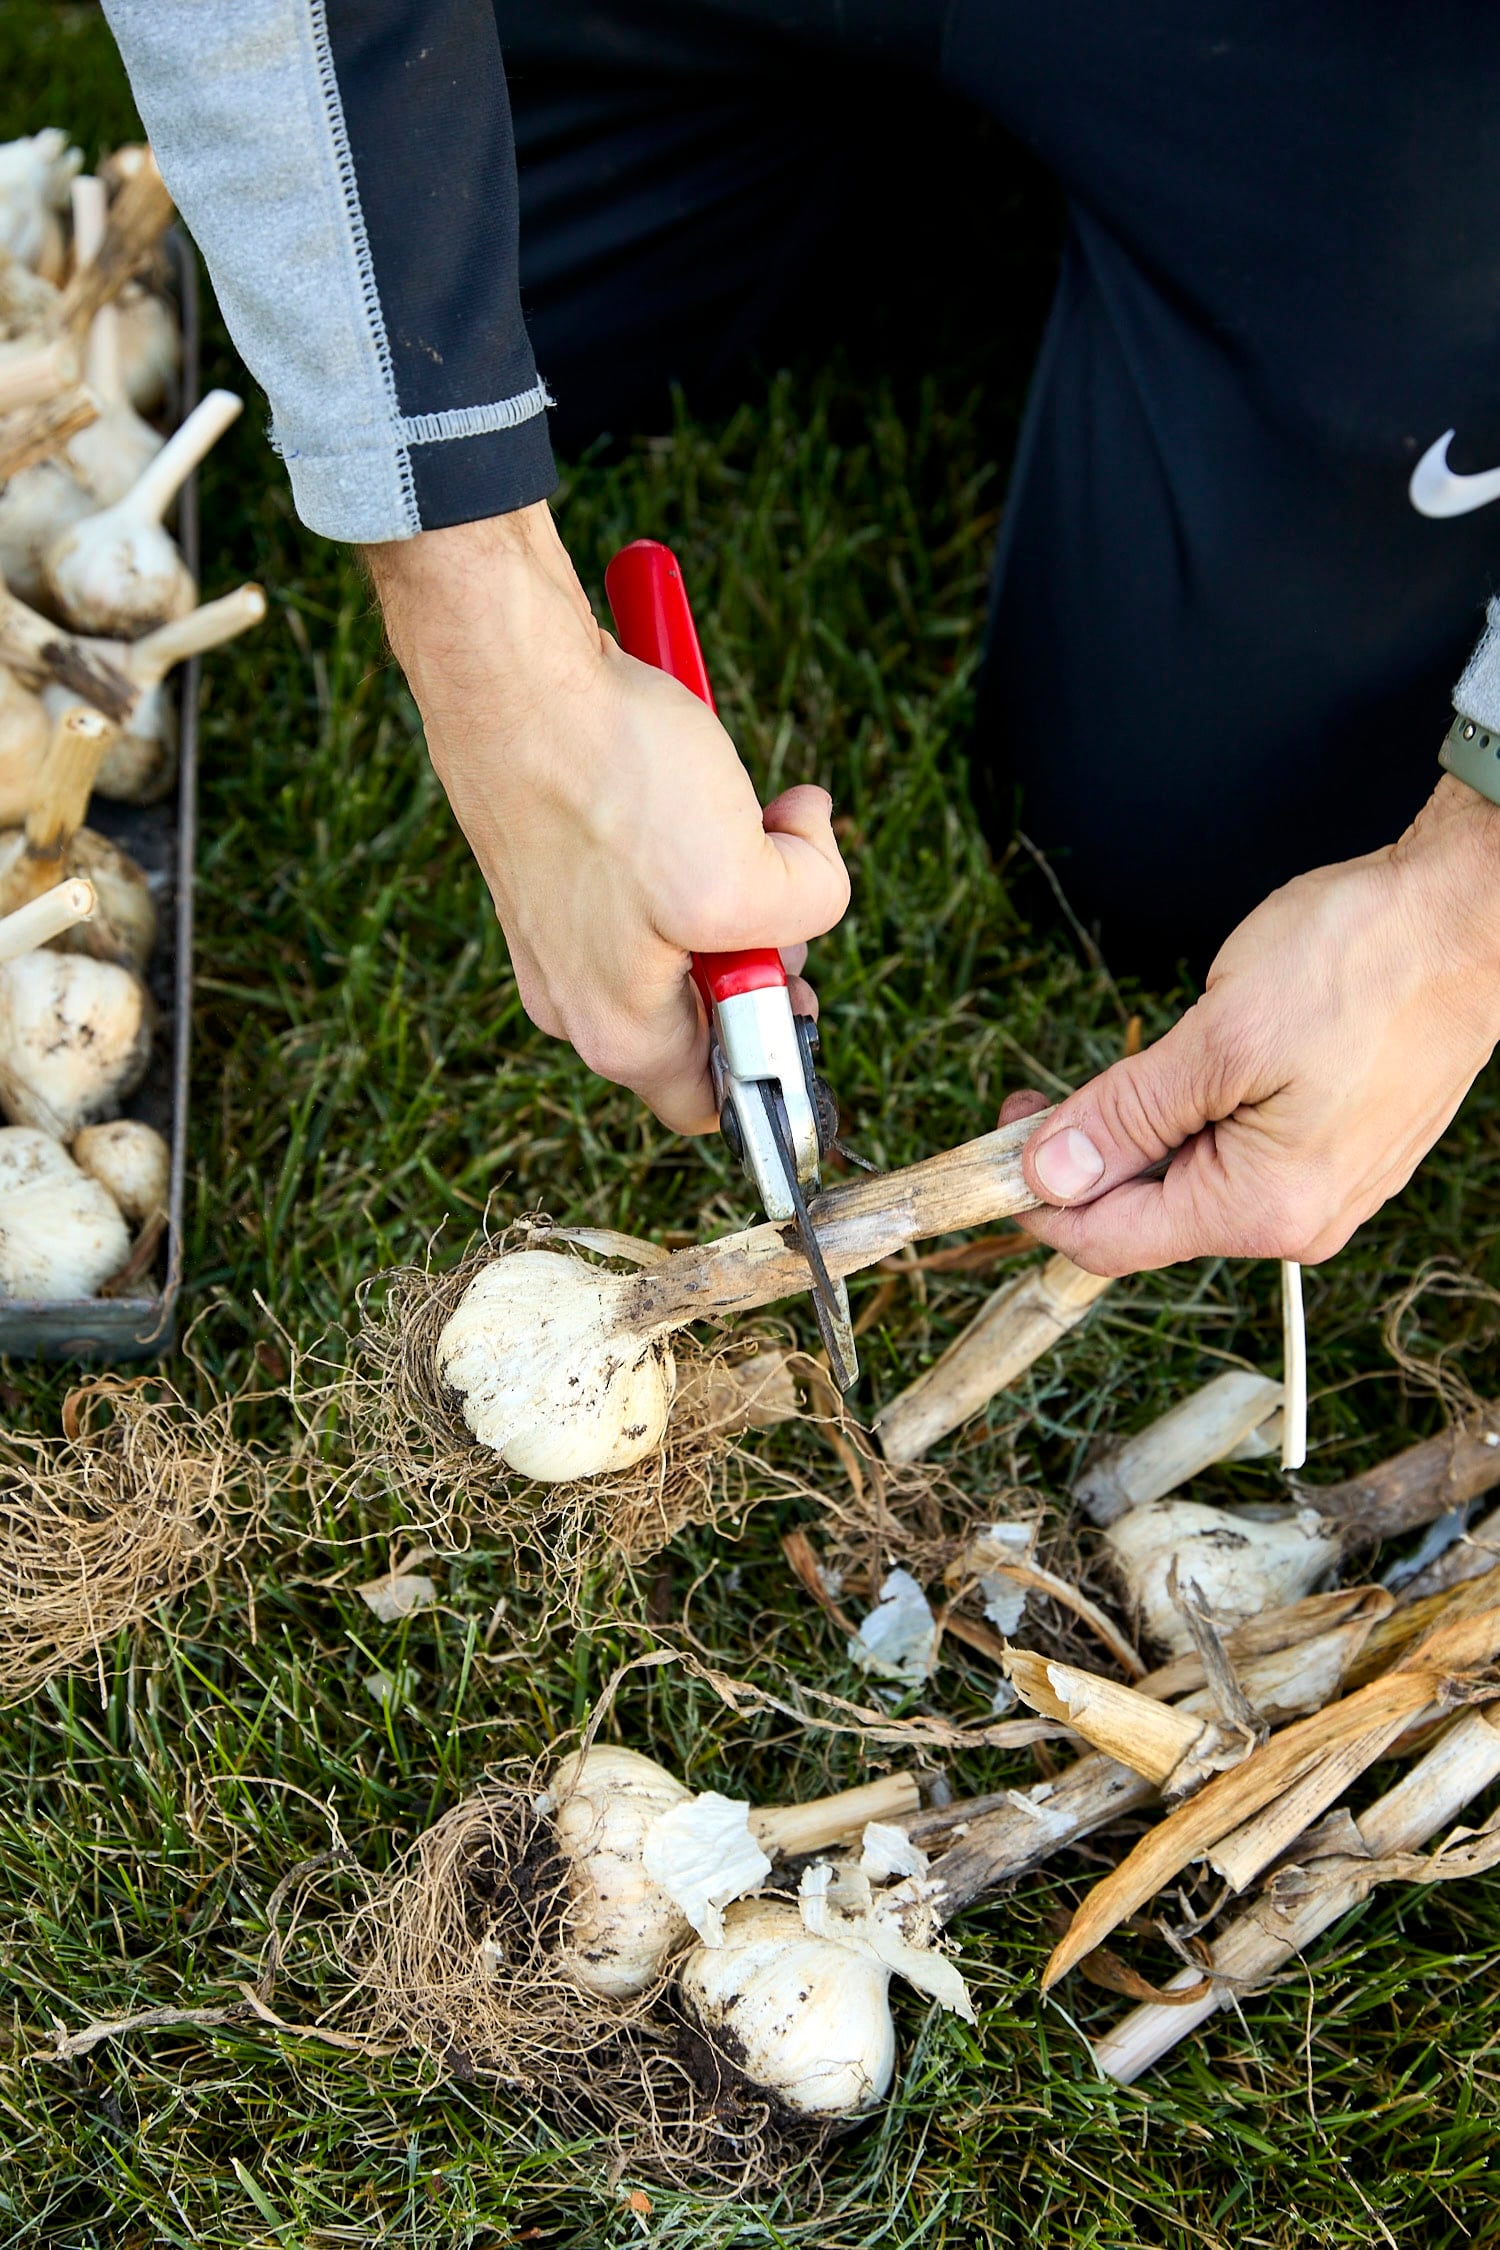
How to Harvest Garlic
When it’s time to harvest, resist the urge to yank garlic out by hand. Even in loose soil, it can damage the bulbs.
Instead, use a garden fork or small digging fork to loosen the soil beside the plant, then lift the bulb gently from underneath. Brush off the extra dirt, but do not wash the bulbs right away if you plan to cure them.
Some heads will be bigger than others, and that’s normal. The larger, healthier ones are great candidates for replanting later. Smaller heads can go straight to the kitchen.
Why Curing Garlic Matters
Freshly harvested garlic is not yet ready for long-term storage. It needs time to cure, which simply means drying down slowly so excess moisture leaves the bulbs.
Curing is what helps garlic store better. Without it, the bulbs are more likely to soften, rot, or break down in storage. It’s an easy step, but an important one.
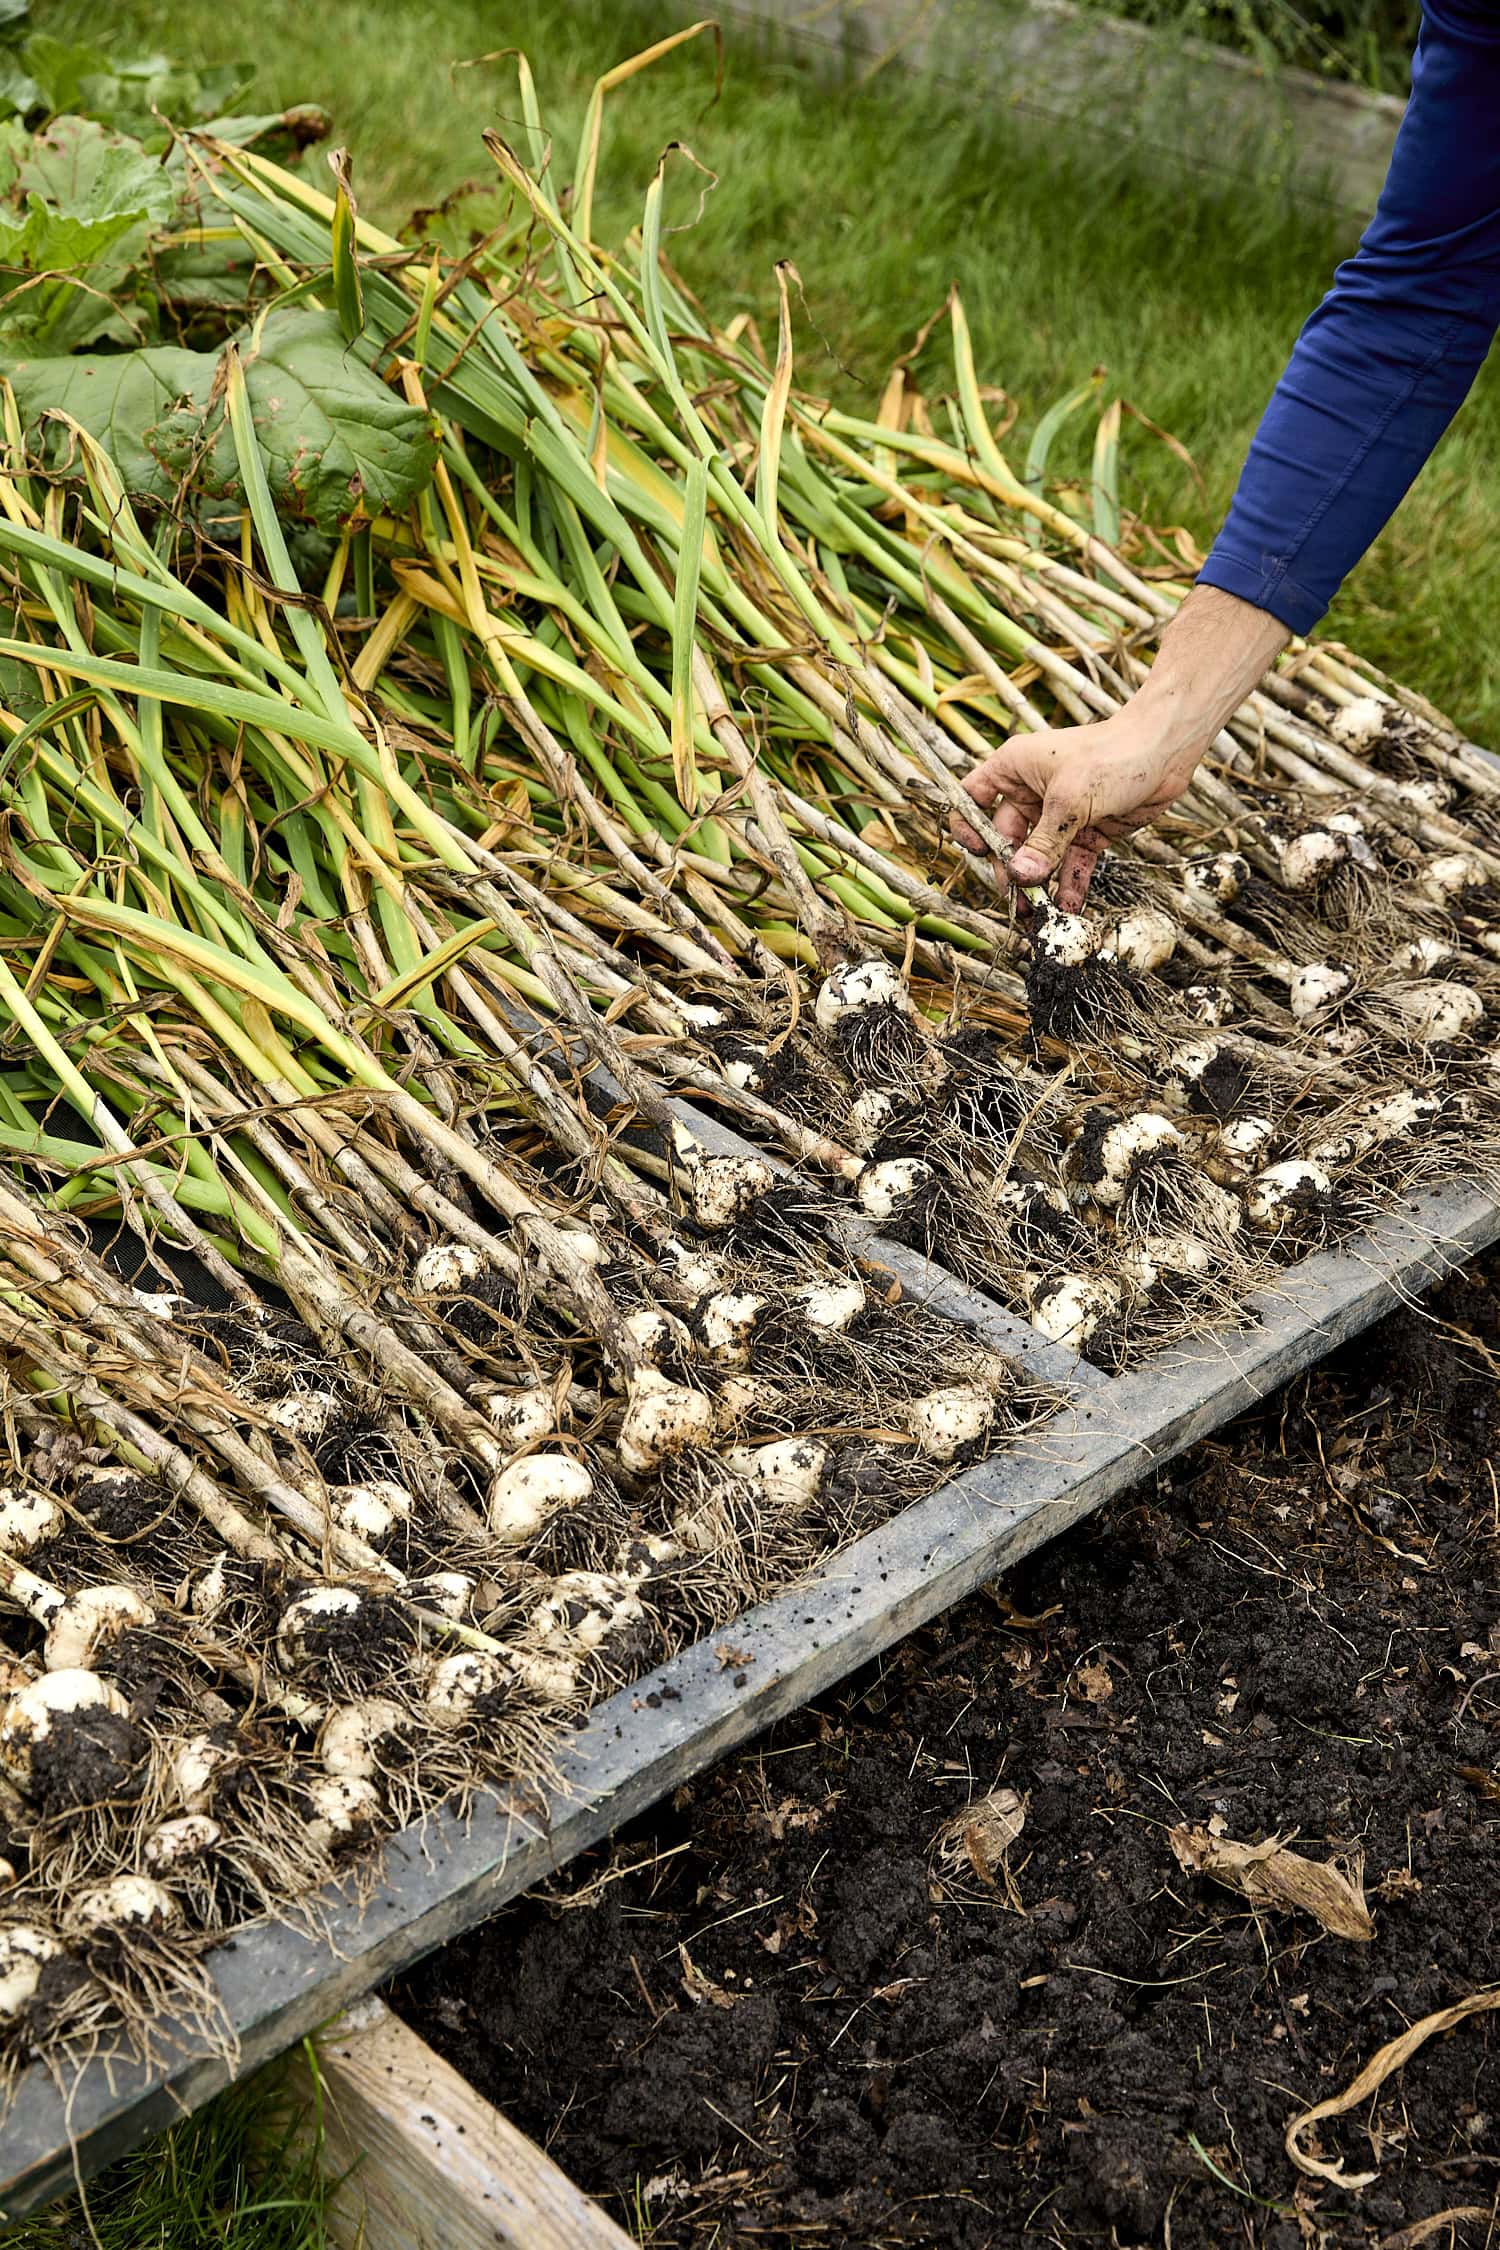
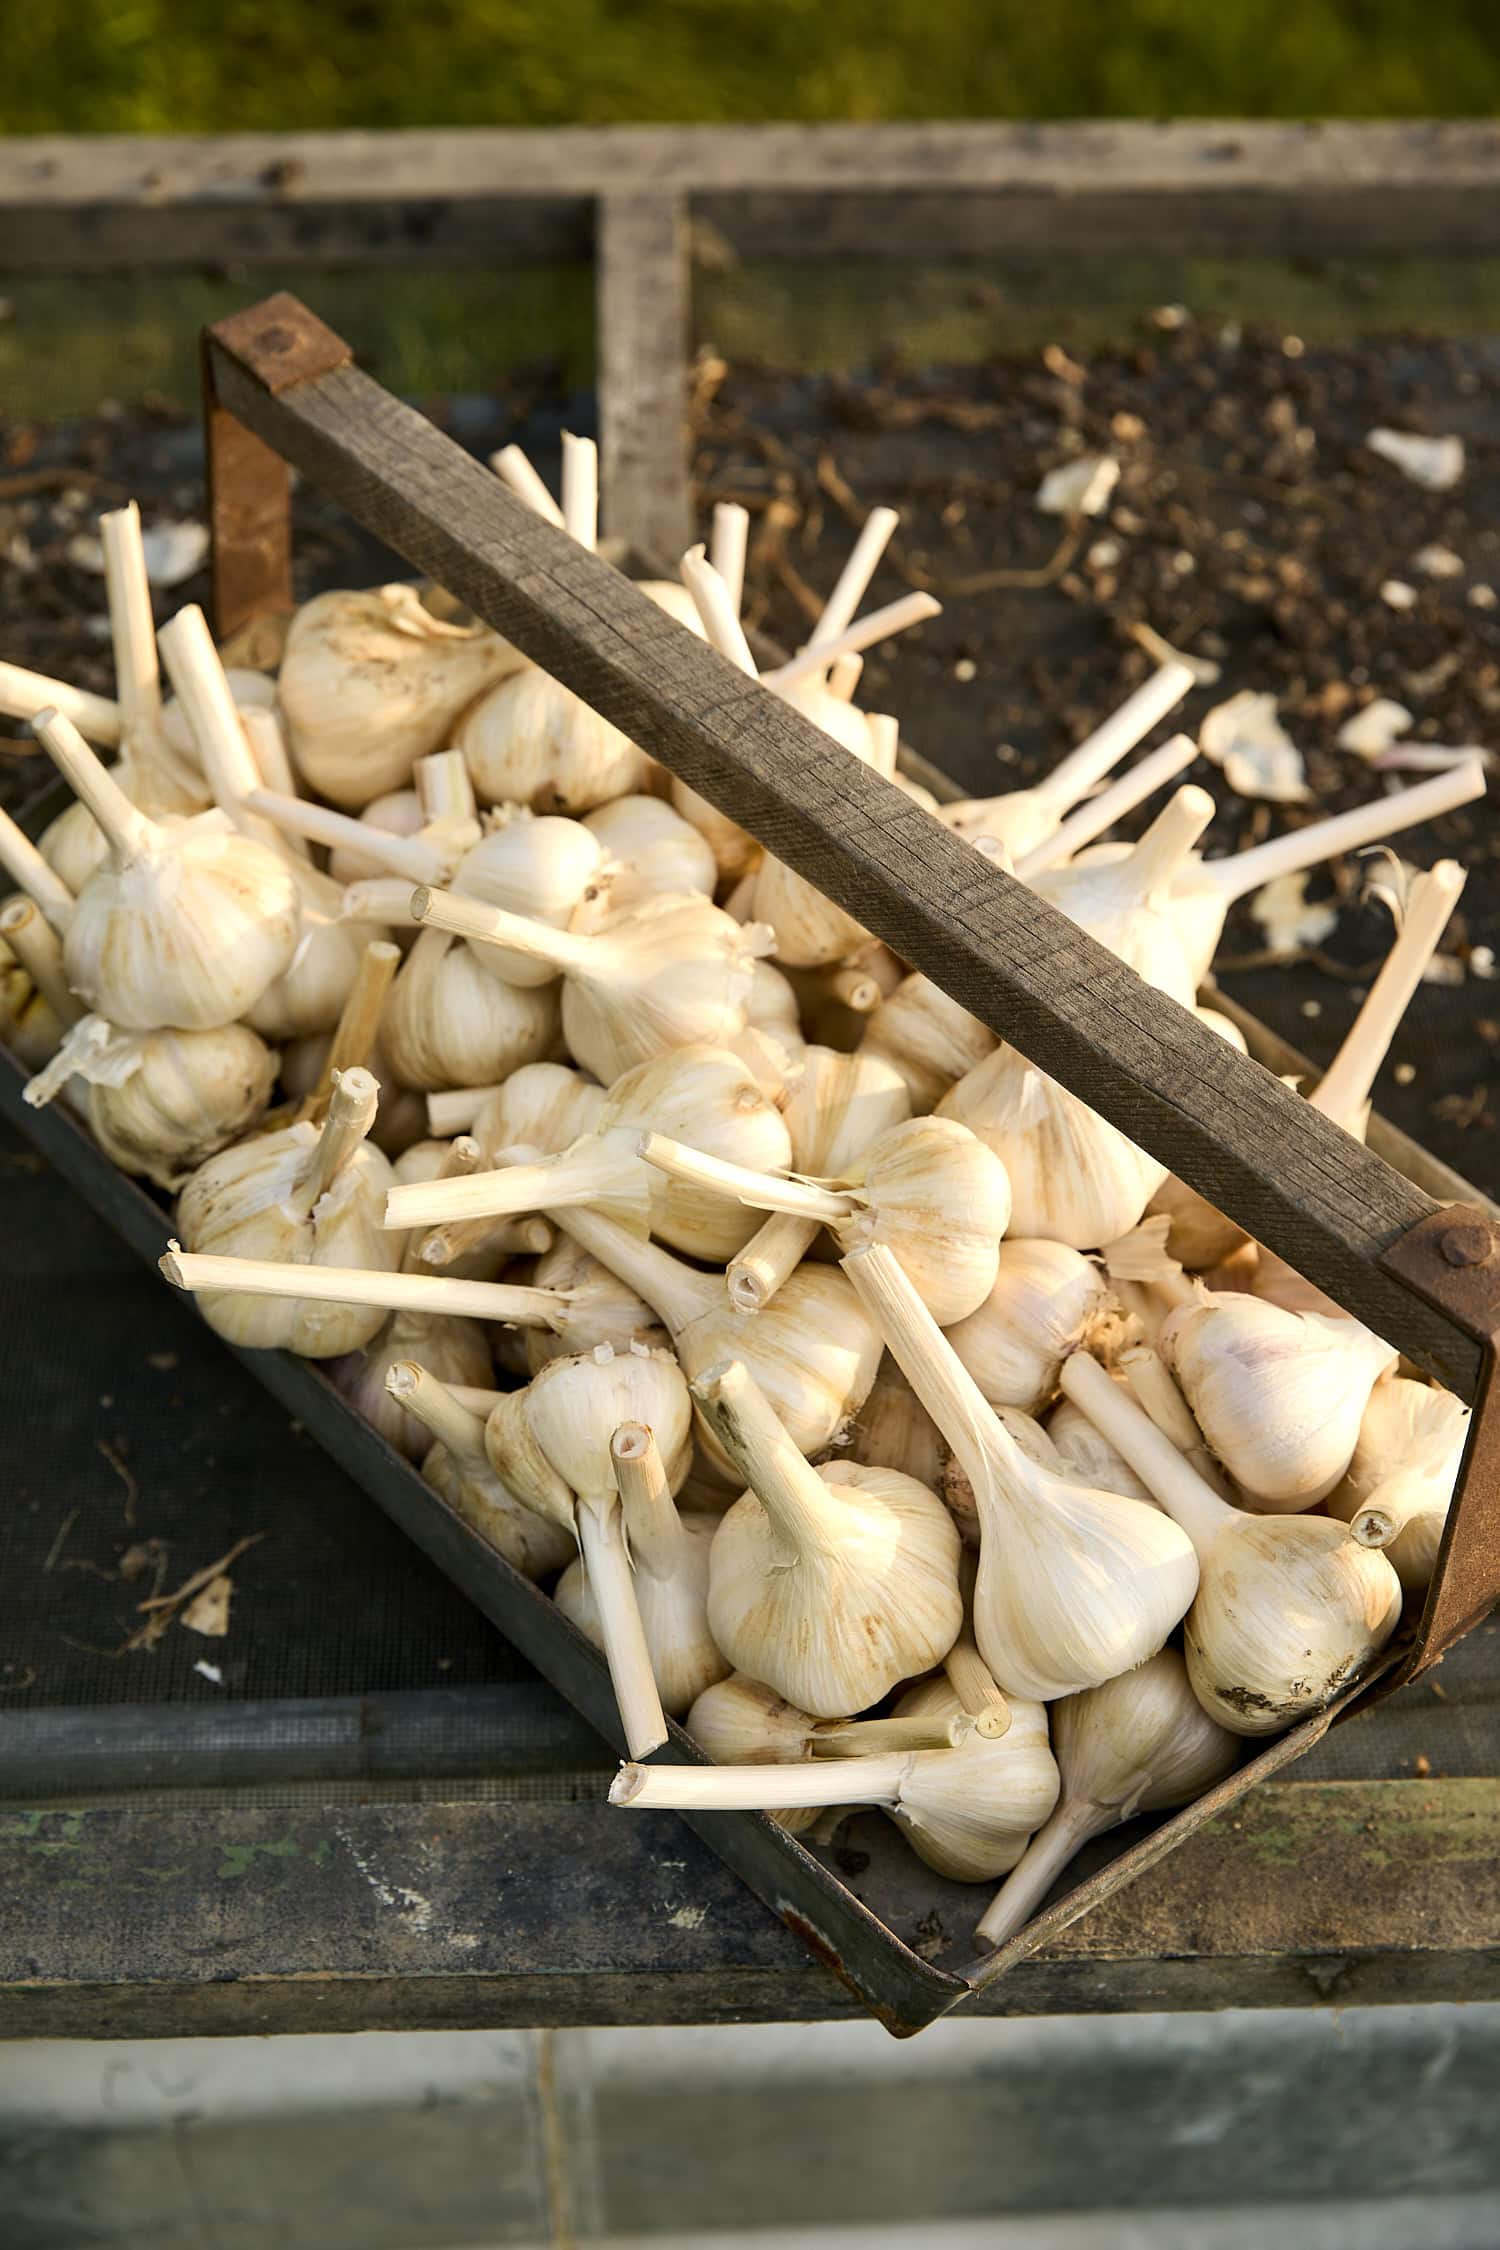
How to Cure Garlic
After harvest, lay the garlic out in a dark, dry, well-ventilated place. Good airflow matters most. A shed, garage, or garden shed can all work well.
I often cure garlic on old window screens because they let air move above and below the bulbs. That kind of setup works beautifully if you have it, but it’s not the only option. You can also tie garlic in small bundles and hang it to dry in a covered area with good airflow.
The important part is to leave the roots and stems attached while the bulbs cure. Do not cut the tops off right away, but instead let the plant finish drying naturally. Once the stems are fully brown and there is no green left, the garlic is cured and ready to trim (see next section).
This process usually takes a few weeks, depending on the conditions.
How to Trim and Store Garlic
Once the garlic is fully cured, trim the roots and cut back the stem. You can also brush off the dirtiest outer layers if needed, but leave enough wrapper in place to protect the bulb.

Store garlic in a cool, dry place with good air circulation. A pantry, cellar, or garage can all work, as long as the bulbs stay dry. Softneck garlic generally stores longer than hardneck, which is one reason many gardeners like to grow both.
If hardneck begins to dry out in storage, it’s still useful. You can dehydrate it and make garlic powder, or mince and preserve it for cooking.
Save the Best Bulbs to Replant
This is one of the best parts of growing garlic. After curing and trimming, sort through the harvest and pull out the biggest, healthiest bulbs. Those are the ones to save for fall planting.
When you keep replanting your best garlic, you gradually build a better crop for your own garden. It’s a simple form of selection, and over time, it pays off in stronger, bigger bulbs.
That cycle is part of what makes garlic so satisfying. Plant it once, care for it well, save your best heads, and suddenly you are growing your own planting stock from year to year.
Can You Grow Garlic in Containers?
Yes, you can. Garlic grows surprisingly well in containers as long as the pot is large enough and drains well.
The biggest difference is that containers dry out faster than garden beds, so you need to watch moisture more closely. In cold climates, containers also need extra winter protection because they can freeze more thoroughly than soil in the ground or in raised beds.
If you’re growing garlic in a pot, place it in a protected area and keep an eye on moisture during warm winter spells. In very cold regions, an unheated garage or sheltered spot near the house can help protect the container through the coldest part of the season.
Common Garlic Growing Problems
Garlic is usually easygoing, but a few issues can show up now and then. Let’s go through what they are and the reason for each one:
- Small bulbs often indicate poor soil, overcrowding, insufficient sun, or spring-planted garlic that did not receive a full cold period.
- Poor sprouting can happen if cloves are planted upside down, set in overly wet soil, or are not healthy to begin with.
- Brown tips in spring are not always a problem. A little tip burn can show up, and the plants often keep growing just fine.
- Pests and diseases do happen, though garlic is generally less troublesome than many garden crops. Keep an eye out for issues like rust, aphids, white rot, or garlic root maggots, and avoid planting into poorly drained soil where problems are more likely to spread. Recently, I’ve been soaking my garlic cloves in cheap vodka for a quick 10-minute soak to ward off disease.
Final Thoughts
Garlic is one of those crops that makes you feel like a true gardener. You plant it in the fall when the rest of the season is winding down, and it settles in quietly over winter. Then, almost before you know it, it’s up and growing in spring, sending out scapes in early summer, and ready to harvest not long after.
It’s easy, practical, and so satisfying to grow (seriously!). And once you start saving your own bulbs to replant, garlic becomes more than just another crop. It becomes part of your own garden’s rhythm.
If you’ve been thinking about growing garlic, take this as your sign to do it. Start with a few heads or plant a whole bed. Either way, by next summer, you’ll be glad you did.