
This post may contain affiliate links. If you make a purchase through links on our site, we may earn a commission. Please read our disclosure policy.

Why I Love Holiday Swags
I didn’t grow up with real Christmas greens, inside or outside. Honestly, around home, there weren’t many places to find fresh greens, and they were expensive. Today, greens can be found in numerous places, and I love to run to my local garden center and see all the different varieties they get in.
First off — yes — there are easy-to-grab swags. You can take one that is already done at home, throw it on your door, and be like all your neighbors. Or you can pick up some freshly cut greens and create your own, a one-of-a-kind decoration that no one else will have. Can I convince you anymore?! Unique swag can be super festive and easy!

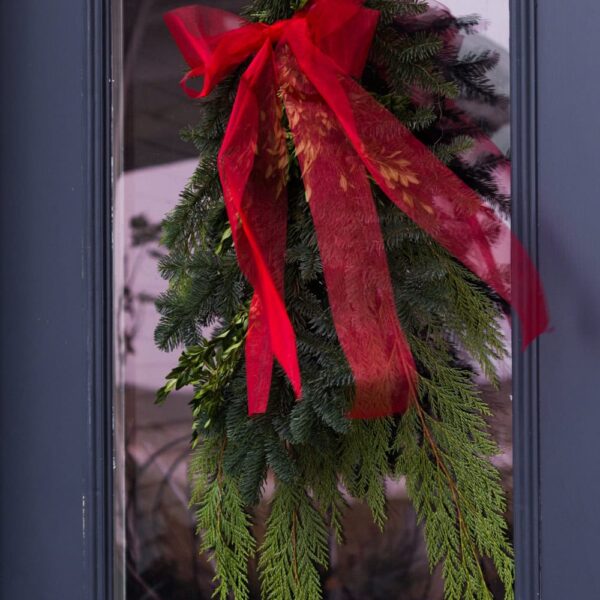
You hardly need a step-by-step tutorial for this, but I hope to provide some inspiration for you to craft something! I like to choose one piece of “statement” green or a variety of greens with different textures and colors. Noble Fir, Port Orford Cedar, and Boxwood (no surprise) are some of my favorites. You can be as simple or intense as you want. You’ll also probably want some floral wire, ribbon or twine, ornaments, pine cones, and berries.
I first like to lay my base green, which is usually the longest piece or the one with the most structure. Then, I add other greens to build up the shape and overall size.
Next, use a wire to tie pieces together towards the top of the swag. Make sure to wire where the ribbon will cover up later. Wire on extra greens in different places to add texture throughout the swag. Wiring pieces of greens in other places allows you to save money by utilizing smaller pieces and making the overall impact larger.
Wire on ornaments, pine cones, or any extra pieces you may be using. To keep the overall swag simple but impactful, I like to choose one item to add. Last, finish with ribbon.
This really is easy and can be a fun group activity – host a swag-making party. Everyone will go home with some holiday cheer!


Hi Caleb,
I love watching your videos. I’ve learned so much about cooking and gardening from you. Thank you.
On one of your videos you mentioned your faux garland. It is gorgeous and I was wondering where I can purchase some.