
This post may contain affiliate links. If you make a purchase through links on our site, we may earn a commission. Please read our disclosure policy.
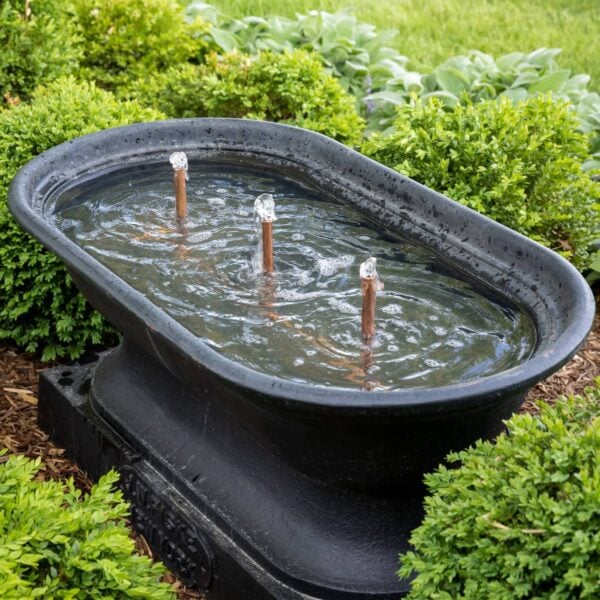
Creating a DIY water fountain can add a truly personal touch to any outdoor space, transforming it into an oasis. Using simple materials like a water pump, copper pipes, and a beautiful vessel, you can craft a personalized focal point that fits right into your garden. It’s a simple project that you can love for years!
The supplies you’ll need for this water fountain.
The elements needed for this DIY water fountain really depend on the size and shape you want for your fountain and the vessel you are building it in. For my fountain, I wanted three bubblers to appear above the surface of the water, each creating a gentle amount of water movement.
These are the supplies I needed to create the fountain I wanted (affiliate links):
- ½-inch copper pipes
- ½-inch copper elbow
- ½-inch copper tee
- ½-inch copper cap
- Liquid solder (I used Copper Lock)
- Copper cutter
- Water pump
- Sandpaper
- Rubber hosing
- Barbed couplers
- Drain pipe rubber plug

Here’s how to make this fountain project.
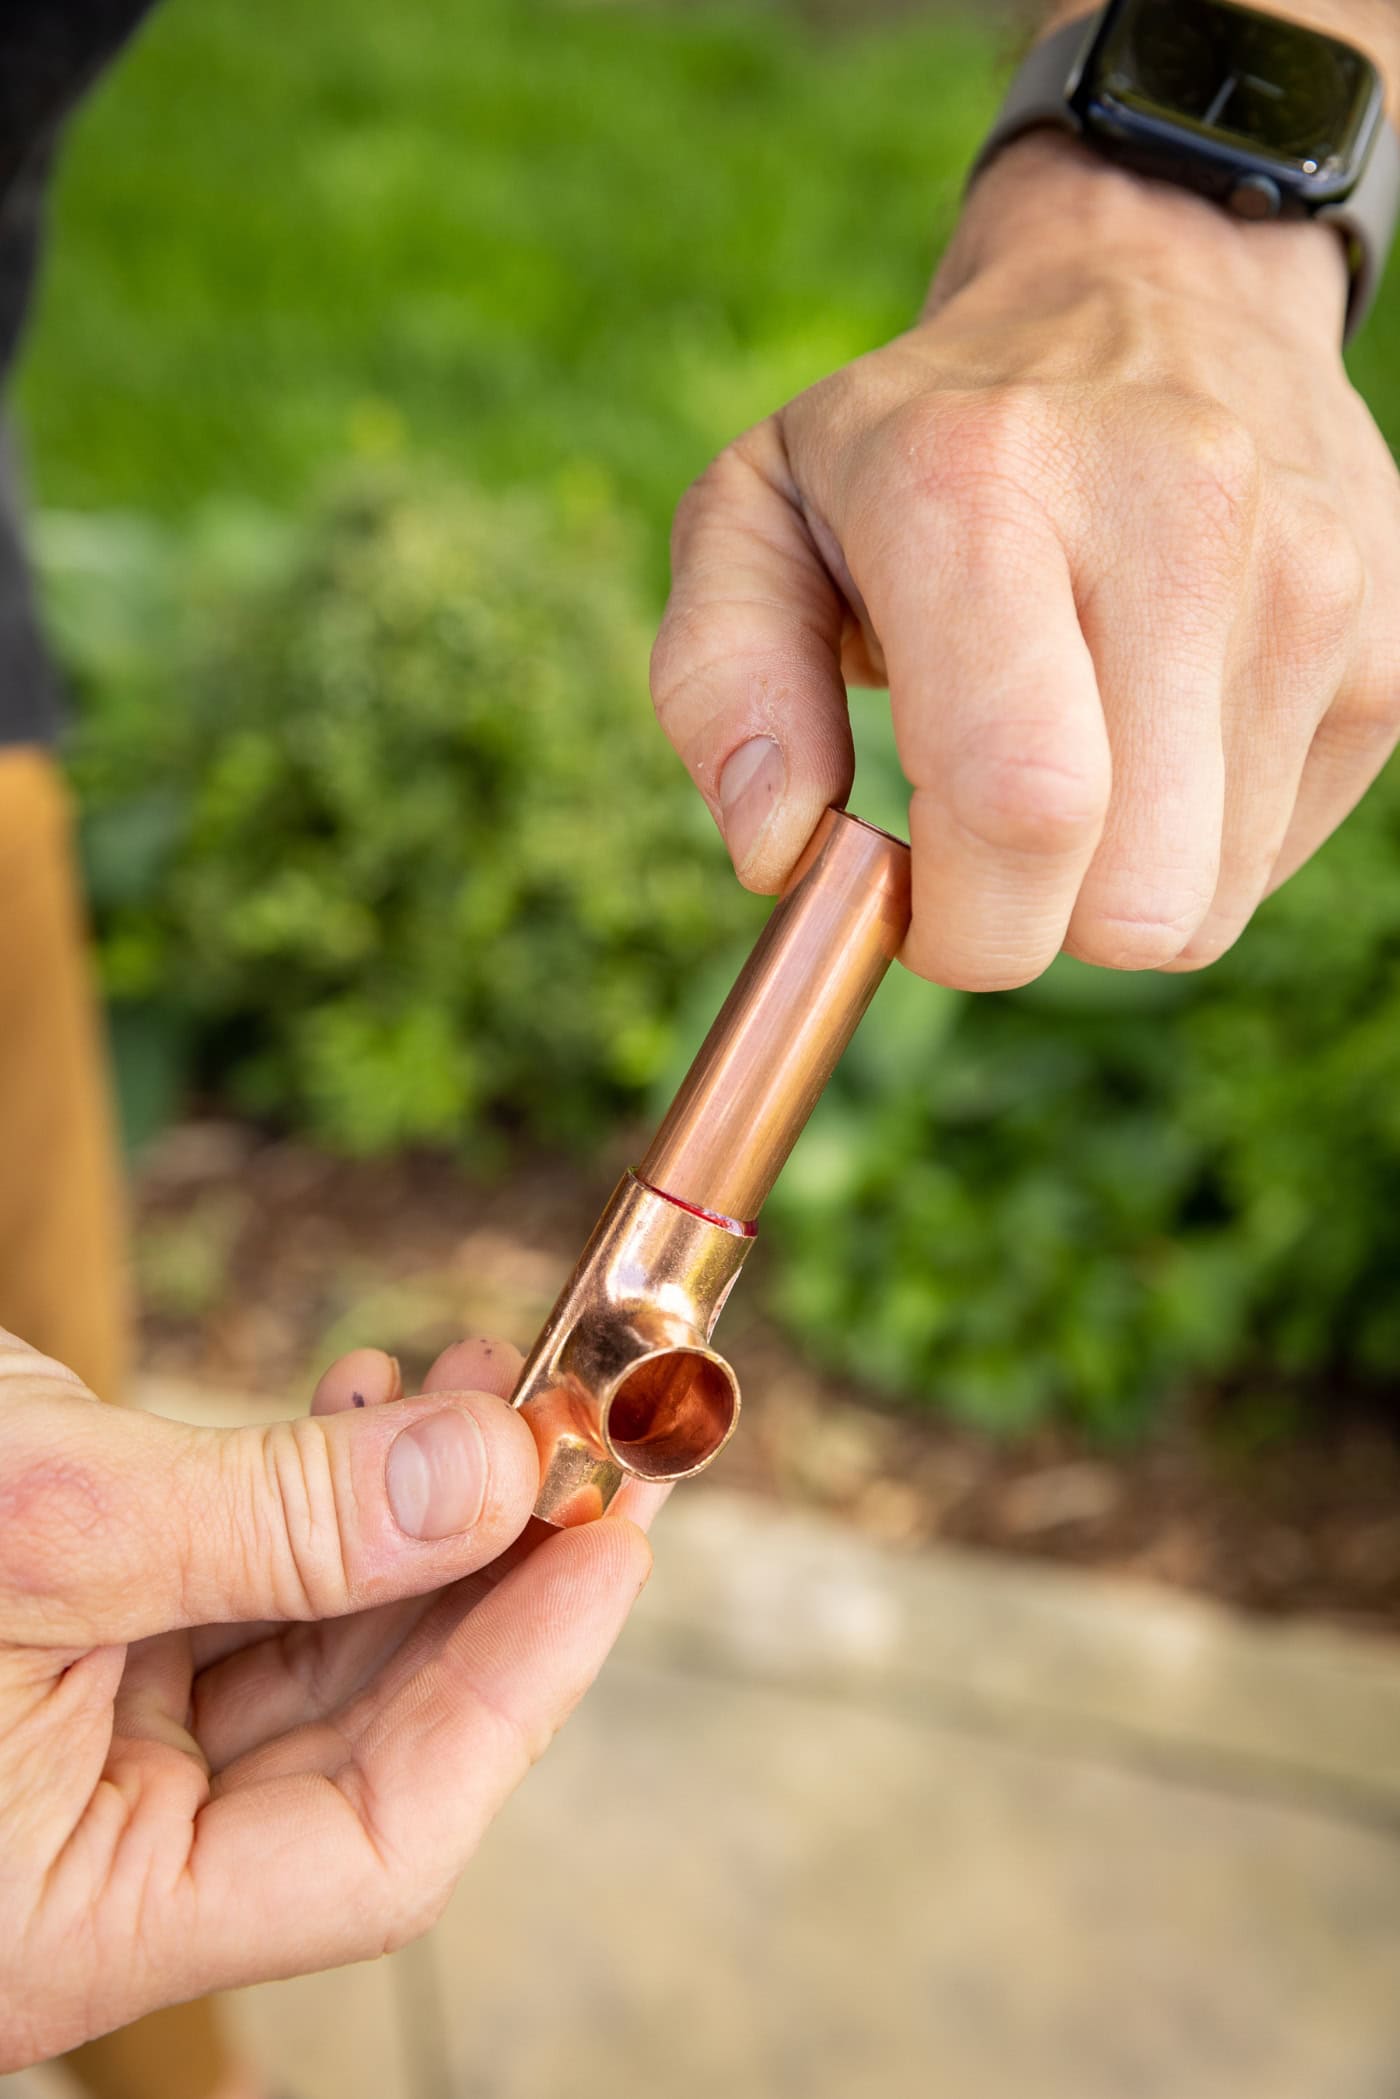
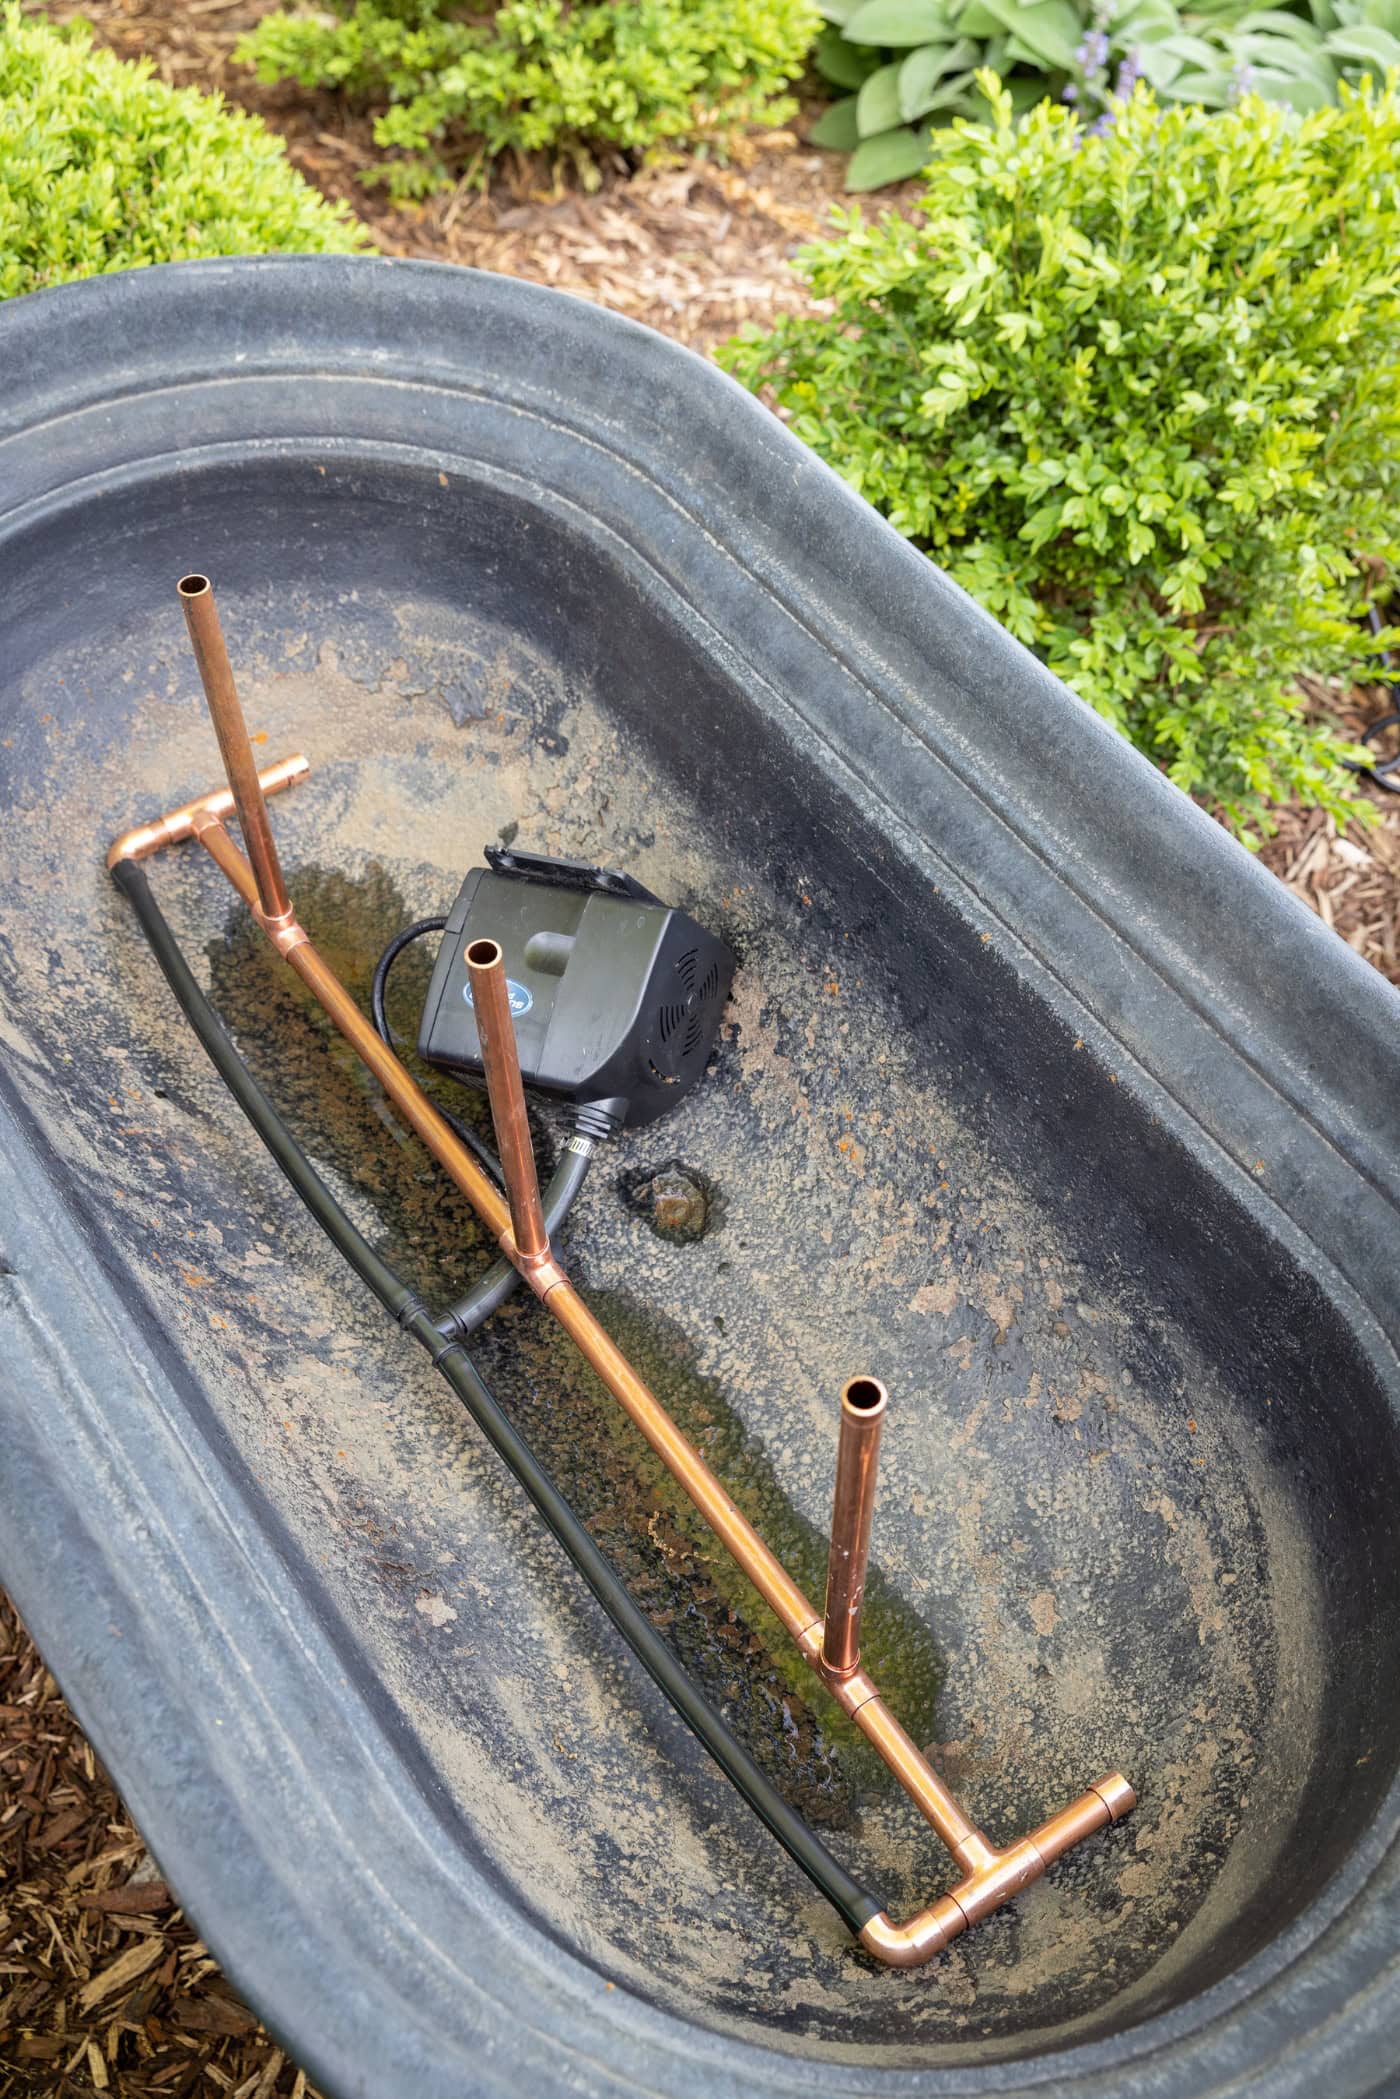
- Cut the copper to size. Determine what size will fit into the trough or other basin. Keep in mind the number of bubblers desired, then cut the copper pipe to size. If using multiple bubblers, plan to create a loop with the piping at the base of the structure. This will ensure each upshoot of the bubbler is evenly distributing water. Dry fit each piece using elbows, tee connectors, and end caps. Test fit the fountain into the water-holding basin.


- Seal the copper pipe together. Using sandpaper, lightly rough up the ends of the copper where it will fit into the joints. Using liquid solder (I used Copper Lock), distribute a thin layer all around the pipe. Slide into the joint, ensuring they match up at the proper angle. Repeat using the solder until the entire structure is complete. Let dry completely before submerging in water.


- Attach the piping to the pump. Utilizing rubber hosing and barbed couplers, connect the cooper feature to the pump. Set the structure in the trough or basin and run the cord discreetly out the bottom, if possible.


- Fill the fountain. Fill the fountain with water and turn on the pump. Check for any leaks and seal if necessary. Adjust the flow rate on the pump to the desired bubbler height. Use an outlet timer on the pump to turn on and off automatically, if desired.


These pro tips will make this project a success.
- If creating a fountain with multiple bubblers, a loop is needed at the base of the piping. This will ensure proper pressure at each bubbler. Otherwise, the water displacement will be uneven.
- Make sure each joint is watertight. A simple dry fit will not be sufficient. Traditional soldering or liquid soldering will work best. This ensures the water flows evenly throughout the system without leaks.
- Drill or use an existing hole in the bottom of the basin to hide the cord from the pump. Use a cord suction stopper to wrap around the cord and plug the bottom. This creates a water tight seal while allowing the cord to be hidden underneath.
- Look for a pump with adjustable flow. This will allow you to dial in the strength of your fountain, creating the perfect water feature.
Frequently asked questions about this DIY water fountain.
Yes! The possibilities are endless and are all dependent on the look and size of your fountain. If using more than one bubbler, ensure that there is a circuit of water flow so that the pressure is evenly distributed. I learned this from experience.
You can use any pump of any size, but I found that a larger, adjustable size was necessary to get the pressure I desired. Personally, I used an 800-GPH pump to provide just the right amount of pressure for my fountain. If you have a smaller fountain, I would go with something less than 800-GPH, but opt for a pump that is adjustable.
Yes, you do not have to use a liquid solder to join the copper. If you are comfortable with traditional soldering, feel free to do so for your fountain.
Watch how to make this DIY outdoor water fountain.


This was such a great tutorial! Thank you for sharing Kaleb!