
This post may contain affiliate links. If you make a purchase through links on our site, we may earn a commission. Please read our disclosure policy.

Why I Love Strawberry Butter
Fruit butter is not something we run to the refrigerator for anymore. All fruit spreads have slowly morphed into each other, and the usual jam or jelly is used as the common denominator when needing something sweet and fruity to spread over toast. To make them at home, it is important to know each one has a purpose and is different:
- Jelly is clear, made with fruit juice, and thickened with pectin.
- Jam and preserves are made with pieces of fruit and juice and can be thickened with pectin or left natural.
- Fruit butter uses the entire fruit, mashing it down and cooking, leaving no need for pectin.
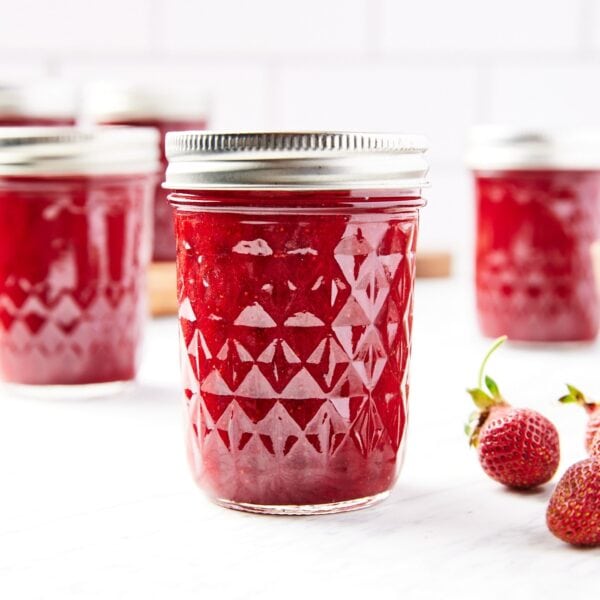
Fruit butter is my choice when preserving any fruit into a spread. The resulting butter is thick and viscous without any thickening agent. The word butter is used to describe the consistency of butter at room temperature, the same spreadable texture as a fruit butter. The total time is quick, and the flavor is left intact. Once you try this, you will never want anything else.

Strawberry Butter Ingredients
- Strawberries will always have the best flavor when picked locally and in season. Starting with the best berries possible will create the most flavor in the spread.
- Sugar works to both sweeten and thicken the butter and is definitely necessary in order to create the correct texture.
- Lemon juice helps to add brightness to the butter while enhancing the flavor of the strawberries.
- Vanilla beans impart a full vanilla flavor instead of a traditional vanilla extract.
The full amount of each ingredient can be found in the recipe card below.

Food safety tip – Home canning is safest when you follow research-tested recipes and proper processing times. Improper canning can risk botulism. New to canning? See my Canning 101 Guide and consult the USDA Complete Guide to Home Canning.
How to Make Strawberry Butter
Step 1: Mash the strawberries – Hull the strawberries to remove the top. Then place in a large heavy-bottom kettle. Add the sugar, lemon juice, and vanilla beans, slicing the beans to expose the vanilla bean seeds inside. Using a masher, mash the strawberries until a decent amount of liquid has collected at the bottom of the kettle.


Step 2: Cook the strawberries – Place the kettle on the stove and bring it to a rolling boil. A rolling boil is a boil that cannot be tamed even when it is stirred. Once at a rolling boil, turn the heat down slightly and let the mixture cook to condense. If canning the strawberry butter, have a kettle filled with water and fitted with a wire rack. Bring the water to a boil and sterilize the jars. When the butter has fully cooked, use a spoon to remove any of the foam. Also, remove the vanilla beans.


Step 3: Blend the mixture – Once the mixture has condensed, remove it from the heat. Using an immersion blender or canister blender, purée the mixture until smooth.


Step 4: Pour into jars – Using a funnel and ladle, pour the butter into the sterilized half-pint jars, leaving ½-inch headspace at the top. Once all of the jars are filled, use a paper towel dabbed in a bit of hot water to wipe off the top of each jar. Place on the lid and ring and twist to fingertip tightness.
Bonus Tip
What is headspace? Headspace is the unoccupied area at the top of a jar. This space allows the contents of the jar to shift and expand during the canning process without impeding the seal created by the lid and ring. It also allows for the creation of a vacuum seal.


Step 5: Can the butter – Using a jar lifter, place all of the jars into a large kettle filled with boiling water and a metal rack on the bottom. Make sure that the top of each jar is covered by an inch of water. Process for the appropriate time (see below). Once they’re processed, use a jar lifter to remove the jars from the kettle, tilting each one to remove any water on the top. Let the jars sit for 24 hours without being disturbed to ensure each jar seals. After 24 hours, remove the rings and store them in a cool, dark place.
Altitude Adjustment
Each altitude can require a different processing time. I’m located between 0 and 1,000 feet above sea level. If you are at a different elevation, make sure to check the USDA Canning Guide (see page 7-6) for your processing time:
| Elevation | 0 to 1,000 ft | 1,001 to 6,000 ft | 6,000 ft + |
|---|---|---|---|
| Time | 5 minutes | 10 minutes | 15 minutes |


Recipe Tips
- To save time, skip slicing the strawberries once they’re hulled. Since there is a long cooking time, there is no benefit to taking the time to slice each strawberry in half or in quarters. Simply let the masher and stove do all of the work.
- While some recipes will instruct you to remove the foam from the butter as it’s boiling, I find that it’s best to wait until the end of the boiling to remove it. Some of the foam will dissipate as it continues to boil, increasing the overall amount of butter. The foam has air, which is not desirable when canning jam or butter.
- To assess the texture of your strawberry butter, place a plate in the freezer. When ready to test, place some of the blended butter on the plate. Tilt the plate, letting the butter fall slowly. The cold will act as an indicator of what the consistency will be once it has cooled. If you draw your finger through the butter without it running back together, the butter is ready.
- Make sure to wipe off the rim of each jar after ladling in the butter. This ensures that no spots of the butter are on the rim, leading to a faulty seal.
- Removing the rings from each jar will ensure that the seal on each jar is correct. If the rings are left on, the jar could have a false seal, which would be unknown until the jar is later opened.

Frequently Asked Questions
Yes. Simply add 2 teaspoons of vanilla extract after the mixture has cooked on the stove.
Yes, a canister blender will work to purée the butter. But always remember that if blending something hot, an opening must be left to vent off any of the steam. Depending on the size of the canister, this may need to be blended in batches.
Yes, but the processing times will vary depending on the size of the jar.
Yes, the butter can be stored in the refrigerator for 3 weeks or in the freezer for 6 months.
Store any unsealed jars in the refrigerator and use them as needed. They should last up to three weeks.
Once sealed, the butter will last at least one year. After one year, the color may begin to darken.
More Preserves Recipes
Have I Convinced You to Make This Recipe?
I hope you make this recipe and put some food on your table. Leave a comment and share a star rating so you can let others know how much you love this recipe. This helps show others that this is a recipe they, too, can make, enjoy, and love!
Canned Strawberry Butter
Equipment
- 5 jam jars
Ingredients
- 3 lb strawberries cleaned and hulled
- 1 ½ cups granulated sugar
- 2 tbsp fresh lemon juice
- 2 whole vanilla beans sliced in half lengthwise
Instructions
- Place the cleaned and hulled strawberries in a large 6-quart heavy-bottomed stock pot or Dutch oven. Add the sugar and lemon juice. Use a potato masher to roughly mash the fruit and draw out the juice to mix with the sugar. Add the sliced vanilla beans and place over medium heat. If canning, have the water bath, jars, lids, and rings ready.3 lb strawberries, 1 ½ cups granulated sugar, 2 tbsp fresh lemon juice, 2 whole vanilla beans
- Slowly bring the mixture to a boil, stirring to ensure the sugar is not sticking to the bottom and is dissolving. Once boiling, combine to stir and boil until it is at a rolling boil. A rolling boil is a boil that will not stop when stirring and continues to boil. Adjust heat as needed to keep the rolling boil for 20 minutes. Skim any foam that forms on top off and set it aside.
- Once the mixture has boiled for 20 minutes, remove it from the heat. Pull out the vanilla beans and squeeze out any remaining seeds from the middle into the mixture. Using an immersion blender or canister blender, blend the mixture until smooth.
- Pour the strawberry butter into prepared 8-oz jars. If storing in the refrigerator or freezer, pour into containers and cool. If canning, water bath the jars for 10 minutes. Once the jars are finished, remove them from the water bath. Cool for 12 hours before removing the rings to check the integrity of the seal.
Video

Notes
Nutrition
Nutrition information is automatically calculated, so should only be used as an approximation.

Did you make this? Leave a comment below!
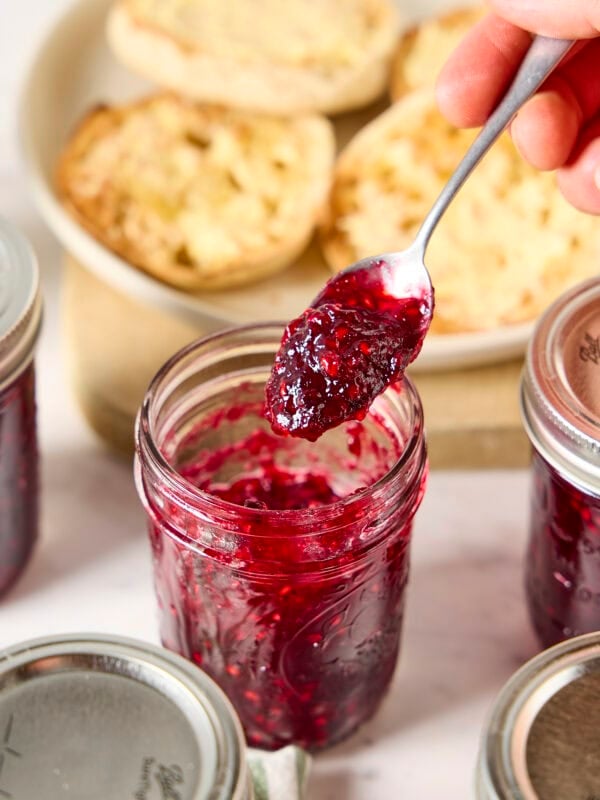
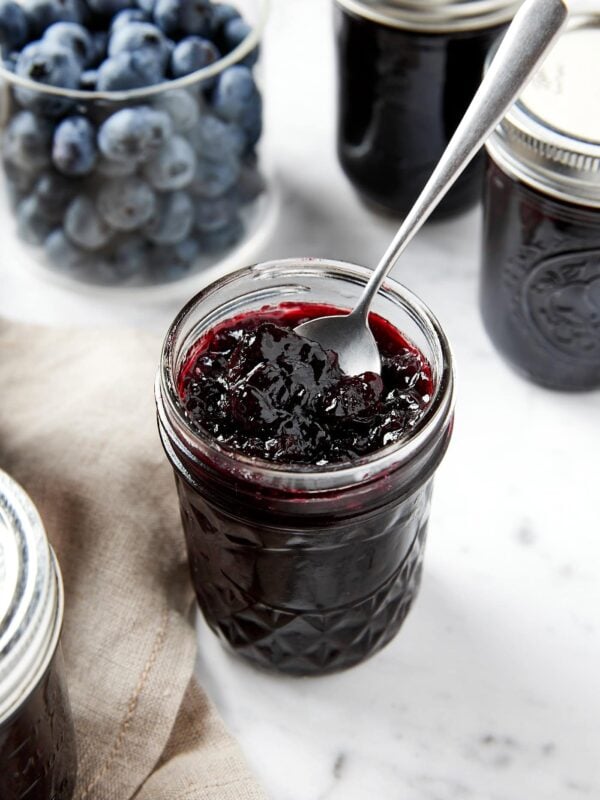


Obviously, I will just try my idea, but would other berries make good “butters”? In your opinion? Blueberries? Raspberries?
Wonderful !
So delicious and easy! Way better than a store bought jam.
Can monkfruit sweetner be substituted for sugar without altering the final set of the strawberry butter ?
I just purchased a Ninja Creami Deluxe and I bet you could make some fanciful, delicious ice cream variation utilizing some of your Strawberry Butter. 😉
Thanks for sharing all your know how, recipes and gardening tips / info. I enjoy your videos.
So easy to make and it tastes wonderful!
I made this today and it was amazing! I used vanilla extract because I didn’t have any vanilla pods. This was so easy and I like that there’s less sugar, too. I highly recommend this!
I made your strawberry butter today. Amazing. I am so glad that I follow you. I really love your recipes. This is the best ever.